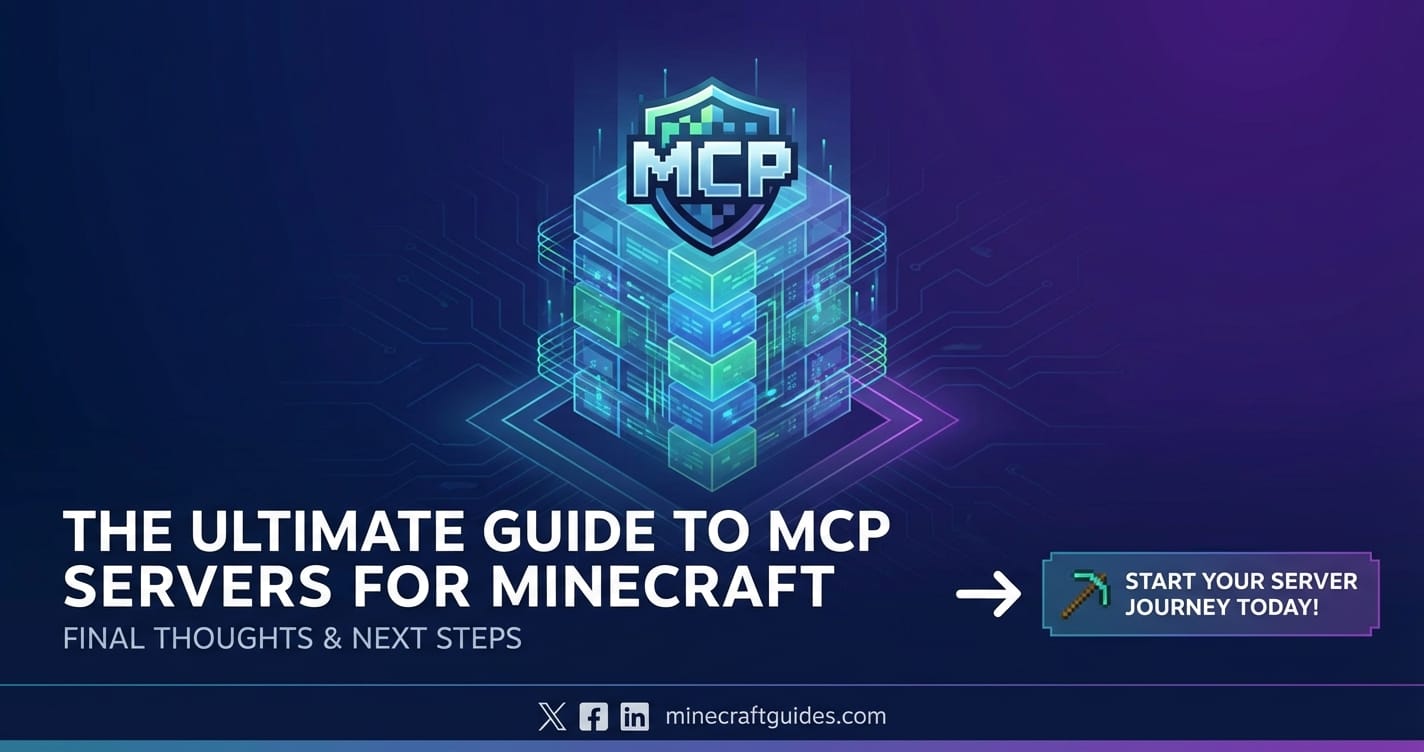
The Ultimate Guide to MCP Servers for Minecraft


Minecraft, a game of boundless creativity and exploration, has captivated millions since its inception. While the vanilla experience offers a universe of adventure, it's the thriving modding community that truly unlocks the game's infinite potential. From adding fantastical creatures and intricate machinery to completely overhauling game mechanics, modifications (mods) transform Minecraft into an entirely new experience. At the heart of this transformative power lies a foundational, albeit often misunderstood, tool: the Minecraft Coder Pack (MCP). This ultimate guide will embark on a comprehensive journey, dissecting the concept of "MCP servers," exploring their historical significance, guiding you through setting up and managing your own highly customized Minecraft environment, and delving into advanced topics that empower you to master the intricate world of modded Minecraft.
The term "MCP servers" often evokes a sense of deep customization and intricate technical setups among veteran players and developers. However, it's a term that carries historical weight and requires careful clarification. Unlike "Vanilla servers" or "Spigot servers," an "MCP server" isn't a direct server software type you simply download and run. Instead, it refers to the ecosystem of servers that run modifications made possible by the foundational reverse-engineering work of the Minecraft Coder Pack (MCP). MCP was the pioneering effort that decompiled and deobfuscated Minecraft's closed-source Java code, providing mod developers with readable source code and tools to create the mods that define these deeply customized experiences. Without MCP's early contributions, the vibrant modding scene we know today, including powerful platforms like Forge and Fabric, might never have blossomed. Understanding MCP's legacy is paramount to truly grasping the architecture and possibilities of these advanced Minecraft server environments. This guide is designed to be your definitive resource, whether you're a curious player looking to experience a richer game, a server administrator aiming for unparalleled control, or an aspiring developer keen to understand the bedrock of Minecraft modding. We will navigate the complexities, demystify the jargon, and equip you with the knowledge to not just run, but truly master your own "MCP server" experience.
Chapter 1: Understanding the Foundation – Minecraft Servers Explained
Before we delve into the specifics of MCP and its influence, it's crucial to establish a solid understanding of what a Minecraft server is and why players and communities choose to host their own. This foundation will provide the necessary context for appreciating the profound impact of MCP on the server landscape.
1.1 What is a Minecraft Server?
At its core, a Minecraft server is a dedicated piece of software that runs the Minecraft game world, allowing multiple players to connect and interact within that shared environment. It acts as the central hub, processing game logic, managing player data, and synchronizing actions across all connected clients. When you launch the Minecraft game on your computer, you're running a client. To play with others online, that client needs to connect to a server.
The architecture of Minecraft is fundamentally client-server. Your client sends your actions (walking, mining, placing blocks) to the server, and the server validates these actions, updates the game state, and then broadcasts the changes back to all connected clients. This ensures a consistent and shared experience for everyone. Without a server, Minecraft is a purely single-player game.
There isn't just one type of Minecraft server. The landscape has evolved significantly over the years, giving rise to several prominent categories, each with its own advantages and ecosystem:
- Vanilla Servers: These are the official servers provided directly by Mojang, the creators of Minecraft. They offer the purest, unadulterated Minecraft experience, completely free from any third-party modifications. While simple to set up, their lack of customization options means they cannot run mods or plugins. They are ideal for players who want to experience the game exactly as intended by its developers, without any deviations.
- Bukkit/Spigot/Paper Servers: This family represents the cornerstone of plugin-based server modding. Bukkit was an early server modding API that allowed developers to create "plugins" – small additions that alter server-side gameplay without requiring players to install anything on their client. Spigot is a highly optimized fork of Bukkit, designed for performance and offering more features. Paper is an even more optimized fork of Spigot, focusing on further performance enhancements and new features, making it incredibly popular for large servers. These servers excel at enhancing administrative capabilities, adding mini-games, economic systems, and custom gameplay rules, all managed server-side.
- Forge Servers: This is where the concept of "MCP servers" truly begins to resonate, albeit indirectly. Forge is a powerful modding API that enables extensive client-side and server-side modifications. Most of the elaborate, content-rich mods you see for Minecraft (like those adding new dimensions, complex machinery, or magic systems) are built using Forge. Running a Forge server allows players to connect with their Forge-modded clients and experience these comprehensive gameplay overhauls together. The server must have the same mods installed as the client for most functionality to work correctly.
- Fabric Servers: A newer, more lightweight modding API compared to Forge. Fabric prides itself on being less intrusive and faster to update for new Minecraft versions. While its mod ecosystem is not as vast as Forge's, it is growing rapidly and offers many unique utility and performance-enhancing mods. Similar to Forge, a Fabric server requires clients to also run Fabric and have compatible mods installed.
Regardless of the type, every server relies on a few basic components: the server JAR file (which contains the server software), configuration files (like server.properties to define game rules), and the world data (the actual blocks, entities, and structures of your Minecraft world). Together, these elements bring your shared Minecraft universe to life.
1.2 Why Host Your Own Server?
The allure of hosting your own Minecraft server extends far beyond merely playing with friends. It opens up a realm of control, customization, and community building that is simply unparalleled by public servers or single-player worlds. For many, it becomes a deeply rewarding endeavor, offering unique opportunities and experiences.
One of the primary motivations is unfettered customization and control. When you run your own server, you are the ultimate authority. You dictate the rules of engagement, the game mode, the difficulty, and crucially, which mods or plugins are installed. This means you can craft a Minecraft experience precisely tailored to your preferences or the desires of your community. Want to build an intricate skyblock world with specific custom recipes? Or perhaps a hardcore survival realm where every decision counts? A personal server makes it possible. This level of control allows for experimentation, testing new gameplay ideas, and fine-tuning the balance of mods to create a cohesive and enjoyable environment.
Another significant draw is the ability to build and nurture a private community. Public servers, while offering vast player bases, often come with the downsides of anonymity, griefing, and inconsistent moderation. A private server, especially one protected by a whitelist, allows you to curate a trusted group of friends, family, or like-minded individuals. This fosters a sense of camaraderie, shared goals, and a more secure, respectful playing environment. It's a place where inside jokes thrive, ambitious collaborative projects come to fruition, and long-lasting friendships are forged over shared adventures.
Hosting a server is also an incredible learning experience. It exposes you to fundamental concepts of network administration, file management, command-line interfaces, and even basic programming logic if you delve into configuration files or writing simple scripts. Troubleshooting issues, optimizing performance, and managing a community all contribute to a valuable skillset that extends beyond Minecraft. For those with a burgeoning interest in IT or game development, a Minecraft server can be an excellent practical sandbox for real-world application of technical knowledge.
Privacy and security are paramount concerns for many online activities, and Minecraft is no exception. By hosting your own server, you have direct control over who can access your world and your data. You can implement robust security measures, manage backups to prevent data loss, and protect your community from malicious actors. This level of oversight is rarely available on public platforms.
Finally, the sheer joy of experimentation with mods and plugins is a powerful motivator. The Minecraft modding scene is a testament to human ingenuity, offering thousands of additions that can fundamentally alter the game. Running your own server allows you to explore this vast library without constraints. You can combine different mods, test compatibility, and discover new ways to play that simply aren't possible in the vanilla game. This capacity for innovation and discovery keeps the game fresh and endlessly entertaining, providing new challenges and creative outlets years after its initial release.
Chapter 2: Diving Deep into MCP (Minecraft Coder Pack)
To truly understand "MCP servers" and the broader modding landscape, one must first appreciate the pioneering role of the Minecraft Coder Pack (MCP). This set of tools and methodologies laid the groundwork for almost all subsequent Minecraft mod development, serving as the unsung hero behind countless hours of customized gameplay.
2.1 What is MCP? The Genesis of Minecraft Modding
In the early days of Minecraft, Mojang, the game's developer, did not officially support modding. The game's code was obfuscated, meaning that variables, methods, and class names were deliberately scrambled into meaningless sequences (e.g., a, b, aa, ab). This practice is common in software development to deter reverse engineering and reduce file size, but it made it nearly impossible for external developers to understand and modify the game's internal workings. The community, however, was eager to extend the game's functionality, and necessity, as they say, is the mother of invention.
The Minecraft Coder Pack (MCP) emerged from this necessity. It was a community-driven project dedicated to reverse-engineering Minecraft's Java code. The primary goal of MCP was to take the obfuscated game client and server JAR files, decompile them back into human-readable Java source code, and then, crucially, "deobfuscate" this code. Deobfuscation involved painstakingly identifying and remapping those scrambled variable and method names back to meaningful, descriptive names (e.g., a becomes World, b becomes Block, aa becomes getPlayerList). This monumental effort was primarily driven by volunteers who spent countless hours poring over the code, guessing, testing, and documenting its functionality.
MCP wasn't just a deobfuscation tool; it was a complete development environment. It provided scripts and utilities that allowed mod developers to: * Decompile: Convert the compiled .class files in the Minecraft JAR into .java source files. * Deobfuscate: Apply the community-sourced mappings to make the decompiled code readable. * Patch: Modify the decompiled code with their own additions or changes. * Recompile: Turn the modified source code back into .class files. * Reobfuscate: (Optionally) Scramble the names again to produce a modified JAR file that mimicked the original structure.
This iterative process of decompiling, modifying, and recompiling Minecraft's core files was how the very first mods, like Risugami's ModLoader, came into existence. ModLoader itself was a crucial step, as it provided a common base for other mods to hook into, reducing the need for every mod to directly patch the core game files, which often led to crippling compatibility issues. Forge Mod Loader (FML) and later Minecraft Forge built upon these principles, creating a robust API that allowed mods to interact with the game in a standardized way, abstracting away much of the direct patching MCP initially facilitated. Therefore, MCP wasn't just a tool; it was the intellectual and technical foundation upon which the entire edifice of Minecraft modding was built, enabling a creative explosion that continues to define a significant portion of the game's appeal.
2.2 The Technical Process of MCP: Deconstructing Minecraft
Understanding the technical workflow of MCP provides deep insight into the complexities of Minecraft modding and why it was such a monumental undertaking. The process involved several intricate steps, each critical for transforming an incomprehensible binary into a modifiable source.
The journey began with the official Minecraft JAR files – minecraft.jar for the client and minecraft_server.jar for the server. These files contain compiled Java bytecode, which, while executable by the Java Virtual Machine, is not easily human-readable, especially due to Mojang's obfuscation.
- Decompilation: The first step was to decompile these JARs. Decompilers are tools that attempt to reverse the compilation process, converting Java bytecode (
.classfiles) back into Java source code (.javafiles). Tools like Fernflower (which later became part of MCP) were instrumental here. However, decompilation is not a perfect science; the resulting code, while syntactically correct, might not always perfectly resemble the original source written by Mojang developers. Furthermore, all method and variable names would still be obfuscated. - Deobfuscation and Remapping: This was arguably the most challenging and time-consuming part of MCP's process. After decompilation, the code was filled with cryptic names like
a.b.c(d, e). The community, often through trial and error, reverse-engineered the purpose of these classes, methods, and fields. For instance, they might observe that methoda.b.cwas always called when a block was broken, and then deduce it was likely abreakBlockmethod. This process involved:- Srg (Sever Reconfigurable Global) Names: MCP assigned stable, internal names (e.g.,
func_12345_a) to obfuscated members. These SRG names remained consistent across minor game updates, acting as an intermediate layer. - Human-Readable Mappings: A separate set of mappings then translated these SRG names into descriptive, human-readable names (e.g.,
func_12345_abecomesbreakBlock). These mappings were stored in files likemethods.csv,fields.csv, andclasses.csvwithin MCP'sconfdirectory. - Applying Mappings: MCP scripts would then apply these mappings to the decompiled source code, effectively replacing the obfuscated names with their deobfuscated counterparts. This step transformed unintelligible code into something comprehensible to a Java developer.
- Srg (Sever Reconfigurable Global) Names: MCP assigned stable, internal names (e.g.,
- The MCP Directory Structure: A typical MCP installation contained several key directories:
jars/: Stored the original, obfuscated Minecraft client and server JARs, along with patched versions.src/: Contained the decompiled and deobfuscated source code of Minecraft, ready for modification. This was where mod developers would typically make their changes.conf/: Housed the critical mapping files (methods.csv,fields.csv,classes.csv) and configuration files for MCP's internal tools.reobf/: Stored the reobfuscated versions of modded code, often used for distributing mods in a way that would integrate seamlessly with the original game's structure.
- Patching and Recompiling: Once the source code in
src/was modified by a mod developer, MCP provided scripts to recompile the changed code. This involved using a Java compiler (likejavac) to turn the.javafiles back into.classbytecode. If the mod was designed to directly modify Minecraft's core, these new.classfiles would then replace the original ones, or be integrated into a new JAR. For more complex mods, especially those using ModLoader or Forge, the mod's code would be compiled separately but would interact with the deobfuscated Minecraft classes provided by MCP.
The ingenuity of MCP lay not just in its technical execution, but in the collaborative spirit of its community. Each new Minecraft version brought a fresh wave of obfuscation, requiring the mapping process to be largely redone. Yet, the community persevered, creating a stable platform for mod developers for many years, directly paving the way for the sophisticated modding APIs we utilize today.
2.3 MCP's Relationship with Modding APIs
While MCP was the initial bedrock, it's crucial to understand its evolving relationship with the subsequent modding APIs like Forge and Fabric. MCP itself is primarily a development tool for reverse engineering and providing readable source code, rather than a runtime environment for players. The "MCP servers" we discuss today are servers running mods that were developed using tools and principles directly or indirectly descended from MCP's foundational work.
Initially, early mods directly patched the game's core files, often leading to severe compatibility issues. If two mods tried to modify the same line of code, one would inevitably overwrite the other, causing crashes. This is where ModLoader stepped in. Developed by Risugami, ModLoader was one of the first modding APIs built using MCP. It provided a standardized way for multiple mods to hook into the game without directly conflicting, greatly improving mod compatibility. Mods were still developed with MCP, but ModLoader offered the runtime framework.
The true game-changer, however, was Minecraft Forge. Forge started as a successor to ModLoader, also built on top of MCP's deobfuscation. Forge provides a comprehensive set of APIs that allow mod developers to interact with almost every aspect of the game – from adding new blocks and items to custom dimensions, entities, and events. Forge essentially abstracts away the low-level complexities of patching the game, providing developers with a stable, high-level interface. When you develop a Forge mod, you use the Forge Mod Developer Kit (MDK), which itself leverages a modern successor to MCP's original deobfuscation work (often provided by tools like Gradle-based development environments that handle the complex decompilation and remapping automatically). So, while you're not directly running MCP scripts, your Forge development environment is performing the same foundational deobfuscation that MCP pioneered.
Similarly, Fabric is a more recent modding API that also relies on deobfuscation. Fabric's approach is often described as lighter-weight and less intrusive than Forge, focusing on providing essential hooks without over-engineering. Fabric uses its own mapping system (Yarn mappings) and toolchain, but the underlying principle of taking obfuscated Minecraft code and making it readable for mod development remains the same as MCP's original mission.
Therefore, when we talk about mcp servers in the modern context, we are implicitly referring to servers that are running Forge-based mods or Fabric-based mods. These servers require a client with a corresponding mod loader (Forge or Fabric) and the same mods installed. The significance of MCP is that it established the technical precedent and provided the initial tools that made all these subsequent modding APIs possible. Without MCP's pioneering efforts in decompilation and deobfuscation, the entire ecosystem of complex, content-rich mods – and thus, the highly customized "mcp servers" that run them – would likely not exist in their current form. MCP is the bedrock; Forge and Fabric are the sophisticated architectures built upon it, offering more refined and stable platforms for both development and runtime execution.
Chapter 3: The Concept of "MCP Servers" – Unpacking the Terminology
The term "MCP server" is frequently used within the Minecraft community, particularly by those familiar with older modding practices or complex custom setups. However, its usage can sometimes be ambiguous, leading to confusion about what it truly signifies. This chapter aims to clarify the terminology and contextualize "MCP servers" within the broader evolution of Minecraft server modding.
3.1 Clarifying "MCP Server": It's More Than a Single Software
The most critical distinction to make is that "MCP server" is not a type of server software in the same vein as "Vanilla server" or "Spigot server." You cannot simply download a file named mcp_server.jar and launch it to create a functional server. Instead, "MCP server" is a colloquial and somewhat historical term that refers to a Minecraft server environment that is heavily modified, particularly one running mods that were developed using the Minecraft Coder Pack (MCP) or its direct successors like Forge or Fabric.
To elaborate: * MCP as a Development Tool, Not a Runtime: As established in Chapter 2, MCP's primary function was to decompile and deobfuscate Minecraft's code, making it readable and modifiable for developers. It provided the means to create mods, but it was never designed to be the server software that runs the game. The server software itself would be either the vanilla minecraft_server.jar that was modified using MCP, or more commonly, a mod loader like Forge or Fabric that uses similar deobfuscation principles. * The Legacy of Deep Customization: The term "MCP server" harks back to an era where direct manipulation of Minecraft's core files was common, or where mod loaders built directly upon MCP's output were the only way to achieve significant modifications. These servers were characterized by extensive changes to game mechanics, the addition of numerous new blocks, items, and entities, and often required clients to install a corresponding set of modifications. The essence of an "MCP server" is therefore a server deeply integrated with a custom modpack, where the client and server must run a compatible mod loader (like Forge or Fabric) and the same set of mods. * The Interplay of Client and Server Mods: Unlike Bukkit/Spigot/Paper servers, which primarily run server-side plugins that don't require client-side installations (beyond the vanilla game client), servers referred to as "MCP servers" typically leverage mods that have both server-side and client-side components. These mods add new content that needs to be rendered on the client and processed on the server (e.g., a new type of machine, a custom creature). This client-server synchronization of modded content is a hallmark of the "MCP server" experience. * Focus on Content Over Performance (Historically): While modern mod loaders like Forge and Fabric have significantly improved performance, earlier "MCP servers" were often synonymous with content-rich but potentially resource-intensive setups. The emphasis was on expanding the game world and its mechanics rather than just optimizing existing functionality, as is often the case with Spigot/Paper.
In essence, when someone refers to an "MCP server," they are almost certainly talking about a highly customized Minecraft server running a significant modpack, most likely powered by Minecraft Forge or Fabric. The term is a nod to the foundational work of MCP that made such extensive modifications possible, even if MCP itself isn't directly running the server software today. It implies a server experience far removed from vanilla Minecraft, demanding specific client configurations and offering a vastly expanded gameplay canvas.
3.2 Evolution of Minecraft Server Modding: From Raw Code to Refined APIs
The journey of Minecraft server modding is a testament to the ingenuity and persistence of its community, evolving from rudimentary hacks to sophisticated, robust API platforms. Understanding this evolution is key to appreciating where "MCP servers" fit into the larger picture.
The Pre-API Era (Direct MCP Patching): In the very beginning, before any stable modding APIs existed, mod developers used MCP directly to decompile and modify Minecraft's source code. They would make their changes, recompile the game, and distribute their modified JAR files. This was the era of maximum control but also maximum chaos. Every mod that altered the same part of the game would conflict, leading to endless compatibility issues. Users often had to manually merge JAR files or painstakingly reorder their mods to get them working, if at all. This period, while crude, highlighted the immense desire for customization and laid the groundwork for future advancements. These were, in a literal sense, the earliest "MCP servers" – servers running a vanilla JAR that had been directly patched using MCP.
The Rise of ModLoader (Early API Abstraction): Risugami's ModLoader was a pivotal development. Built using MCP, ModLoader provided a common set of "hooks" or points of entry into the game's code. Instead of directly patching the entire game, mods could register themselves with ModLoader and use its API to inject their changes. This significantly reduced conflicts and simplified mod installation for users. ModLoader effectively transformed the modding landscape, paving the way for more complex integrations.
The Dominance of Minecraft Forge (Comprehensive Modding API): Minecraft Forge emerged as the spiritual successor to ModLoader, quickly becoming the de-facto standard for comprehensive Minecraft modding. Forge took the concept of an API much further, offering extensive documentation, a rich event system, and helper classes for almost every aspect of the game. Developing a Forge mod typically involves using a Mod Developer Kit (MDK) which, under the hood, leverages modern deobfuscation tools akin to MCP. Forge allows for deep client-side and server-side modifications, enabling the creation of intricate new game mechanics, dimensions, and items. Servers running Forge are the most common type of "MCP server" in contemporary usage, as they embody the spirit of extensive, content-adding modifications that MCP originally facilitated.
Bukkit/Spigot/Paper (Plugin-Based Server Modding): Running in parallel to Forge's development, Bukkit emerged as an alternative for server-side modding that did not require any client modifications. Bukkit provided an API for "plugins," which are server-side additions that change game logic, add commands, mini-games, or administrative tools. Spigot, an optimized fork of Bukkit, and Paper, an even more performance-focused fork of Spigot, became immensely popular for large public servers due to their efficiency and vast plugin ecosystems. These platforms cater to a different kind of customization, focusing on server-side enhancements and gameplay modes that don't introduce new block or item content. They generally do not rely on the same fundamental deobfuscation processes as Forge or Fabric, as they interact with the game server's established methods rather than its raw internal code structure for content injection.
Fabric (Lightweight, Modern Modding API): Fabric is a newer contender in the modding API space, gaining popularity for its lightweight nature, fast update cycle, and different design philosophy compared to Forge. While also relying on deobfuscation (using Yarn mappings), Fabric aims to be less intrusive, offering essential hooks for developers to build upon. Its ecosystem is growing, particularly for performance-enhancing mods and utility tools. Fabric servers represent a modern interpretation of the "MCP server" concept, allowing for significant content and mechanic alterations that require both client and server modifications.
In summary, the journey from directly patching Minecraft with MCP to utilizing sophisticated APIs like Forge and Fabric showcases a clear progression towards more organized, compatible, and developer-friendly modding. Each platform offers different levels of abstraction and addresses distinct modding needs. However, they all ultimately owe a debt to MCP's pioneering work in making Minecraft's code accessible, underscoring why the term "MCP server" continues to be a shorthand for highly modified, content-rich Minecraft server experiences.
APIPark is a high-performance AI gateway that allows you to securely access the most comprehensive LLM APIs globally on the APIPark platform, including OpenAI, Anthropic, Mistral, Llama2, Google Gemini, and more.Try APIPark now! 👇👇👇
Chapter 4: Setting Up Your Own Modded Server (MCP-Derived)
Now that we've demystified "MCP servers" and understood the foundational role of MCP, it's time to roll up our sleeves and dive into the practicalities of setting up your own modded Minecraft server. This chapter will guide you through choosing the right modding platform, configuring your server, installing mods, and optimizing performance.
4.1 Choosing Your Modding Platform
The first and most crucial decision when setting up a modded server (what many refer to as an "MCP server") is selecting the underlying modding platform. Your choice will largely dictate the available mods, the development experience, and the overall performance characteristics of your server. The two primary contenders for content-rich modding are Forge and Fabric, with Spigot/Paper serving a different, plugin-based purpose.
Forge Servers: The Veteran's Choice for Extensive Modpacks
Minecraft Forge has long been the titan of content-modding in Minecraft. Its maturity and extensive API make it the platform of choice for the vast majority of large, complex modpacks that introduce entirely new dimensions, intricate machinery, or expansive magic systems.
- Pros:
- Vast Mod Ecosystem: Forge boasts the largest and most diverse collection of mods, covering almost every conceivable gameplay alteration. If a mod exists, there's a high chance it's for Forge.
- Mature and Stable: Having been around for many years, Forge is a highly stable and well-documented platform with a large community for support.
- Comprehensive API: Its extensive API allows for deep integration and modification of game mechanics, making complex mods possible.
- Client-Side Integration: Many Forge mods have both server and client components, ensuring a unified, content-rich experience for players.
- Cons:
- Resource-Intensive: Forge, especially with large modpacks, can be very demanding on server and client resources (CPU and RAM).
- Slower Updates: Due to its complexity, Forge updates for new Minecraft versions can sometimes lag behind vanilla releases.
- Potential Compatibility Issues: While better than direct patching, large modpacks can still encounter conflicts between mods if not carefully curated.
Setup Guide for a Forge Server:
- Download the Forge Installer: Go to the official Minecraft Forge website (files.minecraftforge.net). Select the Minecraft version you want to use. Choose the "Installer" option for the recommended or latest version.
- Run the Installer (Server Mode): Execute the downloaded JAR file. A small GUI will appear. Select "Install server" and specify an empty folder where you want to install your server files. Click "OK." This will download the necessary server files and libraries into your chosen folder.
- Accept EULA: The installer will create a
eula.txtfile. Open it, changeeula=falsetoeula=true, and save. This signifies your agreement to Mojang's End User License Agreement. - Initial Server Launch: Run the
forge-<version>.jarfile (orminecraft_server.<version>.jarif the installer renamed it). You can do this via a batch file (.baton Windows) or a shell script (.shon Linux) for better control over Java arguments:bash java -Xmx4G -Xms4G -jar forge-<version>.jar nogui PAUSE(Replace4Gwith your desired RAM allocation andforge-<version>.jarwith the actual file name). The server will start, generate world files, and potentially crash ifserver.propertiesneeds initial setup. This first run is primarily to generate configuration files. - Configure
server.properties: Open theserver.propertiesfile that was generated. Adjust settings likelevel-name,gamemode,max-players,online-mode(set totruefor authentic Minecraft accounts,falsefor offline play - usetruefor security on public servers),difficulty, andpvp. - Install Mods: Create a folder named
modsin your server directory (if it doesn't already exist). Download your desired Forge-compatible mods from reputable sources (e.g., CurseForge) and place their JAR files into thismodsfolder. Ensure all mods are for the correct Minecraft and Forge version. - Final Launch: Run your server script again. The server will now load Forge and all the mods. Players connecting to your server will also need to have Forge and the exact same versions of the mods installed on their client.
Fabric Servers: The Agile Alternative
Fabric is a more modern and lightweight modding API that offers a distinct approach compared to Forge. It's known for its rapid updates and a growing ecosystem of utility and performance-focused mods.
- Pros:
- Lightweight and Faster Startup: Fabric's design is less intrusive, leading to quicker server startup times and generally lower overhead.
- Faster Updates: Fabric often updates for new Minecraft versions much quicker than Forge, allowing players and server owners to enjoy new vanilla content sooner.
- Good for Utility and Performance Mods: Many excellent client-side and server-side performance optimization mods (like Lithium, Phosphor, Carpet) are developed for Fabric.
- Modular: Its design philosophy is more modular, allowing for greater flexibility.
- Cons:
- Smaller Mod Library (Historically): While growing rapidly, Fabric's mod ecosystem is still smaller than Forge's, especially for large content-adding mods.
- Fewer Large Modpacks: Most established large modpacks are still on Forge, though Fabric modpacks are emerging.
Setup Guide for a Fabric Server:
- Download Fabric Installer: Go to the official Fabric website (fabricmc.net). Download the universal JAR installer.
- Run Installer (Server Mode): Execute the downloaded JAR file. In the installer, switch to the "Server" tab. Select your desired Minecraft version and a server installer version. Specify an empty folder for your server. Click "Install." This will download the Fabric server JAR and the vanilla Minecraft server JAR into your chosen folder.
- Accept EULA: As with Forge, open the
eula.txtand changeeula=falsetoeula=true. - Initial Server Launch: Create a startup script (
.bator.sh) to launch the Fabric server:bash java -Xmx4G -Xms4G -jar fabric-server-launch.jar nogui PAUSE(Replace4Gwith your desired RAM). Run the script. This will generateserver.propertiesand other initial files. - Configure
server.properties: Adjust your server settings as needed, similar to a Forge server. - Install Mods: Create a
modsfolder in your server directory. Download Fabric-compatible mods (usually from CurseForge or Modrinth) and place their JAR files into this folder. Ensure versions match your Minecraft and Fabric Loader versions. - Final Launch: Run your server script again. The server will now load Fabric and your mods. Players need to install Fabric Loader on their client and have the exact same versions of the mods installed to connect.
Spigot/Paper Servers: For Plugin-Based Enhancements
While not typically what people mean by "MCP server" (as they don't generally add new content that requires client mods), Spigot and its forks like Paper are essential for server-side enhancements and administrative tools. They use a different API and focus on performance and extensibility through plugins.
- Pros:
- High Performance: Paper in particular is highly optimized for performance, making it ideal for large public servers.
- Vast Plugin Ecosystem: Thousands of plugins exist for Spigot/Paper, covering everything from mini-games to anti-griefing tools and complex economy systems.
- No Client-Side Mods Required: Players only need a vanilla Minecraft client to connect, making it very accessible.
- Easier Management: Plugins tend to be easier to install and manage than complex modpacks.
- Cons:
- No New Content (Blocks, Items): Plugins cannot add new blocks, items, dimensions, or entities in the same way Forge or Fabric mods can. They primarily modify existing game mechanics or add server-side features.
- Different API: If you're coming from mod development, the plugin API is fundamentally different.
Setup Guide for a Paper Server:
- Download Paper JAR: Go to the official PaperMC website (papermc.io). Select your desired Minecraft version and download the latest JAR file.
- Create Server Folder: Create an empty folder for your server. Place the downloaded Paper JAR file into it.
- Accept EULA: Create a
eula.txtfile in the server folder, add the lineeula=true, and save. - Initial Server Launch: Create a startup script:
bash java -Xmx4G -Xms4G -jar paper-<version>.jar nogui PAUSE(Replace4Gandpaper-<version>.jar). Run the script. This will generateserver.propertiesand other initial files. - Configure
server.properties: Adjust your server settings. Pay close attention toonline-mode. - Install Plugins: Create a
pluginsfolder in your server directory. Download your desired Spigot/Paper-compatible plugins (e.g., from SpigotMC.org) and place their JAR files into thispluginsfolder. Ensure versions are compatible. - Final Launch: Run your server script again. Paper will load the plugins. Players can connect with a vanilla Minecraft client.
4.2 Essential Server Configuration (server.properties)
The server.properties file is the heart of your Minecraft server's configuration, dictating almost every aspect of its behavior. Understanding and carefully configuring this file is paramount for any "MCP server" administrator, whether running Forge, Fabric, or Paper. Incorrect settings can lead to security vulnerabilities, performance issues, or a simply undesirable gameplay experience.
Let's break down some of the most critical settings:
gamemode(default:survival): Determines the default game mode for new players joining the server. Options aresurvival,creative,adventure, orspectator. This can be overridden per-player by server operators.difficulty(default:easy): Sets the difficulty level of the game. Options arepeaceful,easy,normal, orhard. This affects mob spawning, hunger drain, and other gameplay mechanics.max-players(default:20): Defines the maximum number of players that can be online simultaneously. Set this based on your server's hardware, network bandwidth, and desired community size. Too many players on insufficient hardware will lead to severe lag.online-mode(default:true): This is a crucial security setting.- If
true(recommended), the server verifies connecting players against Mojang's authentication servers. This prevents pirated clients from joining and ensures that players are who they claim to be. Always set totruefor public servers. - If
false, the server skips authentication. This allows offline/cracked clients to join but makes your server vulnerable to identity spoofing (players can join with any username, including an operator's) and various exploits. Only usefalsefor truly private, local networks where trust is implicit, or for very specific testing scenarios.
- If
pvp(default:true): Determines whether players can attack and damage each other. Set tofalsefor a cooperative, friendly environment;truefor competitive or free-for-all gameplay.allow-flight(default:false): Iftrue, allows players to use client-side flight mods (e.g., creative flight, hacked clients) without being kicked for "illegal movements." Keepfalseunless you explicitly want to allow client-side flight, as it can be exploited.level-name(default:world): Specifies the name of the folder where your world data is stored. If the folder doesn't exist, the server will generate a new world with this name. Changing this allows you to easily switch between different worlds or create backups by simply renaming folders.motd(default:A Minecraft Server): The "Message Of The Day" displayed in the multiplayer server list. Use this to greet players, advertise your server, or convey important information. Supports Minecraft color codes (e.g.,\u00A7cWelcome to my server!).server-port(default:25565): The port number the server will listen on for incoming connections. The default25565is the standard Minecraft port. Only change this if25565is already in use on your system or if you're running multiple servers on the same IP address. Remember to port forward this new port if you change it.spawn-protection(default:16): The radius around the world spawn point (in blocks) within which non-operators cannot build or break blocks. Set to0to disable, or a higher number for greater protection. Requires operators to be logged in to apply.enable-query(default:false): Enables the GameSpy4 protocol server listener, which allows third-party tools (like server lists) to query server information. Useful for public servers.enable-rcon(default:false): Enables remote console access, allowing you to send commands to your server from a remote console client. Very powerful, but requires a strong password (rcon.password) and careful port forwarding (rcon.port) due to security implications.max-world-size(default:29999984): Limits the maximum world border radius. Helps prevent excessive world generation and disk space usage.view-distance(default:10): The number of chunks sent to players in each direction. Lowering this can significantly improve server performance, especially on modded servers or with many players. Higher values mean more chunks to process and send.sync-chunk-writes(default:true): Iftrue, chunk data is written to disk synchronously, which is safer but can cause temporary server freezes (lag spikes). Setting tofalse(often recommended for performance on dedicated servers) writes asynchronously but carries a higher risk of data loss if the server crashes unexpectedly.
Importance of Security Settings: Beyond online-mode, correctly managing white-list (true to only allow whitelisted players), enforce-whitelist (prevents unwhitelisted ops from joining if white-list is true), and enable-rcon is crucial for securing your "MCP server." Never expose rcon to the public internet without strong firewall rules and a very complex password. Regularly back up your world and configuration files, especially on modded servers, as mod conflicts or unexpected crashes are more frequent.
4.3 Installing and Managing Mods/Plugins
Installing mods and plugins is where the true customization of an "MCP server" comes to life. However, it's also where many issues arise, making careful management essential. The process differs slightly depending on whether you're using Forge/Fabric (for mods) or Spigot/Paper (for plugins).
For Forge/Fabric Servers (Mods):
- Locate the
modsfolder: After running your Forge or Fabric server for the first time, a folder namedmodswill be created in your server's main directory. This is where all your mod JAR files go. - Download Mods from Reputable Sources: Always download mods from trusted websites like CurseForge or Modrinth. These platforms usually have community review systems, version control, and often include essential information about mod compatibility and dependencies. Avoid obscure sites, as they may host outdated or malicious files.
- Check Version Compatibility: This is paramount. Every mod has a specific Minecraft version and often a specific mod loader version (e.g., Forge 1.16.5 or Fabric 1.18.2) it was built for. Installing a mod for the wrong version will cause your server to crash or the mod simply won't load. The mod's download page will clearly state its compatible versions.
- Check Dependencies: Many complex mods rely on other "library" mods to function. For example, some Forge mods require
CoFH CoreorJEI (Just Enough Items). The mod's description or installation instructions will list any required dependencies. You must download and install all necessary dependency mods into themodsfolder as well. Failure to do so will result in server crashes. - Place Mod JARs: Simply drag and drop the downloaded
.jarfiles of your chosen mods and their dependencies into the server'smodsfolder. Do not extract the JARs. - Client-Side Installation: Remember that for most Forge and Fabric mods, players connecting to your "MCP server" will need to have the exact same mod loader and mod JARs installed in their own Minecraft client's
modsfolder. This is a common point of failure for players unable to connect. You can bundle your modpack using a launcher like CurseForge or ATLauncher to simplify this for players. - Server Restart: After adding, removing, or updating mods, you must restart your server for the changes to take effect.
- Configuration Files: Many mods generate their own configuration files (often
.json,.toml, or.cfgfiles) within aconfigfolder in your server directory after the first launch. These files allow you to fine-tune specific aspects of each mod's behavior. Read the mod's documentation to understand what settings are available.
For Spigot/Paper Servers (Plugins):
- Locate the
pluginsfolder: After running your Spigot or Paper server for the first time, a folder namedpluginswill be created in your server's main directory. - Download Plugins from Reputable Sources: The primary source for Spigot/Paper plugins is SpigotMC.org, though some developers use their own websites or GitHub.
- Check Version Compatibility: Plugins are typically built for specific Spigot/Paper versions (or ranges of versions). A plugin designed for Minecraft 1.16 might not work on 1.18, or vice-versa. Always check the plugin's page for compatible versions.
- Check Dependencies: Like mods, many plugins depend on other plugins. For instance, an economy plugin might require a separate vault plugin. These dependencies will be listed on the plugin's download page. Place all dependency plugin JARs into the
pluginsfolder. - Place Plugin JARs: Drag and drop the downloaded
.jarfiles into the server'spluginsfolder. - Server Restart/Reload: After adding, removing, or updating plugins, you can usually either restart the server or use the
/reloadcommand (though a full restart is generally safer and more thorough, especially for major changes). - Configuration Files: Plugins will generate their own configuration files (often
.ymlor.json) within subfolders inside thepluginsdirectory after their first load. These allow extensive customization of plugin behavior.
General Management Tips for both Mods and Plugins:
- Backup Regularly: Before making any changes to your mods/plugins folder or configuration files, create a full backup of your server directory, especially your world folder. Mod conflicts can corrupt worlds.
- One by One: When adding multiple new mods/plugins, add them one or two at a time and restart the server after each addition. This makes it much easier to pinpoint which specific mod/plugin is causing a crash or conflict.
- Read Log Files: If your server crashes or misbehaves, the server console and
latest.logfile are your best friends. Error messages (often marked[ERROR]or[FATAL]) will point to the problematic mod or plugin. - Keep Updated (Cautiously): While keeping mods/plugins updated is good for bug fixes and new features, always check release notes for breaking changes and test updates on a separate instance of your server if possible, before deploying to your live server.
Effective installation and management of mods and plugins are critical skills for any "MCP server" owner, allowing you to build stable, customized, and enjoyable Minecraft experiences.
4.4 Performance Optimization for Modded Servers
Running a modded Minecraft server, especially one loaded with numerous content-rich Forge or Fabric mods (what we're calling "MCP servers"), can be incredibly demanding on hardware. Unlike vanilla servers, modded environments process significantly more game logic, render more complex entities, and often generate more intricate terrain. Without proper optimization, even powerful hardware can struggle, leading to frustrating lag for players. This section details crucial aspects of optimizing your modded server's performance.
Hardware Considerations: The Foundation of Performance
Optimization starts with robust hardware. Skimping on specifications for a modded server is a recipe for disaster.
- CPU (Central Processing Unit): Minecraft, by nature, is primarily single-threaded, meaning a single core often does most of the heavy lifting for game logic. While modern processors have many cores, a few powerful cores are often better than many weak ones for a Minecraft server. Look for CPUs with high single-core clock speeds. Intel i7/i9 or AMD Ryzen 7/9 series processors are generally excellent choices.
- RAM (Random Access Memory): This is perhaps the most critical component for modded servers. Each mod, chunk, entity, and player consumes RAM.
- Minimum: 4GB for a very light modpack with a few players.
- Recommended: 8GB-16GB for medium-sized modpacks (20-50 mods) and 5-10 players.
- High-End: 24GB-32GB+ for large modpacks (100+ mods) and 10+ concurrent players.
- Allocate adequate RAM using Java arguments (e.g.,
-Xmx8Gfor 8GB,-Xms8Gto start with 8GB).
- SSD (Solid State Drive) vs. HDD (Hard Disk Drive): An SSD is non-negotiable for a modded server. Minecraft constantly reads and writes chunk data, world information, and mod configuration. HDDs, with their mechanical moving parts, are far too slow and will cause significant lag, especially during world generation, chunk loading, and saving. An NVMe SSD offers even better performance.
- Network Bandwidth: While less impactful than CPU/RAM for internal game logic, sufficient uplink bandwidth is crucial for smooth player connections and sending chunk data. Aim for at least 100 Mbps uplink for small to medium servers, and higher for larger communities.
Software Optimizations: Fine-Tuning Your Server Software
Beyond hardware, careful configuration of your server software and Java environment can yield significant performance gains.
- Java Version and Arguments (JVM Flags):
- JDK Version: Always use a supported, modern Java Development Kit (JDK) version. For recent Minecraft versions (1.17+), Java 16 or 17 is typically required. For older versions (1.16.5 and below), Java 8 is common. Ensure your Java installation is 64-bit.
- Aikar's Flags (Paper/Spigot): For Spigot/Paper servers, Aikar's Flags are a highly recommended set of JVM arguments designed to optimize Java's garbage collection for Minecraft servers. They prevent long pauses that cause lag spikes. A typical set looks like this:
java -Xms10G -Xmx10G -XX:+UseG1GC -XX:G1HeapRegionSize=16M -XX:GCLockerEdenExpansionPercent=40 -XX:G1NewSizePercent=30 -XX:G1MaxNewSizePercent=40 -XX:G1HeapWastePercent=5 -XX:G1MixedGCMaxCeiling=9 -XX:MaxGCPauseMillis=200 -XX:InitiatingHeapOccupancyPercent=15 -XX:G1ReservePercent=20 -XX:SurvivorRatio=32 -XX:+HeapDumpOnOutOfMemoryError -XX:HeapDumpPath=./dumps -XX:-UseAdaptiveSizePolicy -XX:NewRatio=1 -XX:NewSize=1024m -XX:MaxNewSize=4096m -jar paper-<version>.jar nogui(Adjust-Xmsand-Xmxto your allocated RAM). While primarily for Paper/Spigot, similar G1GC arguments can benefit Forge/Fabric, though Aikar's are specifically tuned for Bukkit-based servers. - General Flags for Forge/Fabric:
java -Xms<MIN_RAM> -Xmx<MAX_RAM> -XX:+UseG1GC -jar forge-<version>.jar noguiThe-XX:+UseG1GCflag enables the G1 Garbage Collector, which is generally better for servers than the default collector, especially with large heap sizes.
- Server Software (Paper/Fabric Optimization Mods):
- PaperMC: If you're running a Spigot-based server, always use PaperMC over Spigot or Bukkit. Paper includes countless performance optimizations and bug fixes. Its configuration files (
paper.yml,spigot.yml,bukkit.yml) offer extensive options to tweak chunk loading, mob spawning, entity tracking, and more. Review these files thoroughly. - Fabric Performance Mods: For Fabric servers, specific mods are designed purely for performance:
- Lithium: Optimizes various game mechanics (e.g., mob AI, chunk ticking) for better server performance.
- Phosphor: Improves light engine performance, reducing lag spikes associated with lighting updates.
- Carpet: While primarily a debugging/tweaking tool, it includes some performance-related features and can expose server metrics.
- Starlight: An alternative lighting engine that can be significantly faster than vanilla or even Phosphor.
- Forge Performance Mods: Forge also has its share of optimization mods, though they might be less ubiquitous than Fabric's due to Forge's more established, complex core. Examples include
Clumps(groups XP orbs),LagGoggles(profiling), and careful selection of other mods to avoid overly resource-intensive ones.
- PaperMC: If you're running a Spigot-based server, always use PaperMC over Spigot or Bukkit. Paper includes countless performance optimizations and bug fixes. Its configuration files (
- World Pre-generation: Generating chunks on the fly as players explore is a major source of lag. For "MCP servers," especially with heavy world generation mods, pre-generating a large area of your world can dramatically improve initial exploration performance. Tools like
Chunky(for Forge/Fabric) or WorldBorder (for Spigot/Paper) allow you to pre-generate a defined radius of chunks around your spawn or other key areas. This offloads the CPU-intensive generation process to a time when no players are online or during periods of low activity. - Limiting Entities and Redstone:
- Mob Caps: Default mob caps can be too high for modded servers. Adjust
spawn-monstersandspawn-animalsinserver.properties, and use plugins/mods (e.g., ClearLagg for Paper, or specific config settings for Forge/Fabric) to reduce or despawn excess entities. - Redstone Optimization: Complex, rapidly updating redstone contraptions can cause significant server-side lag. Encourage players to build efficiently, or use mods/plugins that limit redstone tick rates or automatically turn off problematic circuits.
- Mob Caps: Default mob caps can be too high for modded servers. Adjust
- Disable Unused Features: Review your mod list and server configuration. Disable any mods or features within mods that your community isn't using. Every active mod or feature adds overhead. For example, if a mod adds a new dimension your players never visit, consider disabling it or removing the mod.
By strategically combining robust hardware with careful software configuration and smart gameplay management, you can transform a sluggish "MCP server" into a smooth, enjoyable experience for all your players.
Chapter 5: Advanced Topics in MCP Server Management and Development
Once you have a functional modded server, the journey doesn't end. Advanced management techniques, security protocols, and even a glimpse into development are crucial for maintaining a stable, secure, and thriving "MCP server" community.
5.1 Server Security and Whitelisting
Security is paramount for any online server, and "MCP servers" are no exception. Given the potentially complex interactions between mods and plugins, vulnerabilities can arise, making robust security practices even more critical. Protecting your server from griefing, unauthorized access, and data breaches ensures a positive experience for your community.
- Whitelisting: This is your first line of defense against unwanted players. By enabling
white-list=trueinserver.propertiesand then adding specific player names to the whitelist using the/whitelist add [playername]command, you ensure that only approved individuals can join your server. This is especially vital for private servers, friend groups, or invite-only communities, as it drastically reduces the risk of griefing and malicious activity.enforce-whitelist: For enhanced security, consider settingenforce-whitelist=trueas well. This prevents server operators who are not on the whitelist from joining, which is a rare but possible security loophole if an operator account is compromised.
- Strong Passwords and SSH/FTP Security: If you're hosting your server on a VPS or dedicated machine, secure access protocols are essential.
- SSH (Secure Shell): Always use strong, unique passwords for your SSH root or administrator account. Even better, disable password authentication and rely solely on SSH key-based authentication. This is significantly more secure as it removes the possibility of brute-force attacks succeeding. Configure your SSH daemon (
sshd_config) to disallow root login and only allow specific users. - SFTP/FTP: If you use SFTP (SSH File Transfer Protocol, generally more secure than plain FTP) to manage server files, ensure the associated user accounts also have strong passwords or are tied to SSH keys. Limit their access to only the necessary directories.
- RCON (Remote Console): If you enable RCON for remote command execution, ensure
rcon.passwordinserver.propertiesis a long, complex, randomly generated string. Only expose thercon.portthrough your firewall to trusted IP addresses, if at all.
- SSH (Secure Shell): Always use strong, unique passwords for your SSH root or administrator account. Even better, disable password authentication and rely solely on SSH key-based authentication. This is significantly more secure as it removes the possibility of brute-force attacks succeeding. Configure your SSH daemon (
- Firewall Configuration: A firewall (e.g.,
ufwon Linux, Windows Defender Firewall) is indispensable.- Allow only necessary ports: Only open the Minecraft server port (default 25565), SSH port (default 22, consider changing it), and any other absolutely essential service ports. Block all other incoming traffic.
- Rate Limiting: Some firewalls can implement rate limiting on specific ports (like SSH) to mitigate brute-force attacks.
- Regular Backups: Data loss, whether from a server crash, hardware failure, or malicious activity, is a constant threat. Implement a robust backup strategy:
- Automated Backups: Use scripts or server host features to perform automated backups of your entire server directory (especially the
worldfolder,mods,plugins,config, andserver.properties) at regular intervals (e.g., daily, hourly for very active servers). - Off-site Storage: Store backups on a separate machine, cloud storage (e.g., S3, Google Drive), or a different physical drive. Relying solely on backups on the same machine is risky.
- Versioned Backups: Keep multiple backup versions, allowing you to roll back to a point before an issue occurred.
- Testing Backups: Periodically test your backups by attempting a restore to ensure they are complete and functional.
- Automated Backups: Use scripts or server host features to perform automated backups of your entire server directory (especially the
- Anti-Griefing and Anti-Cheat Measures:
- Plugins/Mods: For Spigot/Paper, plugins like CoreProtect (for logging block changes), LuckPerms (for granular permissions), or anti-cheat plugins are invaluable. For Forge/Fabric, some modpacks include their own anti-griefing utilities, or you can use server-side permission mods like
FTB Utilities. - Moderation: Actively moderate your server. Have clear rules and enforce them. Player reports and vigilant observation by staff are often the best defense against subtle forms of griefing or cheating.
- Operator Management: Grant operator (
op) status judiciously. Only trusted and knowledgeable individuals should have access to/opcommands, as they can bypass many protections.
- Plugins/Mods: For Spigot/Paper, plugins like CoreProtect (for logging block changes), LuckPerms (for granular permissions), or anti-cheat plugins are invaluable. For Forge/Fabric, some modpacks include their own anti-griefing utilities, or you can use server-side permission mods like
By diligently implementing these security measures, you can create a safer, more stable, and more enjoyable "MCP server" environment for everyone involved.
5.2 Monitoring and Troubleshooting
Running a "MCP server" inevitably means encountering issues – lag spikes, crashes, mod conflicts, or unexpected behavior. Effective monitoring and troubleshooting skills are invaluable for minimizing downtime and maintaining a smooth player experience.
- Log File Analysis: The server's console output and the
logs/latest.logfile are your most crucial diagnostic tools.- Error Messages: Look for lines containing
[ERROR],[WARN], or[FATAL]. These often point directly to the problematic mod, plugin, or configuration setting. Ajava.lang.NullPointerExceptionorjava.lang.NoClassDefFoundErrortypically indicates a missing dependency or a mod compatibility issue. - Stack Traces: When a crash occurs, a lengthy "stack trace" will appear in the log. While daunting, the top few lines often mention the specific mod or class that caused the crash. Look for mod IDs or familiar package names in the stack trace (e.g.,
com.example.mymod.MyClass). - Startup Logs: Pay attention during server startup. Errors or warnings here often indicate mods that failed to load correctly.
- Resource Usage: Some warnings might indicate high resource usage (e.g., slow chunk saves).
- Error Messages: Look for lines containing
- Performance Monitoring Tools:
- Server Console Metrics: Basic metrics like TPS (Ticks Per Second) are usually displayed in the console or can be checked with commands like
/tps. A TPS below 20 indicates lag. - Spark (Forge/Fabric/Paper): Spark (spark.lucko.me) is an invaluable profiling tool. It can identify where your server's CPU cycles are being spent (e.g., which mods, entities, or tasks are causing the most lag).
- Install Spark as a mod/plugin.
- Run
/spark profiler startto begin profiling. - After a few minutes (or when lag occurs), run
/spark profiler stop. - It will provide a link to a web interface with detailed, human-readable performance reports, showing exactly what is consuming resources.
- Timings Reports (Paper/Spigot): For Paper/Spigot servers, the
/timings pastecommand generates a detailed report of server activity, including how much time is spent on different plugins, events, and tasks. This helps identify resource-hungry plugins. - System Monitors: Tools like
htop(Linux) or Task Manager (Windows) can monitor CPU, RAM, and disk I/O at the operating system level, helping you identify if the server is maxing out its allocated hardware resources.
- Server Console Metrics: Basic metrics like TPS (Ticks Per Second) are usually displayed in the console or can be checked with commands like
- Common Issues and Solutions:
- Server Crashes:
- Cause: Mod conflicts, outdated mods, missing dependencies, out-of-memory errors, corrupted world data.
- Solution: Check
latest.logfor stack traces. Remove newly added mods one by one. Increase allocated RAM (-Xmx). Restore from a backup.
- Lag (Low TPS):
- Cause: Too many entities, inefficient mods, excessive chunk loading, slow I/O (HDD instead of SSD), insufficient CPU/RAM, network issues.
- Solution: Use Spark/Timings to identify culprits. Reduce
view-distance. Pre-generate chunks. Limit mob caps. Optimize Java arguments. Upgrade hardware.
- Mod Conflicts:
- Cause: Two mods trying to modify the same core game aspect in incompatible ways.
- Solution: Typically found through server logs or crash reports. Often requires removing one of the conflicting mods or finding a patch/alternative. Some modpacks have specific configurations to mitigate known conflicts.
- Out-of-Memory Errors:
- Cause: Not enough RAM allocated to the Java Virtual Machine for the mods being run.
- Solution: Increase
-Xmxand-Xmsvalues in your startup script.
- Server Crashes:
By regularly monitoring your server's health and learning to interpret the diagnostic information available, you can proactively address potential issues and quickly resolve problems when they arise, ensuring your "MCP server" remains a smooth and enjoyable experience.
5.3 Developing Your Own Mods/Plugins (Brief Overview)
For many, running a modded server sparks an interest in creating their own content. Developing mods or plugins, particularly for "MCP servers" (meaning Forge or Fabric), is a rewarding journey that allows you to tailor the game exactly to your vision. While a full tutorial is beyond the scope of this guide, here's an overview and a natural place to mention API management.
- Setting Up a Development Environment:
- IDE (Integrated Development Environment): Popular choices include IntelliJ IDEA (Community Edition is free and excellent) or Eclipse. These provide code editing, project management, and debugging tools.
- JDK (Java Development Kit): You'll need the correct JDK version matching your Minecraft version (e.g., Java 17 for Minecraft 1.18+, Java 8 for Minecraft 1.12.2).
- Mod Loader Development Kit (MDK):
- Forge: Download the Forge MDK for your target Minecraft version from the Forge website. This includes a pre-configured Gradle project with all the necessary dependencies and scripts to set up your development environment.
- Fabric: The Fabric website provides similar setup instructions, usually involving generating a new Gradle project with the Fabric Loom plugin.
- Gradle: Both Forge and Fabric MDKs use Gradle as their build system. You'll use Gradle commands (e.g.,
gradlew genSources,gradlew runClient,gradlew build) to set up your workspace, run a development client, and compile your mod.
- Basic Mod Structure and Events:
ModMainClass: Your mod will typically have a main class annotated with@Mod(Forge) or implementingModInitializer(Fabric). This is the entry point for your mod.- Events: Modding primarily revolves around "events." The game fires events at various points (e.g.,
BlockBreakEvent,PlayerJoinEvent,TickEvent). Your mod registers "event listeners" to these events to execute custom code when they occur. This is how you interact with the game without directly modifying its core code. - New Content: To add new blocks, items, entities, or recipes, you'll use the mod loader's registration system. You define your new content and tell Forge/Fabric to register it with the game.
- The Role of APIs and External Services: As your mods become more sophisticated, you might want them to interact with services outside the Minecraft server itself. Perhaps you want to:For developers looking to integrate external services or expose their server's data securely, platforms like APIPark offer robust API management solutions. APIPark is an open-source AI gateway and API management platform that can help encapsulate these functionalities into managed APIs. Whether you're building a custom plugin to track player statistics and push them to a data analytics service, or you want to create a secure endpoint for your mod to interact with an AI model for dynamic in-game events, APIPark allows you to: * Standardize API calls: Create a unified format for invoking various AI models or custom services, simplifying how your mod interacts with them. * Manage Access and Security: Define who can access your custom APIs, enforce authentication, and control traffic, ensuring that your server's external integrations are secure and managed. * Monitor Usage: Gain insights into how frequently your mod's external API calls are being used, helping with optimization and troubleshooting.By leveraging platforms like APIPark, developers can streamline the integration of external services, securely expose server-specific data, and manage the entire lifecycle of these API interactions, moving beyond just in-game modifications to creating truly interconnected "MCP server" experiences.
- Store player statistics in an external database.
- Integrate with a Discord bot.
- Pull real-time data from a third-party API (e.g., weather, stock prices).
- Expose certain server data (e.g., online player count, world seed) to a custom web dashboard.
5.4 Using Version Control
For any serious server administrator or mod developer, using a version control system (VCS), specifically Git, is an indispensable practice. It brings order, safety, and collaboration to the often chaotic world of server management and mod development.
- Tracking Configuration Changes: Your "MCP server" has numerous configuration files (
server.properties, mod configs, plugin configs, permissions files). Manually tracking changes to these files, especially when troubleshooting, can be a nightmare.- Git Repository: Initialize a Git repository in your server's main directory (excluding the
worldfolder andlogsfolder, which can be massive and change constantly). - Commit Changes: Before making any significant changes (e.g., installing a new mod, modifying
server.properties), commit your current configuration files to Git. Add a descriptive message (e.g., "Added X mod, changed max players to 15"). - Rollbacks: If a new change breaks your server, you can easily use Git to revert to a previous, working state of your configuration files. This saves countless hours of manual backtracking.
- History: You have a complete history of every change made, by whom, and when.
- Git Repository: Initialize a Git repository in your server's main directory (excluding the
- Collaborative Development/Administration: If you have multiple administrators or developers working on your server or modpack, Git becomes even more critical.
- Shared Repository: Host your Git repository on a service like GitHub, GitLab, or Bitbucket.
- Branching: Each administrator/developer can work on their own "branch" for specific changes without affecting the main server configuration.
- Merging: Once changes are tested and approved, they can be merged back into the main branch.
- Conflict Resolution: Git provides tools to help resolve conflicts when multiple people modify the same file.
- Managing Custom Scripts and Code: If you write any custom startup scripts, administration scripts, or are developing your own mod/plugin, Git is the standard for managing your source code.
- Code Versioning: Track every change to your code, allowing you to experiment, revert, and collaborate effectively.
- Feature Branches: Develop new features in separate branches, keeping your main codebase stable.
Basic Git Workflow for a Server:
- Initialize Git:
bash cd /path/to/your/server git init
Create a .gitignore file: This is crucial. It tells Git to ignore files and folders that you don't want to track (like logs, cached data, and especially large world folders). A typical .gitignore for a Minecraft server might look like this: ``` # Logs logs/
World files (can be huge)
world/ world_nether/ world_the_end/ DIM-1/ DIM1/
Mod/Plugin specific generated files often in /cache
cache/ libraries/
Installer/temporary files
.jar .zip *.bak installer.jar
IDE files
.idea/ .project .classpath .iws .iml *.ipr
OS-generated files
.DS_Store Thumbs.db 3. **Add and Commit Initial Files:**bash git add . git commit -m "Initial server configuration commit" 4. **Regularly Add and Commit Changes:** After making any changes:bash git add . git commit -m "Descriptive message about changes" 5. **Remote Repository (Optional but Recommended):** To push to GitHub/GitLab:bash git remote add origingit push -u origin master # Or main ```
Implementing version control with Git for your "MCP server" transforms server management from a risky, manual process into an organized, recoverable, and collaborative endeavor, greatly enhancing stability and peace of mind.
Chapter 6: Hosting Your MCP-Derived Server – Options and Considerations
Choosing the right hosting solution for your "MCP server" is as critical as selecting your modding platform and optimizing its performance. The ideal choice depends on your budget, technical expertise, expected player count, and the complexity of your modpack. This chapter explores various hosting options, outlining their pros, cons, and key considerations.
6.1 Local Hosting
Local hosting involves running the Minecraft server software directly on your personal computer or a dedicated machine within your home network.
- Pros:
- Free (excluding hardware/electricity): The most cost-effective option, as you're leveraging existing hardware.
- Full Control: You have direct physical access and complete administrative control over the server environment.
- Immediate Access: Very low latency for players on the same local network.
- Cons:
- Dependent on Home Internet/PC: Server performance and availability are tied to your home internet connection's upload speed and your computer's uptime. If your PC shuts down or your internet goes out, the server is offline.
- Security Risks: Requires careful port forwarding on your router, which can introduce security vulnerabilities if not done correctly. Exposing your home IP address.
- Resource Contention: If you game on the same PC, the server will compete for CPU and RAM, potentially degrading both gaming and server performance.
- Accessibility Issues: Other players connecting from outside your home network will experience latency based on your home internet's upload speed, which is typically much lower than download speed. Dynamic IP addresses can also cause issues.
Considerations: Best for small, private groups of friends, local area networks (LAN) parties, or for testing modpacks before deploying to a more robust solution. Requires basic networking knowledge for port forwarding.
6.2 Dedicated Server Providers (Minecraft Game Hosts)
These are companies that specialize in hosting Minecraft servers. They provide a managed service where you rent a portion of their infrastructure (often a virtual machine or a shared slice of a powerful server) specifically configured for Minecraft.
- Pros:
- High Performance and Reliability: Professional-grade hardware, redundant power, and enterprise-grade internet connections ensure excellent uptime and performance.
- Ease of Setup/Management: Many providers offer user-friendly control panels (e.g., Multicraft, Pterodactyl) to start/stop the server, install mods/plugins, manage files, and automate backups with minimal technical knowledge.
- DDoS Protection: Most reputable hosts include robust DDoS (Distributed Denial of Service) protection, crucial for public servers.
- 24/7 Support: Access to technical support for troubleshooting issues.
- Scalability: Often allows for easy upgrades/downgrades of RAM, CPU, or storage.
- Cons:
- Cost: Generally the most expensive option, as you're paying for convenience, performance, and support.
- Limited Customization: While they simplify mod/plugin installation, you may have less control over the underlying operating system or advanced server configurations compared to a VPS or dedicated machine.
Key Features to Look For: * RAM: Ensure adequate RAM for your modpack (refer to Section 4.4). This is often the most critical factor. * CPU: Look for providers mentioning high single-core performance. * SSD Storage: Essential for fast chunk loading and world saving. * DDoS Protection: Non-negotiable for public servers. * Control Panel: User-friendliness and features. * Location: Choose a server location geographically close to the majority of your players to minimize latency.
Considerations: Ideal for moderate to large communities, those who want a hassle-free experience, or users without extensive technical expertise. Excellent choice for most "MCP servers" that need reliability and performance.
6.3 VPS (Virtual Private Server)
A VPS is a virtual machine that you rent from a hosting provider. You get root access to a complete operating system (usually Linux), giving you full control over the environment, but it shares physical hardware resources with other VPS instances.
- Pros:
- More Control: Root access allows you to install any software, configure the OS, and fine-tune Java arguments precisely.
- Cost-Effective (Intermediate): More affordable than a dedicated server, offering a good balance between cost and control.
- Scalable: Can often upgrade resources (RAM, CPU cores) as your needs grow.
- Better Performance than Shared Hosting: Dedicated virtualized resources offer more consistent performance.
- Cons:
- Requires Technical Knowledge: Demands proficiency in Linux command line, server administration, security hardening, and network configuration (e.g., firewall, SSH).
- No Dedicated Hardware: Performance can sometimes be affected by "noisy neighbors" if the physical server is overloaded.
- Self-Managed Security: You are responsible for all operating system and server software security updates and patching.
Considerations: A great choice for technically proficient users who want more control than a game host but aren't ready for a full dedicated machine. Suitable for medium-sized "MCP servers" that require specific custom setups or advanced administrative tools.
6.4 Dedicated Server
A dedicated server is an entire physical machine that you rent from a data center. You have exclusive use of all its hardware resources.
- Pros:
- Maximum Performance and Control: Unparalleled performance, as all hardware resources are exclusively yours. Full control over the entire machine.
- Ultimate Customization: Can install any OS, run multiple Minecraft servers, web servers, databases, or other applications.
- No "Noisy Neighbors": Performance is entirely dependent on your server's hardware and your management.
- Cons:
- Highest Cost: The most expensive hosting option.
- High Technical Expertise Required: You are responsible for all hardware, OS, and software management, including initial setup, maintenance, security, and troubleshooting.
- Less Flexible (Short-Term): Upgrading hardware (e.g., CPU) usually requires migrating to a new machine.
Considerations: Best for very large, highly active "MCP servers" with substantial player counts, complex modpacks, or for professional users/organizations who need maximum performance, control, and want to run multiple services on one machine.
Table: Comparison of Hosting Options for Modded Minecraft Servers
| Feature | Local Hosting | Dedicated Game Host (Managed) | VPS (Virtual Private Server) | Dedicated Server (Unmanaged) |
|---|---|---|---|---|
| Cost | Free (excluding electricity/hardware) | Moderate to High | Low to Moderate | High |
| Performance | Varies (depends on home PC/internet) | High, optimized for Minecraft | Good, dedicated virtual resources | Excellent, exclusive hardware |
| Ease of Setup | Moderate (requires port forwarding) | Very Easy (control panel) | Hard (Linux CLI, OS config) | Very Hard (OS installation, full config) |
| Technical Knowledge | Basic Networking | Minimal | Intermediate to Advanced (Linux Admin) | Advanced (System Admin, Hardware) |
| Control Level | Full (physical access) | Limited (via control panel) | Full (root access to VM) | Full (root access to physical machine) |
| Scalability | Low (limited by hardware) | Easy (upgrade plans) | Moderate (upgrade VM resources) | Hard (hardware upgrades require migration) |
| DDoS Protection | None (unless custom firewall/ISP) | Usually Included | Optional (provider-dependent) | Optional (provider-dependent) |
| Uptime | Low (dependent on home PC/internet) | High (professional data center) | High (professional data center) | High (professional data center) |
| Target User | Small groups, testing, LAN | Most "MCP server" owners, large communities | Tech-savvy users, custom setups | Very large communities, professionals |
The decision for your "MCP server" hosting should be a careful balance between your budget, technical comfort, and the specific needs of your community and modpack. Starting small and scaling up is often a prudent approach.
Conclusion
The journey through the world of "MCP servers" for Minecraft reveals a rich tapestry woven from community ingenuity, technical prowess, and an unyielding desire for customization. We've explored the foundational role of the Minecraft Coder Pack, understanding how its pioneering efforts in decompilation and deobfuscation laid the groundwork for the entire modding ecosystem. While MCP itself is no longer a direct server runtime, its legacy lives on through the sophisticated modding APIs like Forge and Fabric, which power the deeply customized servers that players often refer to as "MCP servers."
From dissecting the nuances of server types and the profound reasons for hosting your own, to the intricate steps of setting up a modded environment with Forge or Fabric, and then fine-tuning performance, we've covered the essentials. We delved into critical server configuration, the careful art of installing and managing mods, and the vital importance of performance optimization – from choosing the right hardware to implementing advanced Java arguments and specialized optimization mods. Furthermore, we ventured into advanced topics such as robust server security, the art of troubleshooting with log files and profiling tools, and even a brief foray into mod development, highlighting how external API management platforms like APIPark can enhance modern server integrations. Finally, we navigated the diverse landscape of hosting options, providing a comprehensive guide to selecting the perfect home for your unique Minecraft world.
The power of an "MCP server" lies in its boundless flexibility. It's an environment where the only limits are your imagination and your technical acumen. Whether you aim to create a private haven for friends, a sprawling empire of custom machinery, or a dynamic new game mode, the tools and knowledge presented in this guide empower you to achieve your vision. The future of Minecraft modding remains vibrant, with ongoing innovation in both client and server-side development. New APIs, optimization techniques, and creative mods continue to push the boundaries of what's possible within the blocky universe. Embrace the challenge, learn from every error, and revel in the satisfaction of crafting a truly unique and engaging Minecraft experience. Your ultimate "MCP server" adventure awaits!
Frequently Asked Questions (FAQs)
1. What exactly is an "MCP server" in today's Minecraft context?
In today's context, an "MCP server" refers to a highly customized Minecraft server running content-rich modifications, typically powered by a modding API like Minecraft Forge or Fabric. The term is a historical nod to the Minecraft Coder Pack (MCP), which was the original tool that enabled developers to decompile and deobfuscate Minecraft's code, making modding possible. While MCP itself isn't the server software, the servers running Forge or Fabric mods are direct descendants of MCP's foundational work in opening up Minecraft for extensive modification.
2. Is it difficult to set up an "MCP server" compared to a vanilla server?
Yes, setting up an "MCP server" is generally more complex than a vanilla server. It involves choosing a modding platform (Forge or Fabric), installing the appropriate mod loader, carefully selecting and installing compatible mods, managing dependencies between mods, and often requiring more significant hardware resources (CPU and RAM). Additionally, troubleshooting can be more involved due to potential conflicts between numerous mods. However, with this guide and patience, it's a manageable and rewarding endeavor.
3. What are the essential hardware requirements for a stable "MCP server"?
For a stable "MCP server," robust hardware is crucial. You'll need a CPU with high single-core performance, ample RAM (8GB-16GB is a good starting point for medium modpacks, 24GB+ for large ones), and critically, a fast SSD (Solid State Drive) for world data and server files. Network bandwidth, especially upload speed, is also important for smooth player connections. The exact requirements scale with the number of players and the complexity/number of mods in your modpack.
4. Can players connect to my "MCP server" with a regular Minecraft client?
No, generally not. For most Forge or Fabric mods that add new content (blocks, items, entities, dimensions), players connecting to your "MCP server" will need to have the exact same mod loader (Forge or Fabric) and the exact same versions of all the mods installed on their own Minecraft client. If they try to connect with a vanilla client or a mismatched modpack, they will typically receive an error message and be unable to join.
5. What are the best practices for troubleshooting lag or crashes on my "MCP server"?
The best practices for troubleshooting include: 1. Checking Server Logs: The logs/latest.log file is your primary diagnostic tool; look for [ERROR], [WARN], and [FATAL] messages or stack traces. 2. Using Profiling Tools: Tools like Spark (for Forge/Fabric/Paper) or Timings (for Paper/Spigot) can pinpoint which mods, plugins, or game mechanics are consuming the most resources and causing lag. 3. One-by-One Approach: When installing new mods, add them one at a time to easily identify the culprit if a crash occurs. 4. Regular Backups: Always have recent backups of your world and server files to restore to a working state if something goes wrong. 5. Reviewing Configuration: Ensure server.properties and individual mod/plugin configurations are optimized and correct.
🚀You can securely and efficiently call the OpenAI API on APIPark in just two steps:
Step 1: Deploy the APIPark AI gateway in 5 minutes.
APIPark is developed based on Golang, offering strong product performance and low development and maintenance costs. You can deploy APIPark with a single command line.
curl -sSO https://download.apipark.com/install/quick-start.sh; bash quick-start.sh

In my experience, you can see the successful deployment interface within 5 to 10 minutes. Then, you can log in to APIPark using your account.

Step 2: Call the OpenAI API.