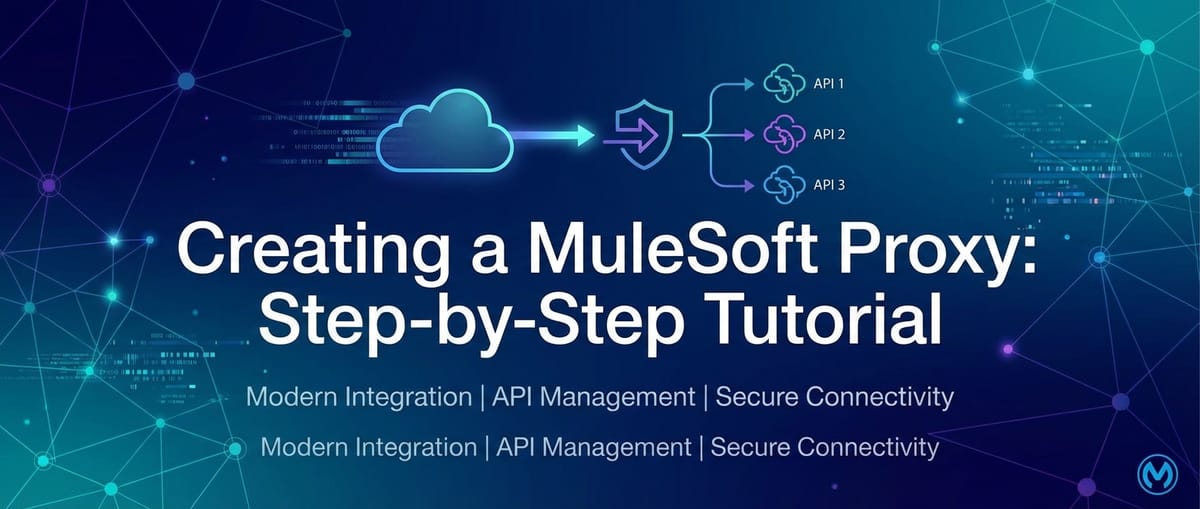
Creating a MuleSoft Proxy: Step-by-Step Tutorial


In today's hyper-connected digital landscape, Application Programming Interfaces (APIs) serve as the fundamental backbone, enabling seamless communication and data exchange between disparate systems, applications, and services. From mobile applications interacting with backend servers to microservices communicating within complex enterprise architectures, APIs are the very sinews of modern software. However, the direct exposure of backend services to external consumers, or even internal ones, can introduce a myriad of challenges related to security, performance, monitoring, and overall governance. This is precisely where the concept of an API proxy, and more broadly an API Gateway, becomes not just beneficial, but absolutely indispensable.
An API Gateway acts as a single entry point for all API calls, routing requests to the appropriate backend services while simultaneously enforcing security policies, managing traffic, monitoring performance, and providing a crucial layer of abstraction. Among the leading platforms that empower organizations to build, deploy, and manage these critical components is MuleSoft Anypoint Platform. MuleSoft’s robust capabilities allow enterprises to create sophisticated API proxies that shield backend services, enhance security postures, and provide invaluable insights into API usage patterns. This comprehensive tutorial will guide you through the intricate process of creating a MuleSoft proxy, from understanding its fundamental principles to deploying and enhancing it with policies, ensuring that your APIs are not only performant but also secure and easily manageable. We will delve deep into each step, explaining the 'why' behind the 'how', providing you with a solid foundation for mastering API management with MuleSoft.
The Imperative of API Proxies and API Gateways in Modern Architectures
Before we embark on the hands-on journey of building a MuleSoft proxy, it's crucial to establish a clear understanding of what an API proxy is, its relationship with an API Gateway, and why these architectural patterns have become non-negotiable for any organization serious about its digital infrastructure. The distinction, while sometimes subtle in common parlance, is significant in architectural design and implementation.
What is an API Proxy? Unpacking the Core Concept
At its heart, an API proxy is an intermediary service that sits between an API consumer and the actual backend service provider. It intercepts incoming requests, forwards them to the original (target) backend service, receives the response from the backend, and then sends that response back to the consumer. Think of it as a sophisticated middleman for your API calls. The primary purpose of an API proxy is to provide a layer of abstraction and control over the raw backend api. Instead of directly exposing the backend service's URL and implementation details, consumers interact with the proxy's endpoint.
This abstraction offers several immediate benefits. Firstly, it enhances security by hiding the true network location and internal architecture of the backend service. If the backend service's address changes, only the proxy needs to be updated, not every consumer application. Secondly, a proxy can centralize functionality that would otherwise need to be implemented in each backend service or consumer. This includes tasks like logging, basic authentication, and request/response transformation. For instance, a proxy can standardize output formats, ensuring that all consumers receive data in a consistent structure, even if the underlying backend varies. It can also perform simple caching to reduce the load on backend systems and improve response times for frequently requested data. This singular point of interaction significantly simplifies the overall api management landscape, making it more resilient and adaptable to change.
The Broader Scope: What Defines an API Gateway?
While an API proxy provides essential intermediary functionality, an API Gateway is a much broader and more comprehensive architectural component. An API Gateway encompasses all the features of an API proxy but extends them significantly to offer a full suite of API management capabilities. It's not just about forwarding requests; it's about intelligent routing, policy enforcement, orchestration, monitoring, and analytics at scale. An API Gateway acts as the enforcement point for organizational policies and security standards, ensuring that every interaction with your digital assets adheres to predefined rules.
Key functionalities that elevate an API Gateway beyond a simple proxy include:
- Routing and Load Balancing: Intelligently directing incoming requests to the correct backend service instance, potentially distributing traffic across multiple instances to optimize performance and availability.
- Authentication and Authorization: Verifying the identity of API consumers and ensuring they have the necessary permissions to access specific resources. This often involves integrating with identity providers and enforcing security protocols like OAuth 2.0 or JWT validation.
- Policy Enforcement: Applying a wide array of policies dynamically, such as rate limiting (to prevent abuse and ensure fair usage), surge protection, IP whitelisting/blacklisting, caching, and more complex data transformation rules.
- Monitoring and Analytics: Collecting detailed metrics on API usage, performance, errors, and latency. This data is invaluable for understanding API health, identifying bottlenecks, capacity planning, and making informed business decisions.
- Request/Response Transformation: Modifying request payloads before they reach the backend or transforming response payloads before they are sent back to the consumer. This can involve format conversions (e.g., XML to JSON), data enrichment, or data masking.
- Service Orchestration: Aggregating multiple backend service calls into a single api response, simplifying consumption for clients.
- Versioning: Managing different versions of an api, allowing consumers to migrate gradually without breaking existing integrations.
In essence, an API Gateway serves as the control tower for your entire api ecosystem. It provides a centralized, consistent, and scalable way to manage, secure, and monitor all your APIs, regardless of where they are deployed or how they are implemented. For enterprises leveraging microservices architectures, an API Gateway is particularly critical, as it provides the necessary glue to manage the interactions between dozens or even hundreds of independent services. MuleSoft's Anypoint Platform offers a highly capable API Gateway solution that integrates seamlessly with its broader ecosystem for design, management, and runtime capabilities.
Prerequisites and Essential Setup for Your MuleSoft Proxy Journey
Before we dive into the practical steps of creating a MuleSoft proxy, it's essential to ensure you have the necessary prerequisites in place. Setting up your environment correctly will pave the way for a smooth and efficient learning experience. These items are fundamental to interacting with the MuleSoft Anypoint Platform and effectively testing your deployed proxy.
1. MuleSoft Anypoint Platform Account
The Anypoint Platform is the unified, single solution for api design, development, deployment, and management. You will need an active account to access its various components, including API Manager, Runtime Manager, and Exchange.
- How to Obtain: If you don't already have one, you can sign up for a free trial account on the MuleSoft website (mulesoft.com). The trial account provides full access to the platform's features for a limited period, which is more than sufficient for this tutorial.
- Key Services: Once logged in, you'll primarily interact with the API Manager for configuring the proxy and policies, and the Runtime Manager for monitoring its deployment and logs.
2. Basic Understanding of APIs and REST Principles
While this tutorial is step-by-step, a foundational understanding of what APIs are and how RESTful principles operate will significantly enhance your comprehension.
- APIs: What they are (interfaces for communication), common methods (GET, POST, PUT, DELETE), request/response cycles.
- REST (Representational State Transfer): Concepts like resources, statelessness, client-server architecture, and uniform interface. This will help you understand why we interact with APIs using specific URLs and HTTP methods.
3. An API Client for Testing
After deploying your MuleSoft proxy, you'll need a tool to send HTTP requests to it and inspect the responses. This is crucial for verifying that the proxy is functioning as expected and that any applied policies are working correctly.
- Postman: This is arguably the most popular and user-friendly api client. It provides a rich interface for constructing requests, managing environments, and inspecting responses. You can download Postman as a desktop application or use its web version.
- Insomnia: Another excellent alternative to Postman, offering similar capabilities for api testing.
- curl: For command-line enthusiasts,
curlis a powerful tool available on most operating systems for sending HTTP requests. While less visual, it's highly versatile.
For the purpose of this tutorial, we will assume the use of Postman for its widespread adoption and ease of use.
4. A Mock Backend Service or a Simple Public API to Proxy
To create a proxy, you must have a target service that the proxy will forward requests to. For learning purposes, we don't need a complex backend. A simple, publicly available api or a mock service will suffice.
- JSONPlaceholder: This is an excellent free online REST api for testing and prototyping. It provides fake data for resources like
/posts,/comments,/users, etc. We will use an endpoint likehttps://jsonplaceholder.typicode.com/postsas our backend service URL. This service is stable and requires no authentication, making it perfect for an initial proxy setup. - Local Mock Service: If you prefer, you could set up a simple local server (e.g., using Node.js Express, Python Flask, or even a tool like Mockoon) to act as your backend. However, for simplicity, a public API like JSONPlaceholder is recommended.
Table 1: Essential Tools and Resources for MuleSoft Proxy Creation
| Tool/Resource | Description | Purpose in Tutorial | Access Method |
|---|---|---|---|
| MuleSoft Anypoint Platform | A unified platform for API design, build, deploy, and manage. | Central hub for creating and managing your API proxy and policies. | Sign up for a free trial at mulesoft.com |
| Postman | A popular API client for constructing and sending HTTP requests, and inspecting responses. | Essential for testing the deployed proxy and verifying policy enforcement. | Download desktop app or use web version from postman.com |
| JSONPlaceholder | A free online REST API providing fake data for testing and prototyping. | Acts as the backend service that our MuleSoft proxy will forward requests to. | Publicly accessible at jsonplaceholder.typicode.com |
| Basic API Knowledge | Understanding of HTTP methods (GET, POST), URLs, headers, and request/response structures. | Aids in understanding the underlying mechanisms of API communication and proxy functionality. | Self-study resources (MDN Web Docs, API documentation) |
Ensuring these prerequisites are in place will allow you to follow the tutorial seamlessly and focus on the core concepts of MuleSoft proxy creation without encountering environmental blockers. With your Anypoint Platform account ready and Postman at your fingertips, you're well-equipped to begin building your first MuleSoft proxy.
Step-by-Step Tutorial: Creating Your First MuleSoft Proxy
Now that we have a solid understanding of API proxies, the broader context of an API Gateway, and our environment is set up, it's time to dive into the practical steps of creating a MuleSoft proxy using the Anypoint Platform. This section will walk you through the entire process, from defining your API to deploying and initially testing your proxy. We'll focus on creating a proxy for a simple REST API using MuleSoft's API Manager, which is the primary tool for managing APIs within the Anypoint Platform.
Step 1: Define Your Backend API (Illustrative Example)
Every proxy needs a target backend service to forward requests to. For this tutorial, we will use a readily available public api to keep things simple and avoid the need for setting up a custom backend. JSONPlaceholder is an excellent choice for this purpose as it provides dummy data and is highly reliable.
- Our Target Backend: We will proxy the
https://jsonplaceholder.typicode.com/postsendpoint. - What this endpoint does: When you send a GET request to this URL, it returns a list of 100 fake post objects, each containing an
id,userId,title, andbody. - Verification (Optional but Recommended): Before creating the proxy, you can test this endpoint directly using Postman. Open Postman, create a new GET request, enter
https://jsonplaceholder.typicode.com/postsas the URL, and click "Send". You should receive a JSON array of post objects as the response. This confirms that our backend service is accessible and functioning correctly.
Understanding your backend api's structure and behavior is crucial because the proxy will essentially mirror its functionality while adding its own layers of control and security. The proxy will intercept requests intended for jsonplaceholder.typicode.com/posts and transparently forward them.
Step 2: Log in to Anypoint Platform and Navigate to API Manager
The API Manager is where you will define, configure, and manage your API proxies and apply policies.
- Log In: Open your web browser and navigate to
anypoint.mulesoft.com. Enter your Anypoint Platform credentials (username and password) and click "Log In". - Access API Manager: Once logged in, you will land on the Anypoint Platform home screen. On the left-hand navigation pane, you will see a list of services. Locate and click on "API Manager". This will take you to the dashboard where all your managed APIs are listed. If this is your first time, the list will likely be empty.
This dashboard provides a centralized view of all your APIs, their statuses, and any policies applied. It's the command center for your api gateway operations within MuleSoft.
Step 3: Add a New API Instance
In MuleSoft, an "API Instance" represents a specific deployment of an API, complete with its runtime configuration and policies. For our proxy, we will create a new API instance.
- Click "Add API": On the API Manager dashboard, click the prominent "Add API" button, usually located in the top right corner.
- Choose "New API": A dropdown menu will appear. Select "New API" to define a fresh API definition and then create a proxy for it. While there's an option "From existing API" if you've already designed an API in Design Center, for a simple proxy, starting with "New API" directly in API Manager is often quicker.
- Define API Details: You will be prompted to fill in several fields:
- API Name: Provide a descriptive name for your API. This is how it will appear in API Manager. For our example, let's use
JSONPlaceholder-Posts-Proxy. - Asset ID: This is a unique identifier for your API within Anypoint Platform's Exchange. It is automatically generated based on the API name but you can customize it if needed. For this tutorial, the default
jsonplaceholder-posts-proxyis fine. - Version: Specify a version for your API. It's good practice to start with
1.0.0orv1. - API Type: Select "REST" as we are proxying a RESTful service.
- Endpoint URL: This is crucial. This is where you will enter the URL of the actual backend service we are proxying:
https://jsonplaceholder.typicode.com/posts. This tells MuleSoft where to forward requests to. - Port: For HTTPS, the default port is 443. For HTTP, it's 80. You typically don't need to change this for public HTTPS endpoints.
- RAML/OAS (Optional but Recommended for Production): For production-grade APIs, it's best practice to define your API contract using RAML or OpenAPI Specification (OAS) in Design Center and then import it. However, for a quick proxy, providing just the endpoint URL is sufficient for MuleSoft to create a basic proxy. For this tutorial, we will bypass the RAML/OAS upload to simplify the initial setup.
- API Name: Provide a descriptive name for your API. This is how it will appear in API Manager. For our example, let's use
- Click "Next": After filling in the details, click "Next".
Step 4: Configure the Proxy Instance
This step focuses on how your proxy will be deployed and accessible.
- Deployment Target:
- Choose "CloudHub": For simplicity and ease of deployment, select "CloudHub" as the deployment target. CloudHub is MuleSoft's fully managed, multi-tenant cloud platform for deploying and running integration applications and APIs.
- Other options: You might see options like "On-Premises" or "Hybrid." These are for deploying to customer-managed servers or existing Kubernetes clusters, offering greater control but requiring more setup. CloudHub is ideal for quick starts.
- Proxy Details:
- Proxy Application Name: This is the name of the Mule application that will run your proxy on CloudHub. It must be globally unique across all CloudHub deployments. A suggested name will usually be provided, like
jsonplaceholder-posts-proxy-v1. You might need to add a few random numbers or letters at the end if the auto-generated name is already taken (e.g.,jsonplaceholder-posts-proxy-v1-001). - Runtime Version: Select the latest stable Mule runtime version available (e.g.,
4.4.0or newer). Mule runtime is the engine that executes your integrations and APIs. - Worker Size: This specifies the computing resources (CPU and memory) allocated to your proxy application. For a tutorial,
0.1 vCoreis perfectly adequate and is the smallest available option. This allocates a fraction of a virtual CPU and corresponding memory. - Worker Number: Keep this at
1for our tutorial. For production, you might increase this for high availability and load balancing across multiple worker instances. - Deployment Region: Choose a CloudHub region closest to you or your target audience to minimize latency.
- Ingress / VPC: Leave this at the default setting for a public proxy. If you were deploying within a private network or a Virtual Private Cloud (VPC), you would configure these settings.
- Endpoint Configuration:
- Proxy Endpoint Type: For a basic proxy, you will typically choose "Basic Endpoint." This creates a simple public endpoint for your proxy.
- Proxy Endpoint URL: This is the public URL through which your consumers will access your proxy. MuleSoft will automatically generate one based on your application name and the CloudHub domain (e.g.,
http://jsonplaceholder-posts-proxy-v1-001.us-e2.cloudhub.io/api/*). The/*indicates that any path after/apiwill be forwarded. Make sure to note this URL down; it's what you will use for testing.
- Proxy Application Name: This is the name of the Mule application that will run your proxy on CloudHub. It must be globally unique across all CloudHub deployments. A suggested name will usually be provided, like
- Click "Deploy Proxy": Review all your settings. Once satisfied, click the "Deploy Proxy" button.
Step 5: Deploy the Proxy and Monitor Status
After clicking "Deploy Proxy," MuleSoft will begin the process of provisioning resources on CloudHub and deploying your proxy application.
- Monitor Deployment: You will be redirected to the API Instances page. The status of your newly created API instance will show as "Starting" or "Deploying." This process can take several minutes (typically 3-7 minutes) as MuleSoft provisions a worker, deploys the Mule application, and starts the runtime.
- Check Runtime Manager (Optional but Insightful): For a more detailed view of the deployment process and to access logs, you can navigate to "Runtime Manager" from the Anypoint Platform left navigation pane. In Runtime Manager, you will see your
jsonplaceholder-posts-proxy-v1-001application listed. Click on it to view its deployment status, logs, and other runtime metrics. This is especially useful for troubleshooting if your proxy fails to deploy. - "Active" Status: Wait until the status of your API instance in API Manager (and Runtime Manager) changes to "Active". This indicates that your proxy has been successfully deployed and is ready to receive requests.
Step 6: Test the Proxy with Postman
Once your proxy is "Active," it's time to test it using your api client (e.g., Postman) to ensure it's correctly forwarding requests to your backend service.
- Retrieve Proxy Endpoint URL: Go back to API Manager, select your
JSONPlaceholder-Posts-ProxyAPI instance. The "Proxy Endpoint" URL will be displayed prominently (e.g.,http://jsonplaceholder-posts-proxy-v1-001.us-e2.cloudhub.io/api/). - Configure Postman:
- Open Postman.
- Create a new GET request.
- Paste the Proxy Endpoint URL into the request URL field. Ensure you append any necessary paths if your backend had them. In our case,
jsonplaceholder.typicode.com/postsis directly mapped to the base path of the proxy, so just the base proxy URL is enough to hit the/postsendpoint. If your backend was.../v1/data, and your proxy URL ended in/api, you'd still callproxy-url/api. The/*in the proxy endpoint definition handles this. - For
JSONPlaceholder-Posts-Proxy, the URL should look something likehttp://jsonplaceholder-posts-proxy-v1-001.us-e2.cloudhub.io/api/. - Click "Send".
- Verify the Response: You should receive a JSON array of 100 post objects, identical to the response you got when you directly called
https://jsonplaceholder.typicode.com/posts.- Important Check: Compare the response from the proxy with the direct backend call. They should be the same. Also, check the HTTP status code (should be
200 OK).
- Important Check: Compare the response from the proxy with the direct backend call. They should be the same. Also, check the HTTP status code (should be
If you receive the expected data, congratulations! You have successfully created and deployed your first MuleSoft proxy. This proxy now acts as a transparent intermediary, allowing consumers to interact with jsonplaceholder.typicode.com/posts through your MuleSoft-managed endpoint. The next step is to enhance this proxy with powerful API policies.
Enhancing Your Proxy with API Policies: The Power of the API Gateway
A basic proxy is functional, but the true power of MuleSoft's API Gateway capabilities shines through its extensive policy enforcement features. Policies allow you to add a layer of security, manage traffic, enforce quality of service (QoS), and transform requests or responses without writing any code. These policies are applied dynamically at the gateway level, centralizing control and making your APIs more robust and compliant.
This section will guide you through applying some common yet crucial policies to your newly created MuleSoft proxy.
Step 7: Apply API Policies
- Navigate to API Manager: Go back to the Anypoint Platform and click on "API Manager" in the left navigation pane.
- Select Your API Instance: Find and click on your
JSONPlaceholder-Posts-ProxyAPI instance from the list of managed APIs. - Access "Policies" Tab: On the API instance details page, you will see several tabs (Details, Alerts, Policies, SLAs, etc.). Click on the "Policies" tab. This is where you will add, configure, and manage all policies for this specific API instance.
Example Policy 1: Rate Limiting to Control Traffic
Rate limiting is a critical policy to prevent api abuse, ensure fair usage, and protect your backend services from being overwhelmed by too many requests. It limits the number of requests a client can make within a specified time window.
- Add Policy: On the Policies tab, click the "Apply New Policy" button.
- Select "Rate Limiting": From the list of available policies, select "Rate Limiting" and click "Configure Policy."
- Configure Rate Limiting:
- Number of Requests: Enter
2(for demonstration purposes, a very low limit). - Time Period: Select
1minute. - Group by: For simplicity, select "Client IP Address." In a production scenario, you might group by "Client ID" (which requires a separate Client ID Enforcement policy) for more granular control over registered applications.
- Expose Headers: Keep this enabled. It adds
X-RateLimit-Limit,X-RateLimit-Remaining, andX-RateLimit-Resetheaders to the response, informing clients about their rate limit status. - Apply to: Select "All methods and resources" for now. In a real-world scenario, you could apply it to specific methods (e.g., POST) or specific API paths.
- Number of Requests: Enter
- Click "Apply": The policy will be applied to your proxy. This takes a few moments to synchronize.
Testing Rate Limiting with Postman:
- Send Requests: Use Postman to send GET requests to your proxy's endpoint (
http://jsonplaceholder-posts-proxy-v1-001.us-e2.cloudhub.io/api/). - Observe Responses:
- The first request should succeed (HTTP 200 OK).
- The second request should also succeed (HTTP 200 OK).
- The third request, sent within the same minute, should fail with an HTTP 429 Too Many Requests status code. The response body will likely contain a message indicating the rate limit has been exceeded.
- Check the response headers for
X-RateLimit-Limit,X-RateLimit-Remaining, andX-RateLimit-Reset. You'll seeX-RateLimit-Remainingdrop to0after the second successful request.
- Wait and Retry: Wait for more than 1 minute, then send another request. It should succeed again as the rate limit window has reset.
This demonstrates how effectively the API Gateway can protect your backend from overload and enforce fair usage policies.
Example Policy 2: Client ID Enforcement for Basic Security
Client ID Enforcement is a fundamental security policy that ensures only authenticated client applications can access your api. It requires consumers to include a client_id (and often a client_secret) in their request headers or query parameters.
- Add Policy: Click "Apply New Policy" again.
- Select "Client ID Enforcement": Choose this policy and click "Configure Policy."
- Configure Client ID Enforcement:
- Header Name (Client ID): Enter
client_id. This is the name of the HTTP header the client must send. - Header Name (Client Secret): Enter
client_secret. - Credentials Origin: Select "Header" for both. You can also choose "Query parameter."
- Apply to: Keep "All methods and resources."
- Header Name (Client ID): Enter
- Click "Apply": The policy will be applied.
Testing Client ID Enforcement with Postman:
Before testing, you need to create a client application in Anypoint Platform and obtain its Client ID and Client Secret.
- Create a Client Application:
- In Anypoint Platform, go to "Access Management" (from the left nav pane).
- Click on "Business Groups" and select your business group.
- Go to the "Applications" tab.
- Click "Create Application".
- Provide an Application Name (e.g.,
Test-Client-App). - Click "Create."
- Once created, click on your
Test-Client-App. You will see its Client ID and Client Secret. Copy both values.
- Test in Postman (without credentials):
- Send a GET request to your proxy endpoint without any
client_idorclient_secretheaders. - You should receive an HTTP 401 Unauthorized status code with a message indicating missing or invalid client credentials.
- Send a GET request to your proxy endpoint without any
- Test in Postman (with valid credentials):
- Add two new headers to your Postman request:
client_id: Paste the Client ID you copied.client_secret: Paste the Client Secret you copied.
- Send the request. It should now succeed with an HTTP 200 OK and the expected JSON data.
- Note: Remember that the Rate Limiting policy is still active. If you hit the rate limit, you'll still get a 429. Test the Client ID Enforcement with requests that are within the rate limit.
- Add two new headers to your Postman request:
This demonstrates how MuleSoft's API Gateway can quickly enforce basic security measures, ensuring that only registered and authorized applications can access your APIs. There are many other policies available, such as IP Blacklisting/Whitelisting, JSON Threat Protection, Message Logging, Caching, and more advanced security policies like OAuth 2.0 Token Enforcement. Each of these policies contributes to building a more robust, secure, and manageable api ecosystem.
APIPark is a high-performance AI gateway that allows you to securely access the most comprehensive LLM APIs globally on the APIPark platform, including OpenAI, Anthropic, Mistral, Llama2, Google Gemini, and more.Try APIPark now! 👇👇👇
Monitoring and Analyzing Your Proxy's Performance
Deploying and securing your proxy is only half the battle. To ensure the long-term health, performance, and reliability of your APIs, continuous monitoring and detailed analytics are paramount. MuleSoft's Anypoint Platform provides robust tools for observing your API proxies in real-time and analyzing historical data, giving you the insights needed to make informed decisions and proactively address potential issues.
Step 8: Monitor and Analyze
After applying policies and having clients interact with your proxy, you can observe its operational behavior and performance.
- Access API Analytics: From the Anypoint Platform left navigation pane, click on "API Manager." Then, select your
JSONPlaceholder-Posts-ProxyAPI instance. On its details page, you'll find an "Analytics" tab or section, or you can navigate to the dedicated "Anypoint Analytics" service from the main menu. - Overview Dashboard: The analytics dashboard provides a high-level overview of your API's performance. You can typically see:
- Total Requests: The number of times your proxy has been invoked.
- Average Response Time: How quickly your API (including the proxy and backend) is responding to requests.
- Error Rate: The percentage of requests that resulted in an error (e.g., 4xx or 5xx status codes).
- Traffic by Location/Application: Visualizations showing where requests are coming from or which client applications are consuming your API the most.
- Policy Violations: Specific metrics on how often policies (like rate limiting or client ID enforcement) are being triggered.
- Detailed Reports: Anypoint Analytics allows you to drill down into more specific reports. You can:
- Filter Data: Analyze data by time range, specific API methods, client applications, or even individual IP addresses.
- Custom Dashboards: Create custom dashboards tailored to your specific monitoring needs, focusing on key performance indicators (KPIs) relevant to your business or operations.
- Alerts: Configure alerts based on predefined thresholds (e.g., send an email if the error rate exceeds 5% in 5 minutes) to ensure proactive incident management.
Importance of Monitoring:
- Performance Bottlenecks: Identify if your proxy or the backend service is experiencing high latency.
- Capacity Planning: Understand traffic patterns to determine if you need to scale up your CloudHub workers or backend infrastructure.
- Security Incidents: Detect unusual traffic spikes or a high number of policy violations, which could indicate a security threat or an attempted attack.
- User Experience: Ensure your API consumers are receiving consistent and fast responses, which is crucial for a positive user experience.
- Business Insights: Gain insights into how your APIs are being used, which features are popular, and which client applications are driving the most value.
While MuleSoft provides excellent built-in analytics, many organizations utilize specialized API Gateway solutions that offer even more granular control and deeper insights into API traffic. For instance, platforms like APIPark provide detailed API call logging capabilities, recording every minute detail of each API invocation. This feature is invaluable for quick tracing and troubleshooting, ensuring system stability and data security. APIPark also offers powerful data analysis tools that analyze historical call data to display long-term trends and performance changes, helping businesses perform preventive maintenance before issues escalate. The ability to track not just overall metrics but also individual request details is a game-changer for operations and development teams.
Advanced Considerations and Best Practices for Enterprise API Gateways
While the basic MuleSoft proxy with a few policies serves as an excellent starting point, enterprise-grade API Gateway implementations demand a more sophisticated approach. Beyond simple forwarding and rate limiting, several advanced considerations and best practices are crucial for building resilient, secure, and scalable API ecosystems. These aspects elevate an api gateway from a mere traffic controller to a strategic component of your digital infrastructure.
1. Robust API Security Beyond Basic Policies
Security is paramount for any api gateway. While Client ID Enforcement is a good start, enterprise APIs often require more advanced security measures:
- OAuth 2.0 and OpenID Connect: Implement these industry-standard protocols for delegated authorization and identity verification. MuleSoft's Anypoint Platform provides policies for OAuth 2.0 Token Enforcement, allowing you to validate access tokens issued by an identity provider (IdP).
- JWT Validation: If your APIs use JSON Web Tokens (JWTs) for authentication, the gateway should validate their signature, expiration, and claims before forwarding the request to the backend.
- Data Masking and Encryption: For sensitive data, the gateway can be configured to mask or encrypt specific fields in requests or responses, reducing the risk of data exposure.
- Threat Protection: Policies like JSON Threat Protection or XML Threat Protection protect against common attacks such as oversized payloads, recursive entities, or excessive attribute counts, which can lead to denial-of-service (DoS) attacks.
- API Firewalling: Integrate the api gateway with external API firewalls or Web Application Firewalls (WAFs) for an additional layer of perimeter defense against OWASP Top 10 vulnerabilities.
2. Sophisticated Traffic Management and Resiliency
Effective traffic management ensures optimal performance and high availability.
- Load Balancing: While CloudHub workers provide some inherent load balancing, more granular control might be needed for specific backend services. The api gateway can distribute traffic across multiple instances of a backend service.
- Circuit Breakers: Implement circuit breaker patterns to prevent cascading failures. If a backend service becomes unresponsive, the gateway can "trip" the circuit, preventing further requests from being sent to that service for a period, allowing it to recover. This greatly enhances the resiliency of your overall system.
- Caching: Beyond simple response caching, implement more intelligent caching strategies at the gateway level to reduce the load on backend systems and improve response times for frequently accessed data. Cache invalidation strategies are key here.
- Spike Arrest: Similar to rate limiting, but designed to smooth out sudden, short bursts of traffic (spikes) rather than enforcing a strict long-term rate, preventing backend services from being overwhelmed by unexpected surges.
3. API Versioning Strategies
As APIs evolve, managing different versions becomes critical to avoid breaking existing client applications.
- URI Versioning: Including the version number in the URI (e.g.,
/v1/users,/v2/users). This is a common and easily understandable approach. - Header Versioning: Specifying the API version in a custom HTTP header (e.g.,
Accept-Version: v1). This allows for cleaner URIs. - Query Parameter Versioning: Using a query parameter (e.g.,
/?version=v1). Less preferred as it can lead to caching issues. The api gateway plays a crucial role in routing requests to the correct backend service version based on the chosen versioning strategy.
4. Data Transformation and Mediation
The api gateway can act as a powerful mediation layer, translating data formats or enriching payloads.
- Format Transformation: Convert request or response payloads between different formats (e.g., XML to JSON, or vice-versa) to accommodate diverse client requirements or backend service expectations.
- Data Enrichment: Augment incoming requests with additional data (e.g., looking up user profiles or adding security tokens) before forwarding them to the backend.
- Schema Validation: Validate incoming request payloads against predefined schemas (e.g., JSON Schema, XML Schema Definition) to ensure data integrity and reject malformed requests early.
5. Centralized Error Handling
Standardizing error responses across all APIs improves the developer experience for consumers.
- The gateway can intercept backend errors and transform them into a consistent, well-defined error format that clients can easily parse, regardless of the underlying backend's specific error structure. This prevents exposing internal error details that could be a security risk.
6. Deployment and DevOps Integration
For agile development and reliable operations, integrate api gateway configurations into your CI/CD pipelines.
- Infrastructure as Code (IaC): Manage your api gateway configurations (API definitions, policies, deployments) as code using tools like MuleSoft's Maven or Gradle plugins, or specialized IaC tools.
- Automated Testing: Include automated tests for your gateway configuration and policies within your deployment pipeline to catch errors early.
- Monitoring Integration: Integrate gateway metrics and logs with your enterprise monitoring and logging systems (e.g., Splunk, ELK stack, Datadog) for comprehensive observability.
7. API Governance and Design First Approach
A successful API program starts with robust governance.
- API Contracts (RAML/OAS): Always define your API contracts using standards like RAML or OpenAPI Specification (OAS) in Design Center. Publish these contracts to Anypoint Exchange. The proxy should then be generated from or adhere strictly to this contract, ensuring consumers and providers have a shared understanding of the API.
- Design Standards: Enforce consistent design standards (naming conventions, error formats, authentication methods) across all APIs managed by the gateway.
While MuleSoft provides robust tools for managing your APIs and implements many of these advanced features, platforms like APIPark offer an open-source alternative, especially tailored for integrating and managing AI services alongside traditional REST APIs. APIPark stands out as an all-in-one AI gateway and API developer portal, open-sourced under the Apache 2.0 license, designed to help developers and enterprises manage, integrate, and deploy AI and REST services with ease.
APIPark addresses several advanced considerations directly: it provides a unified API format for AI invocation, simplifying how diverse AI models are consumed. Users can encapsulate prompts into REST APIs, quickly creating new AI-powered services. Crucially, APIPark offers comprehensive end-to-end API lifecycle management, assisting with design, publication, invocation, and decommission, and helps regulate API management processes, manage traffic forwarding, load balancing, and versioning of published APIs—all key functions expected of a sophisticated API Gateway. For organizations with distributed teams, APIPark facilitates API service sharing within teams and allows for independent API and access permissions for each tenant, ensuring isolation while sharing underlying infrastructure. Furthermore, its performance rivals Nginx, capable of achieving over 20,000 TPS with modest hardware, and it provides detailed API call logging and powerful data analysis for proactive maintenance and operational intelligence, making it an excellent choice for teams looking for flexible, high-performance, and AI-centric API governance solutions that are also open-source.
By meticulously considering these advanced aspects and integrating them into your API Gateway strategy, you can build a resilient, secure, and highly performant api ecosystem capable of supporting complex enterprise requirements and future growth.
Advantages of Using MuleSoft for API Proxies
MuleSoft's Anypoint Platform offers a compelling set of advantages when it comes to creating and managing API proxies and operating as a comprehensive API Gateway. Its integrated nature, extensive capabilities, and enterprise-grade features make it a top choice for organizations seeking robust api management solutions. Understanding these benefits can help justify its adoption and maximize its utility within your architecture.
1. Centralized API Management and Governance
MuleSoft provides a single, unified platform for the entire API lifecycle, from design and development to deployment and management. The API Manager serves as a central hub where all your APIs, proxies, and policies are configured and monitored. This centralization ensures consistency, simplifies governance, and provides a clear overview of your entire api landscape. It drastically reduces the complexity of managing disparate APIs across various teams and environments.
2. Rich Policy Library and Extensibility
One of MuleSoft's standout features is its extensive library of pre-built policies. As we've seen, these policies cover a wide range of functionalities, including security (rate limiting, client ID enforcement, OAuth 2.0), quality of service (caching, spike control), and transformation. These policies can be applied dynamically to any API instance with just a few clicks, enabling rapid enforcement of business rules and security standards without writing custom code. For unique requirements, MuleSoft also allows for the development of custom policies, offering ultimate flexibility.
3. Seamless Integration with Anypoint Platform Ecosystem
The API Gateway capabilities in MuleSoft are not isolated; they are deeply integrated with the broader Anypoint Platform ecosystem:
- Design Center: For designing API contracts (RAML/OAS) that your proxies can implement.
- Anypoint Exchange: A marketplace for sharing and discovering APIs and assets, promoting reuse and collaboration across teams.
- Runtime Manager: For deploying, managing, and monitoring your proxy applications (Mule applications) running on CloudHub or on-premises.
- Anypoint Analytics: Provides deep insights into API usage, performance, and errors.
This seamless integration fosters a streamlined development and operational workflow, ensuring that your API proxies are part of a cohesive and well-managed system.
4. Scalability and Reliability with CloudHub
MuleSoft's CloudHub is a fully managed, highly available, and scalable cloud platform that serves as an ideal runtime for your API proxies. CloudHub automatically handles infrastructure provisioning, load balancing, and scaling, ensuring that your proxies can handle varying traffic loads reliably. This elastic scaling capability is crucial for enterprise applications that experience fluctuating demand, providing peace of mind that your APIs will remain available and performant.
5. Hybrid Deployment Options
MuleSoft offers flexibility in deployment, supporting cloud-native, on-premises, and hybrid deployment models. This means organizations can deploy their API proxies wherever their backend services reside, whether in private data centers, public clouds, or a combination of both. This hybrid capability is particularly valuable for enterprises with complex IT landscapes and stringent data residency requirements. The API Gateway can span across different environments, providing a consistent management layer.
6. Strong Developer Ecosystem and Community Support
MuleSoft benefits from a large and active developer community, extensive documentation, and a wealth of online resources. This vibrant ecosystem means that developers can easily find support, share knowledge, and leverage best practices, accelerating their learning curve and enhancing their productivity when working with MuleSoft's API Gateway features. Training and certification programs further support professional development.
In essence, MuleSoft provides a powerful, integrated, and flexible platform for managing your API proxies and acting as a central api gateway. Its comprehensive features, ease of use, and enterprise-grade capabilities make it an invaluable asset for any organization looking to secure, scale, and effectively govern its digital assets.
Challenges and Considerations in MuleSoft Proxy Implementation
While MuleSoft offers significant advantages for creating and managing API proxies, it's also important to acknowledge potential challenges and considerations that organizations might encounter. Being aware of these aspects can help in better planning, resource allocation, and strategy formulation for a successful implementation.
1. Learning Curve and Complexity
MuleSoft Anypoint Platform is a powerful, comprehensive suite, and with that power comes a certain level of complexity. New users, particularly those unfamiliar with integration platforms or API Gateway concepts, may experience a significant learning curve. Understanding the various components—Design Center, Exchange, API Manager, Runtime Manager, and Anypoint Studio (for more complex implementations)—and how they interact requires dedicated effort and training. While this tutorial focuses on a simple proxy, enterprise use often involves more intricate integrations, data transformations, and custom logic, which demand a deeper understanding of MuleSoft's underlying Mule runtime engine and DataWeave language.
2. Cost for Large-Scale Enterprise Use
MuleSoft is positioned as an enterprise-grade solution, and its licensing costs reflect that. While trial accounts and small-scale deployments might be manageable, the cost can become a significant consideration for large enterprises managing a vast number of APIs, requiring high availability, substantial worker resources on CloudHub, and advanced features. Organizations need to carefully evaluate their budget, scale requirements, and compare MuleSoft's total cost of ownership (TCO) against other solutions, including open-source alternatives like APIPark which offer competitive performance and rich features under an Apache 2.0 license.
3. Performance Tuning for Extremely High Throughput
While MuleSoft is built for performance and scalability, achieving extremely high throughput (tens of thousands or hundreds of thousands of transactions per second) in specific, ultra-low-latency scenarios might require careful tuning and optimization of your Mule applications, worker sizes, and network configurations. The default settings are sufficient for most enterprise needs, but demanding real-time applications might necessitate deeper performance profiling and architectural considerations to minimize latency and maximize concurrent request handling. This often involves expertise in distributed systems and Mule runtime specifics.
4. Potential for Vendor Lock-in
By investing heavily in any proprietary platform, there's always a degree of vendor lock-in. While MuleSoft is robust, deeply integrating your entire api ecosystem within its platform means that migrating away to another API Gateway solution could be a non-trivial undertaking. Adhering to open standards (like OpenAPI Specification for API definitions) and designing loosely coupled services can mitigate some of this risk, but the operational overhead and learning investment remain tied to the platform. Organizations should balance the benefits of a comprehensive platform with the strategic implications of vendor dependency.
5. Managing Complexity in Distributed Systems
While an API Gateway helps centralize api management, it's also a critical component in a distributed system. As your architecture grows, managing the gateway itself—its deployments, configurations, policies, and integrations with backend services—can become complex. This is especially true in hybrid cloud environments where the gateway might need to interact with services both on-premises and in multiple public clouds. Ensuring consistent policy application, monitoring, and troubleshooting across such a landscape requires robust CI/CD practices and strong operational expertise.
Addressing these challenges requires a strategic approach, including investing in proper training, careful cost-benefit analysis, meticulous performance planning, and a strong emphasis on architectural best practices to leverage MuleSoft's strengths effectively while mitigating its potential drawbacks.
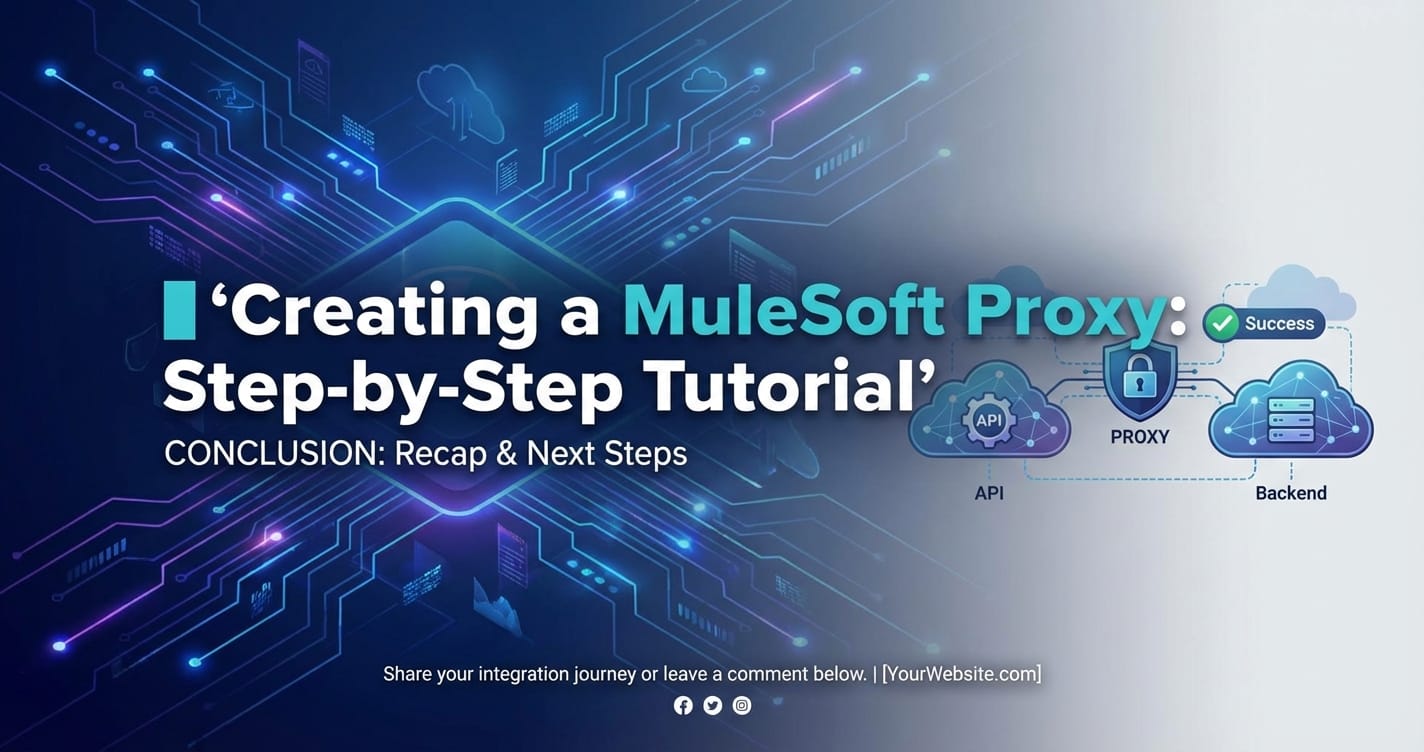
Conclusion: Mastering API Governance with MuleSoft Proxies
The journey through creating and enhancing a MuleSoft proxy illuminates the profound importance of an API Gateway in the modern digital landscape. As organizations increasingly rely on APIs to power their applications, foster integrations, and enable digital transformation, the need for a robust, secure, and scalable api gateway solution has become undeniable. Directly exposing backend services to a multitude of consumers without an intermediary layer is an invitation to security vulnerabilities, performance bottlenecks, and unmanageable complexity.
This tutorial has provided a comprehensive, step-by-step guide, demonstrating how MuleSoft's Anypoint Platform empowers developers and enterprises to establish this critical intermediary. We began by demystifying the concepts of an API proxy and the broader API Gateway, understanding their roles in providing abstraction, security, and control. We then walked through the practical process of configuring and deploying a basic MuleSoft proxy, leveraging a public API to illustrate the seamless forwarding of requests. The subsequent exploration into applying API policies, such as rate limiting and client ID enforcement, showcased how easily security and traffic management can be centralized and enforced at the gateway level, transforming a simple proxy into an intelligent controller for your API traffic. Finally, we touched upon the indispensable role of monitoring and analytics, highlighting MuleSoft's capabilities in providing operational insights, and discussed advanced considerations and best practices for building enterprise-grade API Gateway solutions.
MuleSoft's Anypoint Platform, with its integrated design, management, and runtime capabilities, offers a powerful and flexible solution for modern api gateway needs. Its rich policy library, centralized management, and scalability on CloudHub make it an excellent choice for organizations looking to secure, govern, and optimize their API ecosystems. While there are challenges like the initial learning curve and cost considerations, the benefits of a well-implemented MuleSoft api gateway—improved security, enhanced performance, simplified management, and accelerated digital innovation—far outweigh them for many enterprises.
Ultimately, mastering the creation and management of API proxies is not merely a technical exercise; it is a strategic imperative. It empowers organizations to confidently expose their digital assets, foster secure collaborations, and build resilient, interconnected applications that drive business value in an ever-evolving digital world. As the api landscape continues to expand, tools like MuleSoft and innovative open-source alternatives like APIPark will remain at the forefront, shaping how we connect and communicate in the digital age.
Frequently Asked Questions (FAQ)
1. What is the fundamental difference between an API Proxy and an API Gateway?
Answer: A fundamental difference exists in their scope and functionality. An API Proxy primarily acts as a simple intermediary, forwarding requests from consumers to a single backend service and returning the response. Its main purposes are to abstract the backend's direct URL and potentially add basic security or logging. In contrast, an API Gateway is a much more comprehensive architectural component. It encompasses all proxy functionalities but extends them significantly to provide a single entry point for all APIs, offering advanced features like intelligent routing to multiple backend services, sophisticated policy enforcement (rate limiting, authentication, caching), traffic management, monitoring, analytics, and request/response transformation. Essentially, an API Gateway acts as a control plane for an entire API ecosystem, while a proxy is a specific pattern or component often found within a gateway.
2. Why is it important to use an API Gateway like MuleSoft for my APIs?
Answer: Using an API Gateway like MuleSoft is crucial for several reasons that enhance security, performance, and manageability of your API ecosystem. Firstly, it provides a centralized point for enforcing security policies (e.g., authentication, authorization, threat protection), shielding backend services from direct exposure. Secondly, it optimizes performance through features like caching, load balancing, and traffic management, ensuring high availability and responsiveness. Thirdly, it simplifies API management by centralizing monitoring, analytics, and policy application, providing valuable insights into API usage and health. Lastly, it offers abstraction, allowing backend services to evolve independently without impacting API consumers, and enables robust versioning and orchestration, which are vital for complex microservices architectures.
3. What types of policies can I apply to a MuleSoft proxy, and why are they important?
Answer: MuleSoft allows you to apply a wide array of policies to your proxies, which are crucial for governing API behavior and ensuring security. Common policy types include: * Security Policies: Client ID Enforcement, OAuth 2.0 Token Enforcement, JWT Validation, IP Blacklisting/Whitelisting, JSON/XML Threat Protection (to prevent attacks like DoS or injection). * Traffic Management Policies: Rate Limiting (to prevent abuse and overload), Spike Arrest (to smooth out traffic bursts), Caching (to improve performance and reduce backend load). * Quality of Service Policies: SLA-based throttling, response time agreements. * Transformation Policies: Request/Response Transformation (e.g., changing data formats), Header Injection/Removal. These policies are important because they enable you to enforce business rules, protect backend services, manage resource consumption, standardize API behavior, and enhance the overall reliability and security of your API ecosystem without requiring changes to the backend code.
4. Can I deploy a MuleSoft proxy on-premises or only in the cloud?
Answer: MuleSoft offers significant flexibility in deployment options, supporting both cloud and on-premises environments. You can deploy your MuleSoft proxies to: * CloudHub: MuleSoft's fully managed, multi-tenant cloud platform, which is ideal for quick deployment, automatic scaling, and high availability. This is the default and simplest option for many users. * On-Premises: You can deploy Mule runtime engines (on which your proxies run) to your own servers within your data center, providing maximum control over the infrastructure. * Hybrid Deployments: A combination of both, where some proxies might run in the cloud while others run on-premises, often connecting through Anypoint VPCs or VPNs. This hybrid capability is particularly beneficial for enterprises with complex IT landscapes, existing on-premises infrastructure, or specific data residency and security requirements.
5. How does APIPark complement or offer an alternative to MuleSoft for API management?
Answer: APIPark offers an open-source (Apache 2.0 licensed) AI Gateway and API management platform that can complement or serve as an alternative to proprietary solutions like MuleSoft, especially for organizations focused on AI integration. While MuleSoft provides a comprehensive enterprise-grade solution for general API management, APIPark is specifically designed to quickly integrate over 100 AI models with a unified API format, encapsulating prompts into REST APIs. It offers end-to-end API lifecycle management, traffic forwarding, load balancing, and strong performance (rivaling Nginx) with detailed logging and data analysis, similar to MuleSoft's API Gateway features. APIPark also emphasizes team sharing and multi-tenancy. For organizations prioritizing an open-source model, AI-centric integrations, high performance, and flexible deployment (with a single-command quick start), APIPark presents a compelling choice for managing both traditional REST and cutting-edge AI services, potentially at a lower TCO for certain use cases.
🚀You can securely and efficiently call the OpenAI API on APIPark in just two steps:
Step 1: Deploy the APIPark AI gateway in 5 minutes.
APIPark is developed based on Golang, offering strong product performance and low development and maintenance costs. You can deploy APIPark with a single command line.
curl -sSO https://download.apipark.com/install/quick-start.sh; bash quick-start.sh

In my experience, you can see the successful deployment interface within 5 to 10 minutes. Then, you can log in to APIPark using your account.

Step 2: Call the OpenAI API.