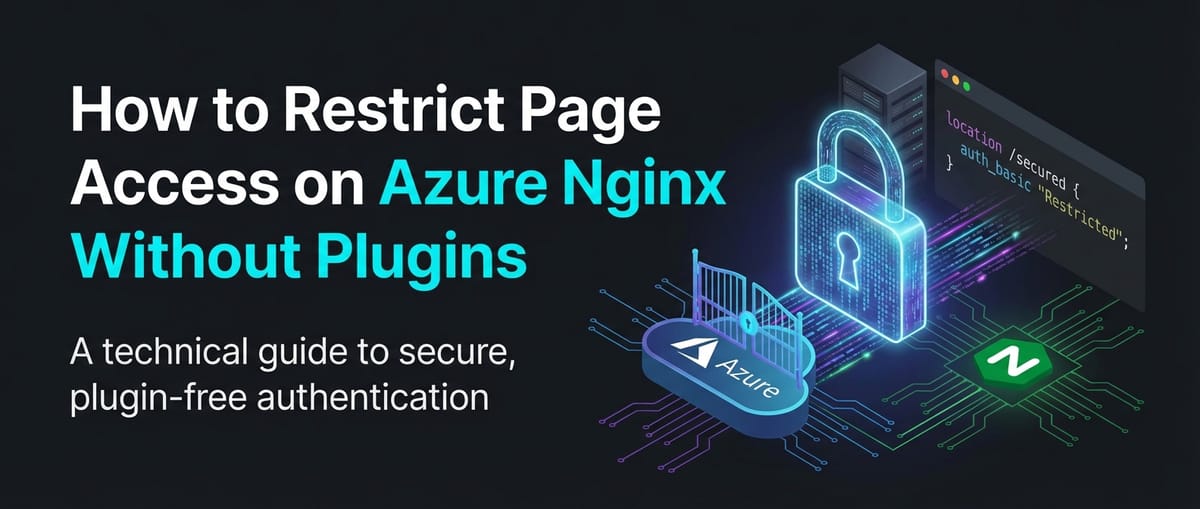
How to Restrict Page Access on Azure Nginx Without Plugins


This comprehensive guide delves into the intricate methods of restricting page access on Azure Nginx deployments, focusing exclusively on Nginx's robust native capabilities without relying on third-party plugins. We will explore various techniques, from fundamental IP-based and basic authentication to more sophisticated header and time-based restrictions, all while contextualizing their application within the Azure ecosystem. The goal is to empower administrators and developers with the knowledge to build secure, high-performance web environments that leverage Nginx's efficiency and Azure's scalable infrastructure.
APIPark is a high-performance AI gateway that allows you to securely access the most comprehensive LLM APIs globally on the APIPark platform, including OpenAI, Anthropic, Mistral, Llama2, Google Gemini, and more.Try APIPark now! 👇👇👇
How to Restrict Page Access on Azure Nginx Without Plugins
In the intricate world of web infrastructure, securing access to sensitive resources is paramount. Whether you're safeguarding an administrative dashboard, a critical API endpoint, or proprietary content, controlling who can access what is a non-negotiable aspect of any robust system. For many organizations leveraging the power and scalability of Microsoft Azure, Nginx stands out as a high-performance web server and reverse proxy, often chosen for its efficiency, small footprint, and extensive feature set. While numerous plugins and modules exist for Nginx to extend its capabilities, a profound understanding of its native access control mechanisms allows for unparalleled control, improved performance, and reduced dependency complexity. This article will meticulously explore how to restrict page access on Azure Nginx deployments using only its built-in directives, ensuring a lean, secure, and highly optimized setup.
The decision to avoid third-party plugins is often driven by several compelling factors. Plugins, while offering convenience, can introduce additional layers of complexity, potential security vulnerabilities, and performance overheads. They might also lag behind Nginx core updates, leading to compatibility issues or maintenance burdens. By mastering Nginx's native capabilities, you gain absolute control over your configuration, benefit from Nginx's legendary performance, and ensure a more stable and predictable environment. This approach is particularly valuable when Nginx functions as a critical gateway or an API gateway for your microservices or applications hosted on Azure, where every millisecond and every line of code matters for security and responsiveness.
Our journey will cover foundational access control methods, delve into advanced techniques, discuss their practical application within the Azure cloud environment, and highlight crucial security best practices. By the end, you will possess a comprehensive understanding of how to implement granular access restrictions that meet stringent security requirements without compromising on Nginx's inherent strengths.
1. Understanding Nginx's Role as a Reverse Proxy and Web Server on Azure
Before diving into access restrictions, it's essential to appreciate Nginx's fundamental architecture and its typical deployment scenarios on Azure. Nginx, pronounced "engine-x," is renowned for its event-driven, asynchronous architecture, which allows it to handle a vast number of concurrent connections with minimal resource consumption. This makes it an ideal choice for:
- Serving Static Content: Delivering HTML, CSS, JavaScript, images, and other static assets with incredible speed.
- Reverse Proxying: Forwarding client requests to backend application servers (e.g., Node.js, Python, Java, .NET) and returning their responses. This role is crucial for load balancing, caching, and, importantly, security. In this capacity, Nginx often acts as the primary gateway for all incoming web traffic.
- Load Balancing: Distributing incoming network traffic across multiple backend servers to improve application responsiveness and availability.
- SSL/TLS Termination: Handling encrypted connections, offloading the CPU-intensive encryption/decryption process from backend servers.
- API Gateway: When used to manage, secure, and route requests to various API endpoints, Nginx can effectively function as a lightweight API gateway, providing features like rate limiting, authentication, and request/response transformation.
On Azure, Nginx is typically deployed on Virtual Machines (VMs) running Linux distributions like Ubuntu, CentOS, or Red Hat Enterprise Linux. These VMs can be part of a Virtual Machine Scale Set (VMSS) for automatic scaling and high availability, or they can operate as standalone instances. The network topology often involves Azure Load Balancers or Application Gateways sitting in front of the Nginx VMs, providing additional layers of traffic management and security before requests even reach Nginx. Understanding this layered approach is key to implementing effective access control.
2. Fundamental Nginx Native Access Control Mechanisms
Nginx offers several powerful directives that allow for granular control over who can access specific resources. These are the bedrock of any Nginx-based security configuration.
2.1. IP-Based Restrictions (allow, deny)
The most straightforward method to restrict access is based on the client's IP address. Nginx's allow and deny directives provide a robust way to filter incoming requests based on their origin IP. These directives are processed sequentially, and the first matching rule dictates the access decision. If no rules match, access is typically granted (if deny all is not present).
Syntax:
allow address | CIDR | unix:;
deny address | CIDR | unix:;
Configuration Examples:
Let's consider a scenario where you have an administrative panel located at /admin that should only be accessible from your office network (e.g., 203.0.113.0/24) and your personal VPN IP (e.g., 192.168.1.100). All other IPs should be denied.
server {
    listen 80;
    server_name example.com;

    location / {
        # Default access for public content
        allow all;
    }

    location /admin {
        # Allow access from specific office network
        allow 203.0.113.0/24;
        # Allow access from a specific VPN IP
        allow 192.168.1.100;
        # Deny access from all other IPs
        deny all;

        # Point to your backend admin application
        proxy_pass http://backend_admin_server;
        proxy_set_header Host $host;
        proxy_set_header X-Real-IP $remote_addr;
        proxy_set_header X-Forwarded-For $proxy_add_x_forwarded_for;
    }

    # You might have an API gateway endpoint
    location /api/v1/internal {
        # This API should only be accessed from specific internal services
        allow 10.0.0.0/8; # Example for internal Azure VNET
        deny all;
        proxy_pass http://internal_api_service;
    }
}
In this example, requests to /admin from 203.0.113.x or 192.168.1.100 would be allowed, while requests from any other IP address would receive a 403 Forbidden error.
Use Cases:
- Restricting access to internal tools: Limiting sensitive dashboards, monitoring tools, or internal documentation to specific corporate network IPs.
- Protecting development/staging environments: Ensuring that pre-production sites are only accessible to developers and testers.
- Securing specific API endpoints: Allowing only trusted backend services or partners to consume particular API routes. For instance, an internal management API might only be exposed to other services within the same Azure Virtual Network (VNET).
Considerations for Azure:
- Public IP vs. Private IP: When Nginx is behind an Azure Load Balancer or Application Gateway, the
$remote_addrvariable might reflect the IP of the load balancer rather than the actual client. To get the true client IP, ensure your load balancer forwards theX-Forwarded-Forheader and configure Nginx to trust proxy headers usingset_real_ip_fromandreal_ip_header.nginx # In http block or server block set_real_ip_from 10.0.0.0/8; # Azure VNET range set_real_ip_from 172.16.0.0/12; # Azure VNET range set_real_ip_from 192.168.0.0/16; # Azure VNET range set_real_ip_from 168.63.129.16; # Azure DNS service IP real_ip_header X-Forwarded-For; real_ip_recursive on; # Process all X-Forwarded-For IPs until a non-trusted one is found - Azure Network Security Groups (NSGs): While Nginx handles application-layer IP filtering, Azure NSGs provide network-layer firewall rules for your VMs. These are complementary. It's best practice to use NSGs to filter broad traffic (e.g., only allow HTTP/S from the internet) and then use Nginx's
allow/denyfor more specific application-level access control. - Dynamic IPs: If clients have dynamic IP addresses, this method becomes less practical. It's most effective for known, static source IPs or IP ranges.
2.2. HTTP Basic Authentication (auth_basic, auth_basic_user_file)
For scenarios where access needs to be restricted to specific users rather than IP addresses, Nginx supports HTTP Basic Authentication. This mechanism requires users to provide a username and password, which Nginx verifies against an encrypted password file.
Syntax:
auth_basic "Authentication Realm";
auth_basic_user_file /path/to/.htpasswd;
Creating the Password File (.htpasswd):
You'll need the htpasswd utility, which is usually part of the apache2-utils (Debian/Ubuntu) or httpd-tools (CentOS/RHEL) package.
- Install
htpasswd:bash sudo apt update && sudo apt install apache2-utils # On Ubuntu sudo yum install httpd-tools # On CentOS - Create the first user:
bash sudo htpasswd -c /etc/nginx/.htpasswd your_username # Enter password when promptedThe-cflag creates a new file. Use it only for the first user. - Add subsequent users:
bash sudo htpasswd /etc/nginx/.htpasswd another_username # Enter password when promptedDo NOT use-cagain, as it will overwrite the file.
Configuration Example:
To protect the /admin area with basic authentication:
server {
    listen 80;
    server_name example.com;

    location / {
        # Publicly accessible content
    }

    location /admin {
        auth_basic "Restricted Admin Area";
        auth_basic_user_file /etc/nginx/.htpasswd;

        proxy_pass http://backend_admin_server;
        proxy_set_header Host $host;
        proxy_set_header X-Real-IP $remote_addr;
        proxy_set_header X-Forwarded-For $proxy_add_x_forwarded_for;
    }

    location /api/v1/protected {
        # An API endpoint that requires basic auth
        auth_basic "API Access Required";
        auth_basic_user_file /etc/nginx/.htpasswd_api; # A separate password file for API users

        proxy_pass http://backend_api_service;
    }
}
When a user attempts to access /admin, their browser will display a pop-up requesting a username and password.
Use Cases:
- Securing private blogs or galleries: Limiting access to content for a small group of authorized individuals.
- Protecting staging environments: Providing access to testers and stakeholders.
- Simple API authentication: For low-volume APIs or internal API gateway endpoints where a full OAuth solution might be overkill.
- Early development authentication: A quick way to secure an application before integrating with a more complex identity provider.
Security Implications:
- HTTPS is Crucial: Basic authentication sends credentials as Base64-encoded plain text. Without HTTPS, these credentials can be easily intercepted. Always use HTTPS when implementing basic authentication. Configure Nginx with SSL/TLS certificates (e.g., from Let's Encrypt, managed by Certbot) to encrypt traffic.
- Not Scalable for Many Users: Managing users via a
.htpasswdfile becomes cumbersome for large user bases. - No Centralized Identity Management: Users are managed locally on the Nginx server, not integrated with corporate directories like Azure Active Directory.
- Vulnerable to Brute-Force Attacks: Without additional measures, basic authentication is susceptible to brute-force attacks. Implement rate limiting (discussed later) to mitigate this.
3. Advanced Nginx Native Access Control Techniques
Beyond basic IP and user authentication, Nginx offers more sophisticated ways to control access using request characteristics like headers, cookies, and even time-based rules. These methods leverage Nginx's powerful variable system and conditional logic.
3.1. Header-Based Restrictions (map, if)
Custom HTTP headers can be a powerful tool for access control, especially in scenarios where requests originate from known applications, services, or specific internal clients. Nginx can inspect arbitrary request headers and make access decisions based on their values.
Mechanism:
mapdirective: Used to create new variables whose values depend on the values of other variables. This is often preferred overifinsidelocationblocks for performance and avoiding unexpected behavior.ifdirective: Can be used for conditional logic based on mapped variables or other Nginx variables.
Configuration Example (Custom Security Header):
Imagine an API endpoint /api/v2/protected that should only be accessible if a specific custom header, X-Api-Key, is present and holds a predefined secret value. This is a common pattern for securing internal API gateway routes between microservices.
http {
    # Define a map to check for the custom header
    map $http_x_api_key $is_authorized {
        "your_super_secret_api_key" 1; # If header matches, set $is_authorized to 1
        default                     0; # Otherwise, set to 0
    }

    server {
        listen 80;
        server_name example.com;

        location /api/v2/protected {
            if ($is_authorized = 0) {
                return 403; # Deny access if not authorized
            }
            # If authorized, proceed to proxy the request
            proxy_pass http://backend_api_service;
            proxy_set_header Host $host;
            proxy_set_header X-Real-IP $remote_addr;
            proxy_set_header X-Forwarded-For $proxy_add_x_forwarded_for;
        }

        location /api/v3/internal-service {
            # Another API endpoint, only accessible from a specific user agent
            # using a combination of map and then if
            map $http_user_agent $is_internal_client {
                "InternalServiceAgent/1.0" 1;
                default                    0;
            }
            if ($is_internal_client = 0) {
                return 403;
            }
            proxy_pass http://another_internal_service;
        }
    }
}
Use Cases:
- Securing internal APIs: Requiring specific tokens or service keys in headers for communication between microservices, where Nginx acts as an API gateway.
- Filtering by User-Agent: Restricting access to certain content for specific browsers, bots, or custom applications.
- Referer-based access: Allowing access only if the request originated from a specific website (though
Referercan be easily spoofed). - Protecting webhook endpoints: Ensuring that webhooks are only triggered by legitimate services by checking a shared secret in a header.
Security Considerations:
- Header Spoofing: HTTP headers can be easily manipulated by malicious users. Therefore, header-based restrictions alone should not be considered a primary security mechanism for publicly exposed services requiring high security. They are more effective for internal network communications or as an additional layer of defense.
- Complexity: Overly complex
mapandiflogic can become difficult to manage and debug. Strive for simplicity.
3.2. Time-Based Restrictions (if $time_iso8601)
For specific operational scenarios, you might need to restrict access to certain resources during particular hours or on certain days. Nginx can achieve this using the $time_iso8601 variable, which provides the current local time in ISO 8601 format (e.g., 2023-10-27T10:30:00+00:00).
Configuration Example:
Let's say an application maintenance page at /maintenance should only be accessible during specific maintenance windows, say from 2 AM to 4 AM UTC on weekdays.
server {
    listen 80;
    server_name example.com;

    location /admin {
        # Allow access only during specific hours (2 AM to 4 AM UTC)
        # Check if the current hour is 02 or 03 (UTC)
        if ($time_iso8601 ~ "^....-..-..T0[23]:") {
            # Further check for weekdays (Monday to Friday)
            # %u: Day of the week (1=Monday, 7=Sunday)
            if ($time_local ~ "^.* (Mon|Tue|Wed|Thu|Fri)") {
                # Access allowed during maintenance window on weekdays
                proxy_pass http://backend_admin_server;
                break; # Stop processing 'if' conditions and proceed with proxy
            }
        }
        # Deny access if outside the maintenance window or not a weekday
        return 403 "Admin access is restricted to maintenance hours (2 AM-4 AM UTC) on weekdays.";
    }

    # An API endpoint that is only available during business hours (9 AM - 5 PM)
    location /api/v4/business_hours {
        # Check if the current hour is between 09 and 16 (inclusive)
        if ($time_iso8601 ~ "^....-..-..T(09|1[0-6]):") {
            # Access allowed during business hours
            proxy_pass http://backend_api_service_2;
            break;
        }
        return 503 "API access is restricted to business hours (9 AM-5 PM UTC).";
    }
}
Note: The regex for time_iso8601 is based on UTC. If you need local time, you would need to adjust for your server's timezone settings or use $time_local which uses the local time. Using regular expressions with if statements can be tricky. Overuse of if inside location blocks is generally discouraged due to how Nginx processes configuration phases. For simpler time-based checks, it can be acceptable, but for complex logic, consider moving it to an upstream application or using Nginx's map directive if possible.
Use Cases:
- Scheduled maintenance pages: Showing a special page when a service is undergoing maintenance.
- Time-restricted content: Making certain content or features available only during specific periods (e.g., promotions, events).
- Restricting access to internal tools: Ensuring internal administrative tools are only used during working hours.
Considerations:
- Server Time Zone: Be mindful of the Nginx server's configured time zone.
$time_iso8601is UTC by default, while$time_localuses the server's local time. - Complexity: Building complex time-based logic can lead to verbose and hard-to-read configurations.
3.3. Combining Multiple Restrictions
Nginx allows you to layer these access control methods to create very specific rules. The order of directives, especially allow and deny, is critical.
Order of Operations for allow/deny:
By default, Nginx processes deny rules first, then allow rules. If an IP matches a deny rule, access is denied immediately. If it doesn't match a deny rule, it then checks allow rules. If it matches an allow rule, access is granted. If no rules match, access is granted.
However, if you explicitly add deny all at the end, it reverses this implicit "allow by default" behavior, making your access policy "deny by default, then explicitly allow." This is generally the more secure approach.
Example: IP restriction + Basic Auth
server {
    listen 80;
    server_name example.com;

    location /secure-area {
        # Step 1: Allow only from trusted IPs
        allow 203.0.113.0/24; # Office network
        allow 192.168.1.100;  # Admin's VPN
        deny all;             # Deny everyone else at the IP level

        # Step 2: For allowed IPs, require basic authentication
        # This will only be reached by IPs that passed the 'allow' rules above
        auth_basic "Team Access Required";
        auth_basic_user_file /etc/nginx/.htpasswd_team;

        proxy_pass http://backend_internal_app;
    }
}
In this setup, only requests originating from the specified IPs will even be prompted for basic authentication. All others will be blocked at the IP level first, receiving a 403 Forbidden without ever seeing the authentication pop-up. This provides a more robust, two-tiered security approach.
4. Leveraging Azure's Ecosystem for Enhanced Nginx Security
While Nginx itself offers powerful access control, deploying it within Azure provides opportunities to integrate with Azure's native networking and security services. These services act as additional gateway layers, complementing Nginx's internal configurations without requiring Nginx plugins.
4.1. Azure Network Security Groups (NSGs)
NSGs are fundamental to network security in Azure. They act as a virtual firewall for your Azure resources, allowing or denying inbound and outbound network traffic. When Nginx runs on an Azure VM, an NSG should always be associated with the VM's network interface or the subnet it resides in.
- How they complement Nginx: NSGs operate at Layer 4 (TCP/UDP ports) of the OSI model, while Nginx operates at Layer 7 (HTTP/HTTPS). NSGs can block traffic before it even reaches your Nginx VM, reducing the load on Nginx and preventing certain types of attacks.
- Configuration: For a web server like Nginx, you'd typically have inbound NSG rules allowing traffic on ports 80 (HTTP) and 443 (HTTPS) from the internet (or specific source IPs/ranges). You might also allow SSH (port 22) only from trusted administrative IPs.
- Example: If Nginx is serving a public website, an NSG would allow inbound HTTP/S from
Anysource toAnydestination. If it's an internal-facing Nginx API gateway, the NSG might only allow traffic from within the Azure VNET or from specific service subnets.
4.2. Azure Load Balancer / Application Gateway
These Azure services often sit in front of Nginx deployments, especially in high-availability or scaled-out architectures. They function as the primary gateway to your application tier.
- Azure Load Balancer: A Layer 4 (TCP/UDP) load balancer that distributes traffic to healthy backend Nginx VMs. It can terminate SSL/TLS (Standard SKU) and forward the real client IP (via
X-Forwarded-Forheader if Nginx is configured to receive it). - Azure Application Gateway: A Layer 7 (HTTP/HTTPS) load balancer, often described as an Application Delivery Controller (ADC) or a web traffic manager. It offers advanced features like SSL/TLS termination, cookie-based session affinity, URL-based routing, and, critically, a Web Application Firewall (WAF).
- WAF Integration: Application Gateway's WAF can protect your Nginx servers from common web vulnerabilities (e.g., SQL injection, cross-site scripting) before Nginx even processes the request. This provides an additional, powerful layer of security without requiring Nginx plugins for WAF functionality.
- Centralized Authentication: While Nginx can handle basic auth, Azure Application Gateway (with its WAF) can also integrate with Azure Active Directory (Azure AD) for authentication, offloading this concern from Nginx and pushing it further upstream in the request flow. This is a higher-level gateway functionality.
4.3. Azure Front Door
For global applications requiring fast, secure, and highly available access, Azure Front Door is an excellent choice. It acts as a global, scalable entry-point (a global gateway) using Microsoft's global edge network.
- Global WAF: Front Door also offers a WAF that can filter malicious traffic close to the user, protecting your backend Nginx servers deployed in Azure regions.
- DDoS Protection: It provides built-in DDoS protection.
- URL-based Routing & Caching: Front Door can cache content at the edge and route traffic to the closest backend, improving performance and reducing load on Nginx.
- Pre-filtering: Similar to Application Gateway, Front Door can apply access restrictions (e.g., IP allow/deny rules) at the edge, blocking unwanted traffic before it consumes resources on your Nginx VMs.
4.4. Azure Private Link / Service Endpoints
For internal Nginx instances (e.g., an internal API gateway for microservices), Azure Private Link and Service Endpoints provide secure and private connectivity.
- Private Link: Allows you to access Azure PaaS services (like Azure Storage, Azure Cosmos DB) and Azure-hosted customer/partner services privately over a private endpoint in your VNET. This ensures that your Nginx servers communicate with other Azure services without traversing the public internet.
- Service Endpoints: Extend your VNET identity to Azure service resources, allowing you to secure traffic directly from your VNET to Azure services over the Azure backbone network.
These technologies are crucial for building a zero-trust network where your Nginx servers, especially those acting as API gateway for sensitive APIs, are insulated from the public internet for internal communication.
5. Practical Deployment Scenarios and Nginx Configuration on Azure
Let's illustrate how these concepts translate into real-world Azure deployments.
5.1. Single Nginx VM Deployment
For simpler applications or testing environments, a single Azure VM running Nginx is common.
- Provision an Azure VM: Choose a Linux distribution (e.g., Ubuntu LTS).
- Configure NSG: Ensure the VM's NSG allows inbound traffic on port 80 and/or 443 from appropriate sources (e.g., your office IP for SSH, internet for HTTP/S).
- Install Nginx:
bash sudo apt update sudo apt install nginx sudo systemctl enable nginx sudo systemctl start nginx - Configure Nginx (e.g.,
/etc/nginx/sites-available/defaultor a custom.conffile): Apply the IP-based, basic authentication, or header-based rules discussed above. - Enable SSL/TLS: Use Certbot for Let's Encrypt certificates to enable HTTPS for all traffic, crucial for basic authentication.
bash sudo snap install --classic certbot sudo ln -s /snap/bin/certbot /usr/bin/certbot sudo certbot --nginx -d example.com -d www.example.comThis will automatically configure your Nginx for HTTPS.
5.2. Nginx in Azure Virtual Machine Scale Sets (VMSS)
For scalable and highly available Nginx deployments, VMSS is the go-to solution.
- Create a VMSS: Configure auto-scaling rules based on CPU usage or other metrics.
- Use Custom Script Extension: To automate Nginx installation and configuration, leverage the Azure Custom Script Extension during VMSS creation or updates. This script can:
- Install Nginx.
- Copy your
nginx.confand site-specific configuration files (e.g.,/etc/nginx/sites-available/your_site.conf) from Azure Storage (blob) or a configuration management system. - Create
.htpasswdfiles (if using basic auth). - Reload Nginx.
- Integrate with Azure Load Balancer: Place a Standard Azure Load Balancer in front of the VMSS to distribute traffic. Ensure health probes are configured to monitor Nginx's availability.
- Manage Certificates: For SSL/TLS, you might need a more centralized certificate management approach, such as using Azure Key Vault to store certificates and a script (or Azure Application Gateway) to deploy them to Nginx instances.
5.3. Nginx in Azure Kubernetes Service (AKS)
While AKS typically uses an Nginx Ingress Controller (which is a Kubernetes-specific add-on that dynamically configures Nginx pods), you can run Nginx as a standard deployment within AKS and manage its nginx.conf directly. This respects the "without plugins" constraint for the Nginx application itself, relying on Kubernetes for orchestration.
- Create a Docker Image: Build a Docker image containing Nginx and your custom
nginx.conf(with all access restrictions). This image can also include your.htpasswdfiles if needed. - Deploy to AKS: Define a Kubernetes Deployment for your Nginx pods and a Service (e.g.,
ClusterIPorNodePort) to expose them internally. - External Access: Use an Azure Load Balancer or Application Gateway as the external gateway to the Nginx Service, or even the AKS-native Nginx Ingress Controller if you consider it an infrastructure component rather than an Nginx "plugin." If strictly avoiding all Nginx plugins or modules, you'd manage the ingress with Azure Load Balancer directly targeting the Nginx service.
- Configuration Management: Use Kubernetes ConfigMaps to store your Nginx configuration files and
htpasswdfiles, mounting them into the Nginx pods. This allows for dynamic updates without rebuilding the Docker image.
6. Security Best Practices for Nginx on Azure
Implementing access restrictions is only one part of a comprehensive security strategy. To ensure your Nginx deployments on Azure are truly secure, adhere to these best practices:
- Always Use HTTPS: Encrypt all traffic to and from Nginx using SSL/TLS. This is non-negotiable, especially when dealing with any form of authentication or sensitive data. Obtain certificates from trusted Certificate Authorities (CAs) like Let's Encrypt (using Certbot), or manage them through Azure Key Vault. Nginx's
ssl_protocols,ssl_ciphers, andadd_header Strict-Transport-Securitydirectives are crucial here. - Principle of Least Privilege:
- File Permissions: Ensure Nginx configuration files, log files, and especially
.htpasswdfiles have restrictive file permissions. Only the Nginx user and root should be able to read sensitive files. - User Accounts: Run Nginx processes under a dedicated, unprivileged user (e.g.,
www-dataornginx), notroot.
- File Permissions: Ensure Nginx configuration files, log files, and especially
- Regular Updates: Keep Nginx and the underlying operating system (Linux distribution) patched and updated to the latest stable versions to mitigate known vulnerabilities. Automate this process using Azure Update Management or scripts.
- Logging and Monitoring:
- Nginx Logs: Configure Nginx to generate detailed access and error logs.
nginx access_log /var/log/nginx/access.log combined; error_log /var/log/nginx/error.log warn; - Integrate with Azure Monitor/Log Analytics: Forward Nginx logs to Azure Log Analytics Workspace for centralized collection, analysis, and alerting. This allows you to detect suspicious access patterns, failed authentication attempts, and errors quickly.
- Security Information and Event Management (SIEM): Consider integrating with Azure Sentinel or another SIEM solution for advanced threat detection.
- Nginx Logs: Configure Nginx to generate detailed access and error logs.
- Deny by Default: Always adopt a "deny by default, then explicitly allow" security posture. For IP restrictions, this means
deny all;followed byallowrules. For Nginx configuration, restrict access to directories unless explicitly permitted.X-Frame-Options: Prevents clickjacking (DENYorSAMEORIGIN).X-Content-Type-Options: Prevents MIME-type sniffing (nosniff).X-XSS-Protection: Basic XSS protection (1; mode=block).Strict-Transport-Security (HSTS): Forces HTTPS for subsequent visits.Content-Security-Policy (CSP): The most powerful, but complex, for preventing XSS and data injection attacks (requires careful configuration).
- Regular Security Audits: Periodically review your Nginx configurations, access logs, and Azure security settings to identify and address potential weaknesses.
Implement Security Headers: Add various HTTP security headers to protect against common web vulnerabilities.```nginx
In server block or http block
add_header X-Frame-Options "DENY" always; add_header X-Content-Type-Options "nosniff" always; add_header X-XSS-Protection "1; mode=block" always; add_header Strict-Transport-Security "max-age=31536000; includeSubDomains" always;
Content-Security-Policy can be very complex, start simple and expand
add_header Content-Security-Policy "default-src 'self';" always;
```
Rate Limiting (limit_req_zone, limit_req): Protect Nginx and your backend services from brute-force attacks, denial-of-service (DoS) attacks, and API abuse by implementing rate limiting. This prevents a single IP or user from making an excessive number of requests in a short period.```nginx http { # Define a rate limiting zone for a specific IP and burst capability # 10m means 10MB of shared memory, storing info for ~160k IPs # rate=5r/s means 5 requests per second limit_req_zone $binary_remote_addr zone=mylimit:10m rate=5r/s;
server {
    listen 80;
    server_name example.com;

    location /login {
        # Apply rate limit to the login endpoint
        # burst=10 allows for 10 requests to be in a queue if rate is exceeded temporarily
        # nodelay means requests are processed immediately if within burst limit,
        # otherwise delayed or denied
        limit_req zone=mylimit burst=10 nodelay;

        proxy_pass http://backend_login_service;
    }

    location /api/v5/public {
        # Rate limit for a public API, perhaps more generous
        limit_req zone=mylimit burst=20 rate=10r/s;
        proxy_pass http://backend_api_service_public;
    }
}
} ```
7. Integration with External Authentication Systems (Conceptual - Without Nginx Plugins)
For enterprise-grade applications, simple basic authentication or IP restrictions often aren't sufficient. Organizations rely on centralized identity providers (IdPs) like Azure Active Directory (Azure AD), Okta, or Auth0, which implement protocols like OAuth2 and OpenID Connect (OIDC). While Nginx itself doesn't natively support these complex protocols without plugins (e.g., nginx-module-auth-openidc), it can still play a crucial role as a reverse proxy in the overall authentication flow.
- Proxying to an Authentication Service: Nginx can forward requests to a dedicated authentication service (e.g., a microservice built specifically for authentication, or an application that handles OAuth/OIDC redirects).
- Checking Session Cookies/JWTs: After a successful authentication by the backend application, a session cookie or a JSON Web Token (JWT) might be issued. Nginx can be configured to check for the presence of a valid session cookie or to proxy requests to an internal endpoint that validates a JWT presented in a header, before allowing access to the protected resource. This involves:
- User accesses a protected resource via Nginx.
- Nginx checks for a valid session cookie/JWT.
- If not present or invalid, Nginx redirects the user to the application's login page (which initiates the OAuth/OIDC flow with the IdP).
- After successful authentication, the IdP redirects back to the application, which sets a session cookie or provides a JWT.
- Subsequent requests with the valid cookie/JWT are passed through Nginx.
- For JWT validation, Nginx could make an internal subrequest to a small, local validation service that cryptographically verifies the token. This keeps Nginx clean of full OIDC logic.
This approach ensures that Nginx remains lean and focused on its core tasks (reverse proxying, load balancing, basic access control) while leveraging dedicated services for complex identity management.
8. The Role of a Dedicated API Gateway: A Note on APIPark
While Nginx is incredibly versatile and can certainly act as a lightweight API gateway for specific use cases, especially with its native features for authentication, rate limiting, and routing, enterprise-grade API management often requires a more specialized and comprehensive solution. For organizations dealing with a large number of APIs, particularly in the realm of AI and microservices, a dedicated API gateway platform offers advanced functionalities beyond what Nginx can provide natively.
This is where a product like APIPark comes into play. APIPark is an open-source AI gateway and API management platform designed to streamline the management, integration, and deployment of both AI and REST services. While Nginx excels at low-level traffic management and general access control, APIPark offers:
- Unified API Management: It provides end-to-end API lifecycle management, from design and publication to invocation and decommissioning, with features like traffic forwarding, load balancing, and versioning specific to APIs.
- Advanced Authentication & Authorization: Beyond basic auth, APIPark offers sophisticated capabilities like independent API and access permissions for each tenant, and API resource access requiring explicit approval (subscription approval features). This granular control is vital for securing complex API ecosystems.
- AI Model Integration: A standout feature is its ability to quickly integrate over 100+ AI models, standardizing API formats for AI invocation and encapsulating prompts into REST APIs, making API management significantly easier for AI-driven applications.
- Detailed Analytics and Logging: APIPark provides comprehensive logging for every API call and powerful data analysis tools to track performance, usage, and detect anomalies, crucial for both security and operational insights. This goes far beyond Nginx's basic access logs.
- Developer Portal: It functions as a developer portal, allowing different departments and teams to easily discover, subscribe to, and consume published API services.
By leveraging a platform like APIPark, enterprises can offload the complexities of API governance, advanced security policies, and AI integration to a purpose-built system, allowing Nginx to continue performing its role as a high-performance network gateway where its native capabilities are most effective. APIPark essentially acts as a specialized API gateway that sits upstream of or alongside Nginx, providing a higher-level of API governance and security without requiring Nginx itself to run complex plugins for API-specific functions.
9. Conclusion
Restricting page access on Azure Nginx without resorting to third-party plugins is not only feasible but often desirable for its performance benefits, enhanced control, and reduced operational overhead. By leveraging Nginx's native directives for IP-based restrictions, HTTP basic authentication, header-based checks, and time-based rules, administrators can construct robust and granular access control policies.
The inherent power of Nginx as a reverse proxy and web server, combined with the comprehensive security features of the Azure ecosystem—including Network Security Groups, Application Gateways with WAF, and Front Door—allows for a multi-layered defense strategy. This approach ensures that traffic is filtered and validated at various stages, from the network edge down to the application layer.
While Nginx's native capabilities are extensive for general web traffic and simpler API gateway needs, it's important to recognize when a dedicated API management platform like APIPark can provide significant advantages for complex API ecosystems, particularly those involving AI models and demanding advanced security and analytics features.
Ultimately, a deep understanding of Nginx's configuration, coupled with a commitment to security best practices and the strategic use of Azure's infrastructure services, will enable you to build highly secure, efficient, and scalable web applications on the Azure platform. The "without plugins" philosophy is a testament to Nginx's powerful core, offering a solid foundation for intricate access control mechanisms that remain performant and maintainable.
Frequently Asked Questions (FAQs)
- Why would I choose to restrict page access on Nginx without plugins? Choosing to restrict page access on Nginx without plugins offers several significant advantages, including enhanced performance due to Nginx's lean architecture, greater control over your configuration, and reduced security risks associated with third-party code. It also simplifies maintenance by eliminating compatibility concerns that can arise with plugin updates, ensuring a more stable and predictable environment, especially when Nginx acts as a critical gateway or API gateway.
- How do I handle the real client IP address when Nginx is behind an Azure Load Balancer or Application Gateway? When Nginx is behind an Azure Load Balancer or Application Gateway, the
$remote_addrvariable in Nginx typically shows the IP address of the load balancer. To capture the real client IP, you need to ensure the Azure service is configured to forward theX-Forwarded-Forheader. Then, in your Nginx configuration, use theset_real_ip_fromdirective (specifying the IP range of your Azure load balancers) andreal_ip_header X-Forwarded-For;to instruct Nginx to correctly interpret the client's original IP address from that header. - Is HTTP Basic Authentication secure when implemented with Nginx? HTTP Basic Authentication itself transmits credentials as Base64-encoded plain text, which is not secure over unencrypted connections. Therefore, it is imperative to always use HTTPS (SSL/TLS) when implementing basic authentication with Nginx. When HTTPS is used, the entire communication, including the credentials, is encrypted, providing a secure channel. However, for large user bases or advanced authentication requirements, consider integrating with dedicated identity providers rather than solely relying on
.htpasswdfiles. - Can Nginx provide a Web Application Firewall (WAF) without plugins? Nginx natively provides some basic protections against common attacks through features like rate limiting (
limit_req_zone,limit_req) and by adding various HTTP security headers (X-Frame-Options,X-Content-Type-Options,CSP). However, it does not offer the full-fledged capabilities of a dedicated Web Application Firewall (WAF) without specific modules or plugins (e.g., ModSecurity). For robust WAF protection in Azure, it's recommended to deploy an Azure Application Gateway with WAF or Azure Front Door with WAF in front of your Nginx servers. These Azure services provide comprehensive WAF functionalities as an external gateway layer, protecting your Nginx instances from common web vulnerabilities. - When should I consider a dedicated API management platform like APIPark instead of Nginx as an API gateway? While Nginx can function as a lightweight API gateway for simpler needs, a dedicated platform like APIPark becomes essential for complex API ecosystems, especially those involving numerous APIs, diverse API consumers, and advanced requirements. APIPark offers comprehensive API lifecycle management, sophisticated access control (e.g., subscription approval, tenant-specific permissions), advanced analytics, AI model integration capabilities, and a developer portal. These features extend far beyond Nginx's native capabilities, providing a more robust, scalable, and manageable solution for governing your entire API landscape, complementing Nginx's role as a high-performance HTTP/S proxy.
🚀You can securely and efficiently call the OpenAI API on APIPark in just two steps:
Step 1: Deploy the APIPark AI gateway in 5 minutes.
APIPark is developed based on Golang, offering strong product performance and low development and maintenance costs. You can deploy APIPark with a single command line.
curl -sSO https://download.apipark.com/install/quick-start.sh; bash quick-start.sh

In my experience, you can see the successful deployment interface within 5 to 10 minutes. Then, you can log in to APIPark using your account.

Step 2: Call the OpenAI API.