How to Test a MuleSoft Proxy: A Step-by-Step Guide


In the intricate landscape of modern digital ecosystems, Application Programming Interfaces (APIs) serve as the fundamental building blocks for communication between disparate systems, applications, and services. As organizations increasingly adopt API-led connectivity and embrace microservices architectures, the role of an API Gateway becomes paramount. MuleSoft, with its Anypoint Platform, stands out as a leading solution for building, managing, and securing APIs, offering robust capabilities, including the deployment of API proxies. These proxies are not merely intermediaries; they are critical control points that enforce security, apply policies, manage traffic, and ensure the reliability and performance of your underlying APIs. Consequently, the rigorous testing of a MuleSoft proxy is not just a recommended practice but an absolute necessity for safeguarding the integrity, security, and efficiency of your entire digital infrastructure.
This comprehensive guide is meticulously crafted to demystify the process of testing MuleSoft proxies. It will take you on a detailed journey, from understanding the foundational concepts of proxies and API gateways to executing advanced testing strategies. We will delve into various testing methodologies, explore essential tools, highlight best practices, and shed light on common pitfalls to avoid. Our aim is to equip developers, QA engineers, architects, and operations teams with the knowledge and actionable steps required to thoroughly validate their MuleSoft proxy deployments, ensuring that every API interaction is secure, performant, and reliable. By the end of this guide, you will possess a holistic understanding of how to confidently test and harden your MuleSoft proxy, transforming it from a mere routing mechanism into a resilient and intelligent gateway for your critical digital assets.
1. Understanding the Foundation – MuleSoft Proxies and API Gateways
To truly appreciate the nuances of testing a MuleSoft proxy, it is essential to first grasp its fundamental role within an API architecture and its relationship with the broader concept of an API gateway. These components are not interchangeable, but rather complementary elements working in tandem to deliver robust API management.
The Role of a Proxy in Modern API Architectures
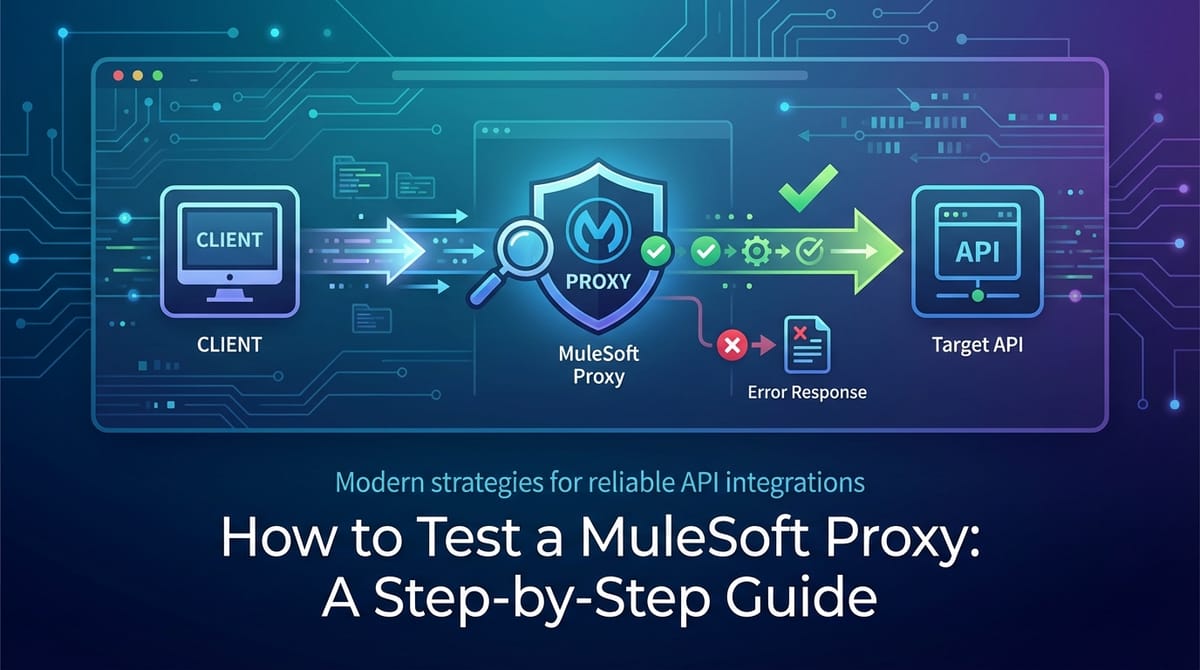
At its core, a proxy acts as an intermediary for requests from clients seeking resources from other servers. In the context of API management, a MuleSoft proxy specifically intercepts incoming API calls before they reach the actual backend service implementation. This interception point is incredibly powerful because it allows for a layer of abstraction, control, and enforcement to be applied without altering the backend service itself. Imagine a bouncer at a club entrance: they don't change how the party inside works, but they control who gets in, how many people enter at a time, and what rules apply before entry. That's essentially what a proxy does for your API.
Key functions of a MuleSoft proxy include:
- Security Enforcement: Applying policies like client ID validation, OAuth 2.0, JWT validation, and IP whitelisting to prevent unauthorized access.
- Traffic Management: Implementing rate limiting, throttling, and spike arrests to protect backend services from overload and ensure fair usage.
- Quality of Service (QoS): Introducing caching to improve response times and reduce load on backend systems, and circuit breakers to prevent cascading failures.
- Mediation and Transformation: While less common for pure proxies, more advanced gateway patterns might involve minor message transformations or routing logic.
- Monitoring and Analytics: Collecting metrics and logs about API traffic, which is crucial for operational insights and troubleshooting.
By externalizing these cross-cutting concerns from the backend service, proxies enable developers to focus solely on business logic, promoting a cleaner separation of concerns and enhancing the reusability and maintainability of APIs.
MuleSoft API Manager and Autodiscovery
The MuleSoft Anypoint Platform provides a centralized control plane for managing APIs, known as API Manager. This is where you define, configure, and apply policies to your APIs, whether they are implemented in Mule applications or are external services. A MuleSoft proxy is typically deployed as a Mule application (either on CloudHub, Anypoint Runtime Fabric, or on-premise) that communicates with API Manager using a mechanism called "autodiscovery."
Autodiscovery is the process by which a deployed Mule application (which can be a proxy) registers itself with API Manager, providing information about its API endpoint. Once registered, API Manager can then apply configured policies to this API instance. This tight integration ensures that policy enforcement is dynamic and consistent across all instances of your API. When you create a proxy in API Manager, MuleSoft provides a template Mule application that you deploy; this application contains the necessary autodiscovery configuration to link back to its definition in API Manager, allowing policies to be pushed down and applied at runtime.
Policies: The Heart of a MuleSoft Proxy
Policies are the core mechanism through which a MuleSoft proxy exerts control and provides value. These are pre-built or custom rules that dictate how the gateway should handle requests and responses. Understanding the types of policies is crucial for effective testing, as much of proxy testing revolves around verifying their correct application.
Common policy types include:
- Security Policies:
- Client ID Enforcement: Requires clients to provide a valid Client ID and Secret for access.
- OAuth 2.0: Validates OAuth 2.0 tokens (e.g., bearer tokens) against an OAuth provider.
- JWT Validation: Verifies the authenticity and validity of JSON Web Tokens.
- IP Whitelist/Blacklist: Controls access based on the client's IP address.
- Quality of Service Policies:
- Rate Limiting: Restricts the number of requests an API can receive within a specific time window.
- Throttling: Similar to rate limiting but often allows for bursts of requests.
- Spike Arrest: Protects against sudden, unexpected spikes in traffic by smoothing out the request rate.
- Caching: Stores responses for a specified duration, serving subsequent identical requests from the cache instead of hitting the backend.
- Circuit Breaker: Prevents a failing backend service from cascading failures by quickly rejecting requests once a threshold of failures is met.
- Compliance and Transformation Policies:
- CORS: Enables or disables Cross-Origin Resource Sharing, crucial for browser-based API calls.
- Message Logging: Logs details of API requests and responses.
- Headers/Query Parameters Enforcement: Ensures specific headers or query parameters are present and conform to rules.
Each policy has specific configurations and expected behaviors, which form the basis for test case design. The real power of a MuleSoft proxy lies in its ability to combine multiple policies, creating a robust security and traffic management layer for your APIs.
The API Gateway Paradigm and its Evolution
The API gateway is an architectural pattern that sits at the edge of your microservices or API ecosystem, acting as a single entry point for all client requests. A MuleSoft proxy is a concrete implementation of an API gateway component. While a proxy primarily focuses on forwarding and applying policies, a full-fledged API gateway can encompass a broader range of functionalities:
- Request Routing: Directing incoming requests to the appropriate backend service.
- Protocol Translation: Converting requests from one protocol (e.g., REST) to another (e.g., SOAP).
- Authentication and Authorization: Centralized security management.
- Load Balancing: Distributing requests across multiple instances of backend services.
- Response Aggregation: Combining responses from multiple backend services into a single response.
- API Composition: Orchestrating calls to several backend services to create new composite APIs.
- Monitoring and Logging: Providing a consolidated view of API usage and performance.
The API gateway paradigm has evolved significantly, moving from simple reverse proxies to intelligent orchestration layers. In this context, MuleSoft's Anypoint Platform provides a powerful API gateway solution that can host numerous proxies and other API implementations, offering a unified platform for comprehensive API lifecycle management. The continuous evolution of API gateway solutions highlights the need for dynamic and robust testing strategies, ensuring that these critical components remain effective and adaptable to changing demands.
2. Prerequisites for Effective MuleSoft Proxy Testing
Before embarking on the actual testing of your MuleSoft proxy, it is imperative to ensure that all necessary prerequisites are in place. Laying a solid foundation will streamline your testing efforts, prevent common roadblocks, and provide an accurate reflection of the proxy's behavior in a controlled environment. Rushing this stage can lead to frustrating debugging sessions and inaccurate test results.
Access to MuleSoft Anypoint Platform (API Manager, Exchange)
The Anypoint Platform is the central hub for managing your MuleSoft assets. For proxy testing, you will specifically need access to:
- API Manager: This is where your API proxy is defined, and where you apply and configure policies. You'll need permissions to view the API definition, its associated policies, and potentially deploy/redeploy proxy applications if you are involved in that part of the lifecycle. Understanding the policy configurations (e.g., rate limits, client IDs, security schemes) is paramount for designing appropriate test cases.
- Anypoint Exchange: While not directly involved in testing the proxy's runtime behavior, Exchange is where your API specifications (like OpenAPI/Swagger definitions) are published. These specifications serve as the "contract" for your API and are invaluable for understanding expected request/response formats, endpoints, and data types, which directly inform your test data generation and assertions.
Ensure you have the correct user roles and permissions to view, configure, and interact with the relevant components within the Anypoint Platform. This might involve roles like "API Admin" or "API Consumer" depending on your specific tasks.
Understanding the Target API (Backend Service)
A proxy is only as good as the backend service it protects and manages. Thoroughly understanding the target API that your MuleSoft proxy front-ends is non-negotiable. This includes:
- API Endpoints and Operations: Knowing all the available paths (e.g.,
/users,/products/{id}) and HTTP methods (GET, POST, PUT, DELETE) for each resource. - Request/Response Payloads: Understanding the expected JSON, XML, or other data structures for both requests sent to the backend and responses received from it. This includes required fields, optional fields, data types, and potential enum values.
- Authentication/Authorization Mechanisms: While the proxy often handles API consumer authentication, the backend might have its own internal authentication or authorization requirements. Knowing these helps in setting up an end-to-end test flow.
- Error Handling: How does the backend respond to invalid inputs, missing resources, or internal errors? The proxy's error handling should align with or enhance these backend behaviors.
- Performance Characteristics: An understanding of the backend API's typical response times and throughput under various loads is crucial for setting realistic performance test benchmarks for the proxy. If the backend is slow, the proxy can't magically make it fast, but it can prevent it from becoming overwhelmed.
Without a deep understanding of the target API, your tests for the proxy might miss critical scenarios or incorrectly validate expected outcomes.
Knowledge of API Protocols (HTTP/S, REST, SOAP)
MuleSoft proxies primarily deal with HTTP/S-based APIs, most commonly RESTful services. A solid grasp of these protocols is fundamental:
- HTTP/S: Understanding HTTP methods (GET, POST, PUT, DELETE, PATCH), status codes (200 OK, 201 Created, 400 Bad Request, 401 Unauthorized, 403 Forbidden, 404 Not Found, 500 Internal Server Error), headers (Content-Type, Accept, Authorization), and query parameters. For HTTPS, understanding SSL/TLS certificates and mutual TLS (mTLS) is important for secure communication.
- REST Principles: Familiarity with concepts like statelessness, resource-based interactions, and uniform interface constraints.
- SOAP (if applicable): While REST is dominant, some legacy systems still expose SOAP web services. If your proxy is fronting a SOAP service, knowledge of XML, WSDL (Web Services Description Language), and SOAP envelopes is necessary.
This knowledge enables you to correctly formulate requests, interpret responses, and diagnose issues during testing.
Development Environment Setup (Anypoint Studio, Maven, JDK)
For certain advanced testing scenarios, particularly if you need to debug the proxy application itself or modify its deployment descriptors, a local development environment is beneficial:
- Anypoint Studio: MuleSoft's IDE for developing and debugging Mule applications. While a proxy is largely configured via API Manager, having Studio allows you to inspect the generated proxy application, understand its
mule-app.properties(especiallyapi.idfor autodiscovery), and potentially build custom policies if needed. - Java Development Kit (JDK): Mule applications run on the JVM, so a compatible JDK (typically OpenJDK) is required for Studio and Maven.
- Apache Maven: The build automation tool used for Mule projects. You might need Maven to build and deploy the proxy application manually or as part of a CI/CD pipeline.
Even if your role doesn't involve direct development of the proxy, understanding these tools provides context and facilitates collaboration with development teams.
Authentication and Authorization Details (Client ID/Secret, OAuth 2.0, Basic Auth)
Since a primary function of a MuleSoft proxy is security, knowing the exact authentication and authorization mechanisms it enforces is critical for designing test cases. You'll need:
- Client IDs and Client Secrets: If the proxy uses Client ID Enforcement, you'll need valid (and invalid) pairs of these credentials to test access.
- OAuth 2.0 Tokens: If using OAuth, you'll need to know how to obtain valid access tokens (bearer tokens), refresh tokens, and understand the scope requirements. You'll also need invalid or expired tokens to test failure scenarios. This often involves interacting with an OAuth provider.
- Basic Authentication Credentials: If Basic Auth is used, valid and invalid username/password combinations are required.
- API Key Management: Some proxies might use simple API keys in headers.
Having these credentials ready and understanding their lifecycle (e.g., token expiration) is crucial for accurate security testing.
Network Configuration and Firewall Rules
The deployment environment for your MuleSoft proxy (CloudHub, RTF, on-premise) will have specific network configurations. It's important to understand:
- Proxy Endpoint URL: The exact URL(s) through which clients will access your API via the proxy.
- Firewall Rules: Ensure that your testing environment has the necessary network access to reach the proxy endpoint and that the proxy itself can reach the backend API service. Blocked ports or incorrect routing can manifest as mysterious connection errors during testing.
- VPN/Private Network Access: If the proxy or backend is on a private network, ensure your testing tools or environment have the appropriate VPN or direct network access.
Network issues can often be misdiagnosed as API or proxy logic errors, so confirming connectivity beforehand saves significant troubleshooting time.
By meticulously preparing these prerequisites, you establish a controlled and predictable environment for testing, allowing you to focus your efforts on validating the proxy's behavior rather than resolving infrastructure or access challenges. This disciplined approach is the cornerstone of effective and efficient proxy testing.
3. The Core Principles of MuleSoft Proxy Testing
Effective testing of a MuleSoft proxy extends beyond simply sending requests and observing responses. It requires a strategic approach, guided by core principles that ensure thorough coverage, accurate validation, and meaningful insights into the proxy's behavior. Adhering to these principles will elevate your testing efforts from rudimentary checks to a robust quality assurance process.
Defining Test Scenarios for API Proxies
The bedrock of any successful testing endeavor is the clear definition of test scenarios. For API proxies, this involves identifying every possible interaction, condition, and policy that the proxy is expected to handle or enforce. Think of test scenarios as narratives that describe what you want to test and why.
When defining test scenarios for a MuleSoft proxy, consider the following dimensions:
- Positive Scenarios (Happy Path):
- Successful Policy Enforcement: Verify that when all conditions are met (e.g., valid Client ID, within rate limit, valid token), the request successfully passes through the proxy to the backend and returns the expected response.
- Correct Routing: Confirm that requests for different API paths or versions are routed to the correct backend service or version.
- Data Integrity: Ensure that the request payload is forwarded to the backend without unintended modification and that the backend response is returned to the client accurately.
- Negative Scenarios (Unhappy Path): These are critical for security and resilience.
- Policy Violation: Test cases designed to deliberately violate policies (e.g., missing Client ID, exceeding rate limits, invalid OAuth tokens, requests from blacklisted IPs). The expected outcome is a specific error response (e.g., 401, 403, 429) from the proxy, before reaching the backend.
- Malformed Requests: Send requests with invalid JSON/XML payloads, incorrect headers, or missing required query parameters. The proxy (or the backend if the proxy allows it to pass) should respond with appropriate errors (e.g., 400 Bad Request).
- Backend Unavailability/Errors: Simulate scenarios where the backend API is down or returns errors (e.g., 500 Internal Server Error, 503 Service Unavailable). The proxy should gracefully handle these, potentially returning a custom error, activating a circuit breaker, or applying a fallback mechanism.
- Edge Cases:
- Boundary Conditions for Policies: For rate limiting, test exactly at the limit and one request over. For caching, test just before and just after cache expiration.
- Empty or Null Values: Test how the proxy handles requests with optional parameters or fields set to null or empty.
- Large Payloads: Test sending very large request bodies to see how the proxy handles resource consumption.
Each scenario should clearly state the input (request details), the expected action by the proxy (e.g., policy enforcement, routing), and the expected output (response status code, headers, body).
Isolation vs. End-to-End Testing
A balanced approach to testing involves both isolated and end-to-end strategies:
- Isolated Proxy Testing:
- Focus: Primarily on the proxy itself, verifying its policy enforcement and basic routing logic.
- Method: You might use mock backend services (service virtualization) to simulate backend responses, allowing you to test proxy behavior without dependence on a live backend. This is particularly useful for validating complex policy combinations or error handling scenarios where the backend might not easily produce specific error codes on demand.
- Benefit: Reduces external dependencies, speeds up testing, and helps pinpoint issues specifically within the proxy layer.
- End-to-End (E2E) Testing:
- Focus: Validating the entire flow, from client through the proxy to the actual backend service and back.
- Method: Requires a live, functioning backend API. Requests are sent to the proxy, which then forwards them to the backend, and the final response is validated.
- Benefit: Provides the highest confidence that the entire system (client -> proxy -> backend -> proxy -> client) works as expected. It catches integration issues that isolated testing might miss.
While isolated testing is efficient for specific policy validation, comprehensive end-to-end testing is indispensable for verifying the holistic functionality and reliability of your API ecosystem. The blend of both approaches provides the most robust coverage.
Test Data Management
Effective test data is the fuel for your test scenarios. Poorly managed test data can lead to inconsistent results, difficulty in reproducing bugs, and wasted effort.
Key considerations for test data management:
- Realistic Data: Use data that closely mimics production data, but sanitize or anonymize any sensitive information. This ensures your tests reflect real-world usage patterns.
- Diverse Data Sets: Create various data sets to cover positive, negative, and edge cases. For instance, different client IDs, valid/invalid user credentials, various input parameters, and data that triggers specific policy conditions.
- Reproducible Data: Ensure that your test data is stable and reproducible. If tests depend on the state of the backend (e.g., a specific user must exist), ensure that state can be reset or reliably created before each test run.
- Version Control: Store your test data alongside your test scripts in version control. This ensures traceability and consistency across different testing environments and team members.
- Automation: For complex scenarios, consider automating the generation or setup of test data. Tools or scripts can populate databases or mock services with the required states.
Managing test data effectively minimizes flakiness in your tests and increases confidence in your results.
Expected Outcomes and Assertions
Every test scenario must have a clearly defined expected outcome, against which the actual result is asserted. Without explicit assertions, a test merely "runs" but doesn't truly "validate."
When defining expected outcomes and assertions for a MuleSoft proxy:
- HTTP Status Codes: Assert on the expected HTTP status code (e.g., 200 OK for success, 401 Unauthorized for invalid credentials, 429 Too Many Requests for rate limiting).
- Response Body Content:
- For successful calls: Assert that the JSON/XML response matches the expected structure and contains the correct data from the backend.
- For error calls: Assert that the error message, error code, and structure of the error response align with the proxy's (or platform's) error handling conventions.
- HTTP Headers: Verify that specific headers are present or absent, and that their values are correct. For example, check for
X-RateLimit-Remainingheaders,Cache-Controlheaders, or custom correlation IDs. - Performance Metrics (for performance tests): Assert that response times, throughput, and error rates remain within acceptable thresholds.
- Side Effects (less common for proxies, but relevant for E2E): If the backend API has side effects (e.g., creating a record in a database), verify these effects as part of the end-to-end validation.
Use robust assertion libraries or built-in capabilities of your testing tools to make these checks precise and reliable. Clear, specific assertions are what transform a collection of requests into a powerful suite of validations, ensuring that your MuleSoft proxy behaves exactly as intended under all conceivable conditions.
4. Step-by-Step Guide to Testing MuleSoft Proxies
Having established a solid understanding of MuleSoft proxies, their core principles, and the necessary prerequisites, we can now embark on the practical, step-by-step process of testing them. This section will guide you through various testing methodologies, from initial setup to advanced performance and security validations.
Step 4.1: Initial Setup and Policy Application
Before you can test, you need a working proxy and an understanding of its configuration.
Deploying Your Backend API
First, ensure that the actual backend service your MuleSoft proxy will protect is deployed and accessible. This could be:
- A Mule application deployed on CloudHub, RTF, or on-premise.
- An external REST or SOAP service hosted elsewhere.
- A third-party API.
Verify that you can directly access and interact with this backend API (bypassing the proxy) to confirm its basic functionality. This helps isolate issues later if the proxy is not working as expected. For instance, if your backend API is at http://my-backend-service.com/api/v1/users, confirm a GET request to this endpoint returns expected user data.
Creating the Proxy in API Manager
Navigate to MuleSoft Anypoint Platform and go to API Manager.
- Add API: Click "Add API" and choose "Manage API from existing Mule application."
- Select API Type: Choose "REST API" or "SOAP API" based on your backend.
- Configure API Details: Provide a Name, Version, and
APIendpoint. - Create Proxy: In the deployment target section, select "Proxy" and choose your preferred deployment option (e.g., CloudHub, RTF, Anypoint Platform Private Cloud Edition).
- Target URL: Crucially, specify the "Target URL" (implementation URI) of your backend API that this proxy will front. For example,
http://my-backend-service.com/api/v1. - Deployment: MuleSoft will generate a proxy application (a
.jarfile for CloudHub) for you to download and deploy. Deploy this application to your chosen runtime. Ensure theAPI IDproperty in the deployed application correctly points to theAPIdefinition in API Manager for autodiscovery.
Once deployed, the proxy should be "Active" in API Manager, indicating it has successfully registered. Note the "Proxy Endpoint" URL provided by API Manager; this is the URL your clients will use to access your API.
Applying Basic Policies (e.g., Client ID Enforcement, Rate Limiting)
With the proxy deployed and active, it's time to apply policies in API Manager. For initial testing, start with a couple of common policies:
- Client ID Enforcement: This is a fundamental security policy.
- In API Manager, go to your API definition, then click "Policies."
- Click "Apply New Policy" and select "Client ID Enforcement."
- Configure it (e.g., require header
X-ANYPNT-CLIENT-IDandX-ANYPNT-CLIENT-SECRET). - Save and Apply.
- Now, clients will need to request access to your API in Anypoint Exchange to obtain a Client ID and Secret.
- Rate Limiting: A crucial QoS policy.
- Select "Rate Limiting" from the policy list.
- Configure the limit (e.g., 5 requests per 10 seconds) and the identifier (e.g.,
#[remoteIp]for IP-based limiting or#[api.client_id]for client-specific limiting). - Save and Apply.
After applying policies, observe the proxy status in API Manager; it might briefly show "Updating" as policies are pushed to the runtime. Wait until it's "Active" again.
Understanding Proxy Endpoints
It's vital to differentiate between:
- Backend API URL: The direct address of your actual service (e.g.,
http://my-backend-service.com/api/v1). - Proxy Endpoint URL: The address clients use to access your API through the MuleSoft proxy (e.g.,
http://my-proxy-app.cloudhub.io/api/v1).
All your testing will be directed at the Proxy Endpoint URL.
Step 4.2: Functional Testing – Verifying Core API Behavior
Functional testing is about ensuring the proxy performs its intended functions correctly under various conditions, especially regarding policy enforcement and data integrity.
Using a REST Client (Postman/Insomnia/curl)
REST clients are your go-to tools for manual and automated functional testing.
Making basic GET, POST, PUT, DELETE requests through the proxy.
- Setup: Open your preferred REST client.
- GET Request (Happy Path):
- Set the method to
GET. - Enter the Proxy Endpoint URL followed by the specific resource path (e.g.,
http://my-proxy-app.cloudhub.io/api/v1/users). - If Client ID Enforcement is active, you'll need to add
X-ANYPNT-CLIENT-IDandX-ANYPNT-CLIENT-SECRETheaders with valid credentials (obtained from Exchange after requesting access). - Send the request.
- Verification: Expect a
200 OKstatus code and the correct user data from your backend. This confirms the proxy is routing traffic correctly and policies are allowing legitimate access.
- Set the method to
- POST/PUT/DELETE Requests: Repeat the process for other HTTP methods, ensuring you provide appropriate request bodies for POST/PUT operations and the correct resource IDs for PUT/DELETE.
- Verification: Confirm the expected status codes (e.g.,
201 Createdfor POST,200 OKor204 No Contentfor PUT/DELETE) and response bodies.
- Verification: Confirm the expected status codes (e.g.,
Verifying successful responses (200 OK) and correct data payload.
- Focus on Detail: Don't just check the status code. Scrutinize the response body to ensure all fields are present, their values are accurate, and the data structure matches your API specification. Any discrepancy here could indicate a subtle issue with proxy routing or potential message transformation (if that were part of your proxy's function).
Testing with valid and invalid input data.
- Valid Inputs: Test requests with all required parameters and valid data types.
- Invalid Inputs:
- Send requests with missing required query parameters or body fields.
- Provide data of incorrect types (e.g., string instead of integer).
- Use values outside expected ranges (e.g., negative quantity for an item).
- Verification: The proxy should either reject these (if it has input validation policies, which are less common for a pure proxy) or forward them to the backend, which should then return an appropriate
400 Bad Requestor similar error. Verify that these error messages are informative and adhere to your API's error contract.
Testing Policy Enforcement
This is where much of the proxy's value lies, and where rigorous testing is paramount.
Client ID Enforcement: Verify requests without client ID/secret fail.
- Scenario: Send a request to your Proxy Endpoint URL without the
X-ANYPNT-CLIENT-IDandX-ANYPNT-CLIENT-SECRETheaders. - Verification: Expect a
401 Unauthorizedor403 Forbiddenstatus code from the proxy, typically with a message indicating invalid credentials or missing authentication. The request should not reach your backend.
Rate Limiting: Send requests exceeding the limit, observe 429 errors.
- Scenario: If your policy is 5 requests per 10 seconds, send 6 or more requests within that timeframe to the same Proxy Endpoint URL.
- Verification: The first 5 requests should succeed (assuming valid credentials). The 6th request (and subsequent ones within the window) should receive a
429 Too Many Requestsstatus code from the proxy. You might also seeX-RateLimit-Remainingheaders decreasing with each successful request and becoming 0 for rate-limited requests.
Security Policies (OAuth 2.0, JWT validation): Test with valid and invalid tokens.
- Valid Token: Obtain a valid OAuth 2.0 bearer token or JWT from your authentication provider. Include it in the
Authorization: Bearer <token>header. - Verification: The request should pass through to the backend successfully.
- Invalid Token: Use an expired, malformed, or entirely fake token.
- Verification: Expect a
401 Unauthorizedor403 Forbiddenfrom the proxy. The request must not reach the backend. - Missing Scopes: If your policy enforces specific OAuth scopes, test with a valid token that lacks the required scope.
- Verification: Expect a
403 Forbiddenor similar error from the proxy.
CORS Policies: Test cross-origin requests.
- Scenario: If your proxy has a CORS policy, try making a
OPTIONSpreflight request or a cross-originGETrequest from a different domain (e.g., using a simple HTML page with JavaScriptfetchAPI) to your proxy. - Verification: Check if the response includes the correct
Access-Control-Allow-Origin,Access-Control-Allow-Methods, andAccess-Control-Allow-Headersheaders as configured in your CORS policy. If the policy is restrictive, verify that cross-origin requests from disallowed origins are blocked.
Caching Policies: Verify cached responses, cache invalidation.
- Scenario 1 (Cache Hit): Make a
GETrequest to a resource. Immediately make the exact sameGETrequest again. - Verification: The first request should hit the backend. The second request, if the caching policy is active, should be served directly by the proxy from its cache, resulting in a significantly faster response time and potentially a different set of response headers (e.g., an
Ageheader or lack ofETagif not configured). The backend logs should only show the first request. - Scenario 2 (Cache Expiration): Make a
GETrequest. Wait for the cache TTL (Time To Live) to expire. Make the exact same request again. - Verification: The first request hits the backend and populates the cache. The second request, after TTL expiry, should again hit the backend.
Header/Query Parameter Enforcement: Ensure required parameters are present.
- Scenario: If you have a policy that requires a specific header (e.g.,
X-Custom-Tenant-ID) or query parameter (e.g.,version=2), test requests that:- Include the parameter with a valid value. (Expected: Success)
- Exclude the parameter. (Expected: Failure from proxy, e.g.,
400 Bad Requestor403 Forbidden.) - Include the parameter with an invalid value (if applicable). (Expected: Failure)
IP Whitelisting/Blacklisting: Test access from allowed/denied IPs.
- Scenario: If you have an IP Whitelist policy, attempt to access the proxy from an IP address not on the whitelist.
- Verification: The proxy should return a
403 Forbiddenor similar error. Conversely, ensure access from whitelisted IPs is successful. For blacklisting, test from a blacklisted IP address.
Step 4.3: Performance Testing – Assessing Scalability and Resilience
Performance testing is crucial for an API gateway to ensure it can handle expected (and unexpected) traffic loads without degrading performance or availability of your APIs.
Why Performance Testing is Critical for an API Gateway
An API gateway is a single point of entry, meaning it can become a bottleneck if not properly scaled and optimized. Performance testing helps:
- Identify Bottlenecks: Pinpoint where the proxy (or its underlying infrastructure) struggles under load.
- Validate Scalability: Confirm the proxy can scale horizontally or vertically to meet increased demand.
- Assess Resilience: How does the proxy behave under extreme load or when backend services are slow/unavailable? Does it protect the backend effectively?
- Benchmark Performance: Establish baseline response times, throughput, and error rates for different load profiles.
- Cost Optimization: Understand the minimum resources required to meet performance SLAs, potentially reducing infrastructure costs.
Tools: JMeter, LoadRunner, Gatling
- Apache JMeter: An open-source, Java-based load testing tool. It's highly versatile for simulating various load patterns and collecting performance metrics.
- LoadRunner: A commercial, enterprise-grade performance testing solution known for its comprehensive features and reporting.
- Gatling: A modern, open-source load testing tool based on Scala, designed for high performance and easier scripting with a DSL (Domain Specific Language).
These tools allow you to simulate hundreds, thousands, or even millions of concurrent users making requests to your proxy.
Designing Load Scenarios (Concurrent users, ramp-up period, duration)
- Normal Load: Simulate typical daily traffic.
- Peak Load: Simulate maximum expected traffic (e.g., during promotional events).
- Stress Load: Push the system beyond its expected limits to find breaking points.
- Soak/Endurance Load: Run tests over extended periods (hours or days) to detect memory leaks or resource exhaustion.
When configuring your load test, consider:
- Number of Concurrent Users/Threads: How many virtual users will hit the proxy simultaneously?
- Ramp-up Period: How long will it take for all virtual users to become active? (e.g., gradually increase users over 5 minutes).
- Loop Count/Duration: How many times will each user execute the test script, or for how long will the test run?
- Throughput: What is the desired requests per second (RPS)?
Monitoring Key Metrics (Response times, throughput, error rates, CPU/memory usage of proxy)
During performance tests, monitor both the client-side metrics (from your load testing tool) and the server-side metrics (from your MuleSoft proxy deployment).
- Client-side (from JMeter, etc.):
- Average Response Time: The average time taken for the proxy to respond.
- Throughput: Requests per second (RPS).
- Error Rate: Percentage of requests that failed (e.g., 5xx errors, timeouts).
- Percentiles: (e.g., P90, P95, P99) to understand the worst-case response times.
- Server-side (MuleSoft Anypoint Monitoring, deployment platform metrics):
- CPU Utilization: Of the proxy application's runtime.
- Memory Usage: Of the proxy application.
- Network I/O: Traffic in and out of the proxy.
- Backend API Metrics: How is the backend performing under the load forwarded by the proxy? This is critical for end-to-end performance.
Identifying Bottlenecks
Analyze the collected metrics to identify where the system is struggling.
- High CPU/memory on the proxy could indicate inefficient policy processing.
- Long response times with low CPU might point to network latency or backend slowness.
- Increased error rates often highlight resource exhaustion or misconfigurations under load.
Adjust policies, scale resources, or optimize the backend based on these findings.
Step 4.4: Security Testing – Protecting Your APIs
Security is arguably the most critical aspect of an API gateway. Robust security testing ensures your MuleSoft proxy effectively protects your backend APIs from malicious attacks and unauthorized access. This goes beyond simple policy enforcement tests.
Common Vulnerabilities in API Proxies (Injection, Broken Authentication, Sensitive Data Exposure)
While MuleSoft policies mitigate many risks, understanding common API vulnerabilities helps in designing targeted security tests:
- Injection Flaws: SQL Injection, Command Injection, XSS (Cross-Site Scripting) – although typically handled by the backend, a poorly configured proxy could potentially pass through or even exacerbate these.
- Broken Authentication & Authorization: Weak authentication mechanisms, bypassed authorization checks, or improper session management. Proxy policies are designed to prevent this, but their configuration must be robustly tested.
- Sensitive Data Exposure: Unintended exposure of sensitive data in error messages, logs, or unencrypted channels.
- Security Misconfiguration: Default configurations, open ports, verbose error messages, or unpatched systems.
- Lack of Resource & Rate Limiting: This is precisely what rate-limiting policies address, but their effectiveness must be tested.
- Broken Function Level Authorization: An attacker can access resources or functions they shouldn't.
Tools: OWASP ZAP, Burp Suite
- OWASP ZAP (Zed Attack Proxy): A free, open-source security scanner maintained by the Open Web Application Security Project. It can automate many vulnerability scans, act as a proxy for manual inspection, and perform various attack simulations.
- Burp Suite: A popular commercial platform for web security testing. It offers advanced tools for intercepting, modifying, and replaying requests, as well as robust scanning capabilities.
These tools allow you to actively probe your proxy for weaknesses.
Testing for API Security Policies (JWT validation, OAuth scopes)
Revisit the policy enforcement tests from Step 4.2 but with a security mindset:
- Attempt to Bypass Policies: Can you craft a request that evades Client ID enforcement (e.g., by tampering with headers)?
- JWT Validation:
- Test with tampered JWT signatures.
- Test with JWTs that have expired
expclaims. - Test with JWTs from an unknown issuer.
- Test with JWTs that have missing required claims.
- OAuth Scopes: Attempt to access resources that require a scope not present in your token.
- Verification: In all these scenarios, the proxy should return a
401 Unauthorizedor403 Forbiddenand never forward the malicious request to the backend.
Testing for SQL/NoSQL Injection, XSS through API inputs
While these are primarily backend vulnerabilities, it's good practice to:
- Proxy as a Filter: If your proxy uses a WAF (Web Application Firewall) or custom policies for input validation, test if it effectively blocks common injection patterns in query parameters, headers, or request bodies.
- Pass-through Test: If the proxy doesn't perform deep content inspection, send requests with injection payloads.
- Verification: Ensure the proxy does not introduce new vulnerabilities or alter payloads in a way that makes existing ones exploitable. The backend should handle these robustly.
Denial-of-Service (DoS) attacks simulation (beyond simple rate limiting)
While rate limiting protects against simple flooding, DoS testing involves more sophisticated attacks:
- Resource Exhaustion: Can you send very large payloads, or highly complex queries (if allowed), that tie up proxy resources?
- SlowLoris Attacks: Can you keep connections open by sending very slow, partial requests, exhausting the proxy's connection pool?
- Verification: The proxy should ideally have mechanisms (like timeouts, connection limits) to mitigate these. Performance tests under stress can also reveal DoS susceptibility.
Step 4.5: Error Handling and Resilience Testing
A well-tested proxy doesn't just work when everything is perfect; it also handles errors gracefully and recovers from failures.
Testing how the proxy handles backend service unavailability.
- Scenario: Take your backend API service offline or make it unresponsive. Then, send requests to the Proxy Endpoint URL.
- Verification: The proxy should not hang indefinitely. It should ideally return a
502 Bad Gatewayor503 Service Unavailablepromptly, without exposing internal backend errors. If a circuit breaker policy is configured, verify that it trips and prevents further requests to the downed backend, returning an immediate error.
Testing how the proxy handles malformed requests.
- Scenario: Send requests with completely malformed JSON/XML bodies (e.g., missing brackets, invalid characters), or requests that violate HTTP protocol rules (e.g., invalid HTTP method).
- Verification: The proxy should return a
400 Bad Requestor similar HTTP status code, ideally with a clear and concise error message, before attempting to forward the request to the backend.
Testing for correct error codes and meaningful error messages.
- Consistency: Ensure that error responses from the proxy (e.g., for policy violations) adhere to a consistent format and use appropriate HTTP status codes.
- Information Hiding: Verify that error messages do not leak sensitive information about the proxy's internal workings or the backend infrastructure (e.g., stack traces, server versions). Error messages should be user-friendly for developers consuming the API, but not overly verbose for security reasons.
Circuit Breaker patterns and their testing.
If you've applied a Circuit Breaker policy in API Manager:
- Scenario 1 (Open the Circuit): Configure a low error threshold (e.g., 3 consecutive failures). Make multiple requests that cause the backend to fail.
- Verification: Observe that after the threshold is met, the circuit breaker "opens," and subsequent requests to the proxy immediately fail with a
503 Service Unavailable(or configured error), without even attempting to call the backend. - Scenario 2 (Half-Open and Close the Circuit): After the circuit is open, wait for the configured timeout (e.g., 30 seconds). The circuit should transition to "half-open." Send a few requests. If they succeed, the circuit should "close," and the proxy should resume normal operation. If they fail, it should immediately revert to "open."
- Verification: Monitor the proxy's behavior and the backend logs to confirm the state transitions.
Step 4.6: Regression Testing – Ensuring Stability Across Changes
Regression testing is about ensuring that new changes (e.g., new policies, policy updates, backend changes, platform upgrades) do not negatively impact existing functionality of the MuleSoft proxy.
Automating tests with MUnit (for underlying Mule applications, though proxy testing is external) or external tools.
While MUnit is primarily for unit testing Mule applications, it's less direct for testing an external proxy. However, if your proxy includes custom logic within the Mule application, MUnit would be relevant for testing that custom logic.
For proxy policy testing, automation typically involves:
- Postman Collections with Newman: Create comprehensive Postman collections with all your functional, negative, and policy enforcement tests. Use Newman (Postman's command-line runner) to execute these collections automatically.
- Dedicated API Testing Frameworks: Tools like Karate DSL, Rest-Assured (Java), or Pytest with requests (Python) allow you to write robust, code-based API tests that can target your proxy.
- Load Testing Tools: JMeter scripts can be saved and rerun for regression performance testing.
Maintaining a suite of tests that run after every policy change or deployment.
- Version Control: Store all your automated test scripts and data in a version control system (Git).
- Test Suite Organization: Group tests logically (e.g., security tests, rate limiting tests, functional tests).
- Regular Execution: Integrate these automated test suites into your CI/CD pipeline. Every time a policy is changed, the proxy application is updated, or the backend API is modified, the regression suite should run automatically. This proactive approach catches issues early, preventing them from reaching production.
By diligently following these steps, you can establish a robust testing regimen for your MuleSoft proxy, ensuring its reliability, security, and performance across the entire API lifecycle.
APIPark is a high-performance AI gateway that allows you to securely access the most comprehensive LLM APIs globally on the APIPark platform, including OpenAI, Anthropic, Mistral, Llama2, Google Gemini, and more.Try APIPark now! 👇👇👇
5. Advanced Testing Strategies and Automation
Beyond the foundational and functional tests, advanced strategies and automation are crucial for maintaining the resilience, scalability, and security of your MuleSoft proxy in dynamic enterprise environments. These practices streamline the testing process, integrate quality checks earlier in the development lifecycle, and provide continuous insights into your API ecosystem.
Integrating with CI/CD Pipelines
The goal of modern software delivery is continuous integration and continuous delivery (CI/CD). Integrating your MuleSoft proxy tests into this pipeline is fundamental for achieving rapid, reliable deployments.
Automated deployments and automated tests.
- Proxy Deployment Automation: Use tools like Maven and specific MuleSoft plugins to automate the build and deployment of your MuleSoft proxy application. When a change is made to the proxy's underlying configuration (e.g., custom policies, environment variables), the CI/CD pipeline should automatically build a new
.jarand deploy it to a designated environment (e.g., a development or staging environment). - Automated Test Execution: Immediately after a successful deployment, the CI/CD pipeline should trigger your automated test suites. This includes:
- Functional Test Suites: Running Postman collections via Newman, or executing tests written in Karate DSL, Rest-Assured, or other frameworks.
- Performance Test Suites: Triggering JMeter or Gatling scripts for a quick smoke performance test or a full load test, depending on the pipeline stage.
- Security Scans: Initiating automated security scans using tools like OWASP ZAP against the newly deployed proxy.
- Feedback Loop: The pipeline should provide immediate feedback on the test results. If any tests fail, the deployment should be halted, and developers should be notified. This "fail fast" mechanism prevents faulty configurations or code from progressing further in the deployment pipeline.
Tools like Jenkins, GitLab CI, Azure DevOps.
These are popular CI/CD orchestration tools that can be configured to manage the entire process:
- Jenkins: A highly flexible, open-source automation server. You can write custom Jenkinsfiles (Groovy scripts) to define your pipeline stages, including building, deploying, and testing.
- GitLab CI/CD: Integrated into GitLab, it provides a powerful YAML-based configuration for pipelines, making it easy to define jobs for various stages.
- Azure DevOps Pipelines: Offers comprehensive CI/CD capabilities, allowing you to define pipelines using YAML or a visual designer, integrating with Azure services and other tools.
By automating the entire cycle, you significantly reduce manual effort, increase testing frequency, and improve the overall quality and speed of your API deployments.
Contract Testing (API Blueprint, OpenAPI/Swagger)
Contract testing ensures that the interactions between your API consumer (the client), your MuleSoft proxy, and your backend API adhere to a predefined contract (the API specification). This is crucial for microservices architectures where independent teams develop consumers and providers.
Ensuring the proxy adheres to the defined API contract.
- Client-Side Contract: Verify that the proxy's exposed API (its public-facing interface) matches the OpenAPI/Swagger definition that clients expect to consume. This means checking endpoints, request/response schemas, HTTP methods, and parameter definitions.
- Provider-Side Contract: While the proxy itself doesn't typically implement the business logic, it's vital to ensure that the requests it forwards to the backend conform to the backend's expected API contract. Any transformations or policy applications by the proxy should not break this contract.
Tools like Pact.
- Pact: A popular open-source framework for consumer-driven contract testing.
- Consumer-Driven: The consumer (client) writes a "pact" file defining its expectations of the provider (API).
- Provider Verification: The provider (your backend API, or in this case, the proxy's interaction with the backend) then verifies that it fulfills these expectations.
- Proxy's Role: You can use Pact to test two aspects:
- Proxy as Consumer: If your proxy performs any logic that consumes a different internal service (less common for a pure proxy), it can act as a consumer.
- Proxy as Provider (to its clients): You can generate mock client requests based on the proxy's OpenAPI specification and verify that the proxy responds according to that specification. This ensures the proxy's public interface remains consistent.
Contract testing catches breaking changes early in the development cycle, reducing integration headaches and fostering independent development.
Monitoring and Alerting
Even with comprehensive testing, issues can arise in production. Continuous monitoring and robust alerting are critical for real-time visibility into your MuleSoft proxy's health and performance.
Real-time API performance monitoring.
- Key Metrics: Monitor response times, throughput, error rates, latency, and resource utilization (CPU, memory) of your proxy instances.
- Custom Dashboards: Create dashboards that visualize these metrics over time, providing a quick overview of the API gateway's health.
- Distributed Tracing: Implement distributed tracing (e.g., using OpenTelemetry or MuleSoft's built-in tracing capabilities) to track requests as they flow through the proxy and into the backend. This helps identify bottlenecks across the entire transaction path.
Leveraging MuleSoft Anypoint Monitoring.
MuleSoft provides Anypoint Monitoring as part of the Anypoint Platform, offering out-of-the-box capabilities for monitoring your Mule applications, including proxies.
- Dashboards: Pre-built and customizable dashboards for API metrics, application health, and infrastructure performance.
- Alerts: Configure alerts based on predefined thresholds (e.g., alert if response time exceeds 500ms for 5 minutes, or if error rate goes above 1%).
- Visualizations: Trace API calls end-to-end, drill down into individual transactions, and analyze logs.
External monitoring tools.
For environments with diverse technologies or specific needs, external monitoring tools can complement Anypoint Monitoring:
- Prometheus & Grafana: Popular open-source tools for metric collection and visualization.
- Datadog, New Relic, AppDynamics: Commercial APM (Application Performance Monitoring) solutions offering deep insights, tracing, and AI-powered anomaly detection.
- ELK Stack (Elasticsearch, Logstash, Kibana): For centralized log aggregation, analysis, and visualization.
Beyond initial testing, continuous monitoring of your APIs and gateway performance is paramount. Platforms like MuleSoft Anypoint Monitoring offer excellent capabilities, but for comprehensive API lifecycle management, especially across diverse API ecosystems and AI services, an advanced solution can be invaluable. For instance, APIPark, an open-source AI gateway and API management platform, provides end-to-end API lifecycle management, detailed API call logging, and powerful data analysis, ensuring your APIs perform optimally and securely within an integrated gateway environment. APIPark empowers teams with capabilities like quick integration of 100+ AI models, unified API format for AI invocation, and prompt encapsulation into REST APIs, enhancing the value and agility of your API infrastructure.
Service Virtualization
Service virtualization involves simulating the behavior of dependent services (like your backend API) to allow for isolated and consistent testing of your MuleSoft proxy.
- Simulating Backend Services for Isolated Proxy Testing:
- Scenario: When your backend API is still under development, unstable, or difficult to provision for testing, you can create a virtual service that mimics its responses.
- Method: Tools like WireMock, MockServer, or dedicated service virtualization platforms allow you to define expected requests and corresponding mock responses (including status codes, headers, and body).
- Benefit:
- Decoupling: Eliminates dependencies on the backend team, allowing the proxy team to test independently.
- Reproducibility: Ensures consistent and predictable responses for specific test cases, regardless of backend state.
- Error Simulation: Easily simulate backend errors (e.g., 500 Internal Server Error, slow responses) that might be hard to trigger on a live backend, allowing thorough resilience testing of the proxy.
By embracing these advanced strategies and automation techniques, you can move towards a more proactive, efficient, and reliable approach to managing and ensuring the quality of your MuleSoft proxies, bolstering the integrity of your entire API gateway infrastructure.
6. Tools of the Trade for MuleSoft Proxy Testing
A craftsman is only as good as their tools, and the same holds true for API testing. Equipping yourself with the right set of tools can significantly enhance your efficiency, coverage, and the overall quality of your MuleSoft proxy testing efforts. This section provides an overview of essential tools, categorized by their primary function.
REST Clients
These are fundamental for sending HTTP requests to your API proxy and inspecting responses. They are indispensable for manual functional testing and quick validation.
- Postman:
- Overview: A widely popular API platform for building, testing, and documenting APIs.
- Features for Proxy Testing:
- Collections: Organize your test requests into logical groups. You can create collections for "Happy Path," "Policy Violations," "Backend Errors," etc.
- Environments: Manage different sets of variables (e.g.,
proxy_url,client_id,client_secret) for various environments (dev, staging, prod) without modifying requests. - Tests (Scripts): Write JavaScript code in the "Tests" tab to assert on response status codes, headers, and body content. This enables automated functional testing within Postman.
- Pre-request Scripts: Use JavaScript to dynamically generate authentication tokens, sign requests, or prepare data before sending a request.
- Collection Runner: Execute an entire collection of requests, viewing results for each test.
- Integrations: Can integrate with Newman for CI/CD.
- Insomnia:
- Overview: Another powerful and elegant open-source API client, similar to Postman.
- Features: Offers a clean UI, robust environment management, code generation, and easy organization of requests. It also supports assertions and request chaining.
- curl:
- Overview: A command-line tool for transferring data with URLs. It's pre-installed on most Unix-like systems and offers immense flexibility.
- Features for Proxy Testing:
- Scriptability: Easily embedded in shell scripts for automation.
- Flexibility: Allows precise control over HTTP methods, headers, body, and authentication details.
- Debugging: Excellent for quickly testing specific scenarios or debugging network issues from a terminal.
- Example:
curl -X GET -H "X-ANYPNT-CLIENT-ID: myClientId" "http://my-proxy-app.cloudhub.io/api/v1/users"
Load Testing Tools
These tools are essential for simulating high volumes of traffic to your proxy, crucial for performance and scalability testing.
- Apache JMeter:
- Overview: An open-source, Java-based application designed to load test functional behavior and measure performance.
- Features for Proxy Testing:
- Test Plans: Define a sequence of requests, assertions, and listeners.
- Thread Groups: Simulate concurrent users, controlling the number of threads, ramp-up period, and loop count/duration.
- HTTP Request Samplers: Configure GET, POST, PUT, DELETE requests with headers, body, and parameters.
- Listeners: Visualize and analyze test results (e.g., Response Time Graphs, Throughput Graphs, Aggregate Report).
- Assertions: Assert on response status codes, body content, and response times.
- Distributed Testing: Can orchestrate load generation across multiple machines.
- LoadRunner (Micro Focus):
- Overview: A commercial, enterprise-grade load testing product.
- Features: Supports a wide range of protocols, advanced scripting (VuGen), sophisticated scenario design, real-time monitoring, and comprehensive reporting. Often chosen for large-scale, complex enterprise systems.
- Gatling:
- Overview: An open-source, modern load testing framework built on Scala, Akka, and Netty.
- Features: Known for its high performance, code-centric approach (using a DSL for scenario definition), and clear, colorful HTML reports. It's particularly good for continuous integration environments due to its lightweight nature.
Security Testing Tools
These tools help uncover vulnerabilities in your proxy's configuration and the underlying API it protects.
- OWASP ZAP (Zed Attack Proxy):
- Overview: A free and open-source integrated penetration testing tool for finding vulnerabilities in web applications.
- Features for Proxy Testing:
- Intercepting Proxy: Manually inspect and modify requests/responses as they pass through.
- Automated Scanner: Perform active and passive scans to identify common vulnerabilities (e.g., SQL Injection, XSS, security misconfigurations).
- Fuzzing: Send malformed or unexpected data to API parameters to uncover weaknesses.
- Forced Browsing: Discover hidden resources.
- Burp Suite (PortSwigger):
- Overview: A comprehensive commercial suite of tools for web security testing, with a free community edition.
- Features:
- Proxy: Intercept, inspect, and modify traffic.
- Repeater: Manually manipulate and resend individual requests.
- Intruder: Automate customized attacks to test for vulnerabilities like brute-forcing, SQL injection, and XSS.
- Scanner: Automatically scan for a wide range of web vulnerabilities.
Automation Frameworks
For integrating tests into CI/CD pipelines and scaling your testing efforts.
- Newman (for Postman collection execution):
- Overview: A command-line collection runner for Postman.
- Features: Allows you to run Postman collections directly from the command line, making it perfect for integration into build scripts and CI/CD pipelines. It outputs results in various formats (JSON, JUnit XML, HTML).
- Karate DSL:
- Overview: An open-source, general-purpose test automation framework that uses a Gherkin-like (BDD) syntax for API testing, performance testing, and UI automation.
- Features: No Java knowledge required for basic API testing, rich feature set for making HTTP calls, handling JSON/XML, assertions, and data-driven testing. Excellent for readability and collaboration.
- MUnit (for Mule applications, not directly for proxy policies, but relevant for backend):
- Overview: MuleSoft's own testing framework for unit and integration testing Mule applications.
- Features: Allows you to write tests directly within Anypoint Studio for your Mule flows, mock external services, and assert on message content, variables, and flow execution. While less direct for testing an external proxy policy, it is invaluable for testing the backend Mule application that the proxy is protecting, or any custom logic within the proxy application itself.
Table: Comparison of API Testing Tools
| Feature / Tool | Postman / Insomnia | curl | Apache JMeter | Gatling | OWASP ZAP / Burp Suite | Karate DSL | MUnit (for Mule Apps) |
|---|---|---|---|---|---|---|---|
| Primary Use | Functional, Dev | Quick Tests, Scripting | Load, Performance | Load, Performance | Security (SAST/DAST) | Functional, Integration | Unit, Integration |
| Learning Curve | Low | Moderate | Moderate | Moderate-High | Moderate-High | Low-Moderate | Moderate |
| Automation Cap. | High (via Newman) | High | High | High | High | Very High | High |
| Manual Usefulness | Very High | High | Low | Low | Very High | Moderate | Low |
| Scripting Lang. | JS | Shell | XML/GUI | Scala DSL | GUI/JS/Python | Gherkin-like DSL | XML/DataWeave/Java |
| CI/CD Integration | Excellent | Excellent | Excellent | Excellent | Good | Excellent | Excellent |
| Security Focus | Low | Low | Low | Low | Very High | Low | Low |
| Performance Focus | Low | Low | Very High | Very High | Low | Low-Moderate | Low |
| Cost | Free (Basic) | Free | Free | Free | Free (ZAP) / Commercial | Free | Free (with Anypoint Platform) |
This diverse toolkit allows you to approach MuleSoft proxy testing from multiple angles, ensuring comprehensive coverage across functionality, performance, and security. The choice of tool often depends on the specific testing phase, the complexity of the scenario, and the technical expertise of the testing team.
7. Best Practices and Common Pitfalls
Successful MuleSoft proxy testing requires not only a systematic approach but also adherence to best practices and an awareness of common pitfalls. By integrating these principles into your testing strategy, you can significantly enhance the quality, reliability, and security of your API gateway and the APIs it manages.
Best Practices
Early and Continuous Testing
- Shift Left: Start testing your proxy configurations and policies as early as possible in the development lifecycle. Don't wait until the proxy is fully deployed to a production-like environment. Validate policies in isolated development environments.
- Continuous Integration: Integrate automated tests into your CI/CD pipeline to ensure that every change to the proxy, its policies, or the backend API is immediately validated. This catches issues quickly and prevents them from escalating.
Automate Everything Possible
- Repetitive Tasks: Any test that needs to be run repeatedly (e.g., regression tests, functional tests for policy enforcement) should be automated. Use tools like Postman with Newman, Karate DSL, or JMeter scripts.
- Data Generation: Automate the creation or provisioning of test data, especially for complex scenarios or when external dependencies are involved.
- Deployment & Provisioning: Automate the deployment of the proxy and its dependencies to test environments.
Comprehensive Test Coverage
- Policy Coverage: Ensure every policy applied to your proxy (Client ID enforcement, Rate Limiting, OAuth, Caching, etc.) is thoroughly tested for both positive (expected success) and negative (expected failure) scenarios.
- Endpoint Coverage: Test all exposed API endpoints and their various HTTP methods through the proxy.
- Edge Cases: Pay special attention to boundary conditions for policies (e.g., just above/below a rate limit) and unusual input values.
- Error Handling: Systematically test how the proxy handles backend failures, malformed requests, and invalid credentials.
Realistic Test Data
- Mimic Production: Use test data that closely resembles your actual production data in terms of volume, variety, and complexity (while ensuring sensitive data is anonymized).
- State Management: If your tests depend on specific states (e.g., a user account with a certain status), ensure your test data setup can reliably create and manage these states.
Clear Test Scenarios and Expected Results
- Define Inputs: Clearly specify the request (HTTP method, URL, headers, body) for each test.
- Predict Outcomes: For every test, explicitly define the expected outcome, including HTTP status code, specific headers, and response body content (or structure). This makes test failures easy to diagnose.
- Traceability: Link test cases back to specific requirements or policies to ensure full coverage.
Version Control Your Tests
- Store Scripts: Keep all your automated test scripts, Postman collections, JMeter test plans, and test data files in a version control system (like Git).
- Collaboration: This allows team members to collaborate, track changes, and revert to previous versions if needed. It also ensures consistency across different environments and testers.
Collaborate Across Teams
- Dev-QA-Ops: Foster strong collaboration between development, QA, and operations teams. Developers should understand how their code will be tested, QA engineers need insights into the proxy's internal workings, and operations teams provide crucial deployment and monitoring context.
- Backend Team: Work closely with the backend API team to understand their API specifications, expected behaviors, and error handling mechanisms. This ensures end-to-end consistency.
Common Pitfalls
Neglecting Policy Testing
- Mistake: Assuming policies configured in API Manager automatically work as expected without explicit testing.
- Consequence: Critical security (e.g., unauthorized access due to broken OAuth) or performance (e.g., backend overload due to faulty rate limiting) flaws can go undetected until production.
- Remedy: Dedicate significant test cases specifically to validate every aspect of each applied policy.
Insufficient Load Testing
- Mistake: Only performing functional tests and skipping performance testing, or conducting superficial load tests that don't reflect real-world peak traffic.
- Consequence: The proxy performs well under light load but buckles under pressure, leading to outages, slow API responses, and a poor user experience during peak times.
- Remedy: Design and execute realistic load, stress, and soak tests using dedicated load testing tools, monitoring both client-side and server-side metrics.
Ignoring Error Scenarios
- Mistake: Only focusing on "happy path" scenarios where everything works perfectly, and neglecting to test how the proxy handles errors, invalid inputs, or backend failures.
- Consequence: The proxy might crash, return cryptic error messages, or even expose sensitive information when things go wrong, degrading user trust and making troubleshooting difficult.
- Remedy: Systematically design negative test cases, including malformed requests, invalid credentials, backend unavailability, and specific error conditions.
Over-reliance on Manual Testing
- Mistake: Performing most or all proxy testing manually using a REST client.
- Consequence: Manual testing is time-consuming, prone to human error, difficult to scale, and cannot be easily integrated into CI/CD, leading to slower releases and less reliable validation.
- Remedy: Automate all repetitive and critical test cases. Use manual testing primarily for exploratory testing, new feature validation, or ad-hoc debugging.
Inadequate Monitoring
- Mistake: Not setting up comprehensive monitoring and alerting for the deployed proxy in production.
- Consequence: Issues (performance degradation, policy failures, security breaches) can go unnoticed for extended periods, causing prolonged outages or data exposure.
- Remedy: Implement robust APM (Application Performance Monitoring) and logging solutions for your proxy, configuring alerts for critical thresholds and error rates.
Testing in Production (without proper care)
- Mistake: Using production environments for extensive functional, performance, or security testing, especially for destructive tests.
- Consequence: Can lead to data corruption, service disruption, performance degradation for live users, or security vulnerabilities in a live system.
- Remedy: Maintain dedicated, production-like staging or pre-production environments for comprehensive testing. If limited testing must occur in production, ensure it's carefully planned, controlled, and minimally invasive (e.g., synthetic transactions, non-destructive health checks).
By diligently incorporating these best practices and consciously avoiding common pitfalls, teams can ensure their MuleSoft proxies are not only functional but also secure, performant, and resilient, serving as robust gatekeepers for their critical API assets.
Conclusion: Fortifying Your Digital Frontier with Robust Proxy Testing
In the rapidly evolving digital landscape, APIs have transcended their role as mere technical connectors to become strategic assets that drive business innovation, foster partnerships, and power next-generation applications. At the heart of managing and securing these vital digital arteries lies the API gateway, and within the MuleSoft ecosystem, the proxy stands as a critical component of this gateway infrastructure. It acts as the frontline defender and traffic controller, ensuring that API interactions are not only efficient but also inherently secure and resilient.
This extensive guide has aimed to illuminate the intricate world of MuleSoft proxy testing, moving from foundational concepts to advanced strategies. We've traversed the essential steps of setting up a proxy, meticulously verifying its functional correctness and policy enforcement, rigorously assessing its performance under load, and bolstering its defenses through targeted security testing. The emphasis throughout has been on a holistic, systematic approach, underscoring that a robust testing methodology is not an optional luxury but a fundamental requirement for any organization leveraging APIs at scale.
We delved into the importance of early and continuous testing, advocating for the integration of automated test suites into CI/CD pipelines to achieve speed and reliability. The discussion on advanced strategies, including contract testing and comprehensive monitoring, highlighted the ongoing commitment required to maintain API quality in dynamic environments. The mention of APIPark further illustrates the broader industry trend towards powerful, integrated API gateway and management platforms that streamline the entire API lifecycle, including critical aspects like logging, analytics, and security.
Ultimately, effective MuleSoft proxy testing empowers you to:
- Enhance Security: By ensuring robust policy enforcement, preventing unauthorized access, and mitigating common API vulnerabilities.
- Improve Performance: By validating the proxy's ability to handle high traffic volumes, manage load, and respond efficiently, thereby preventing bottlenecks.
- Increase Reliability: By verifying graceful error handling, resilience against backend failures, and consistent behavior across various scenarios.
- Accelerate Innovation: By providing confidence in your API infrastructure, enabling faster development cycles and quicker time-to-market for new services.
As organizations continue to embrace API-led connectivity and leverage their APIs to drive digital transformation, the importance of a meticulously tested and well-managed API gateway cannot be overstated. By adopting the principles and practices outlined in this guide, you are not just testing a piece of software; you are fortifying your digital frontier, building a resilient and trustworthy foundation for your entire digital ecosystem, and ensuring the continued success of your API strategy. This commitment to quality and rigor is what truly transforms a simple proxy into an intelligent, secure, and high-performing gateway, ready to navigate the complexities of the modern digital world.
Frequently Asked Questions (FAQ)
1. What is the primary difference between a MuleSoft proxy and a Mule application (API implementation)?
A MuleSoft proxy primarily acts as an intermediary, sitting in front of an existing API implementation (which could be another Mule application or an external service). Its main role is to apply cross-cutting concerns like security policies (Client ID enforcement, OAuth), traffic management (rate limiting, throttling), and caching, without altering the backend API's business logic. An API implementation (Mule application), on the other hand, contains the actual business logic, connects to databases, performs data transformations, and implements the core functionality of the API. Essentially, the proxy is the gatekeeper, while the API implementation is the house behind the gate.
2. Why is it so important to test MuleSoft proxy policies thoroughly?
Proxy policies are the enforcement mechanisms for critical aspects like security, performance, and reliability. If policies are not tested thoroughly, misconfigurations could lead to serious vulnerabilities (e.g., unauthorized users bypassing authentication), performance degradation (e.g., backend services being overwhelmed due to faulty rate limiting), or poor user experience (e.g., incorrect caching behavior). Comprehensive testing ensures that these policies function exactly as intended under both normal and exceptional conditions, safeguarding your APIs and backend systems.
3. What are the best tools for performance testing a MuleSoft proxy?
For performance testing, tools designed to simulate high volumes of concurrent requests are essential. Apache JMeter is a widely popular open-source choice due to its flexibility, extensive features, and ability to generate realistic load. Gatling is another excellent open-source option, known for its high performance and code-centric approach with a Scala DSL. For enterprise-grade testing with advanced features and comprehensive reporting, commercial tools like LoadRunner are often utilized. The choice depends on team expertise, budget, and specific testing requirements.
4. How can I integrate MuleSoft proxy testing into my CI/CD pipeline?
Integrating proxy testing into CI/CD involves automating both the deployment of the proxy and the execution of its tests. You can use command-line runners for your API tests, such as Newman (for Postman collections) or dedicated test frameworks like Karate DSL. These can be triggered as part of your CI/CD pipeline stages (e.g., using Jenkins, GitLab CI, Azure DevOps) immediately after the proxy application is deployed to a test environment. The pipeline should then analyze the test results and, if any failures occur, halt the deployment process, ensuring that only validated proxy configurations reach higher environments.
5. What is the role of monitoring in supplementing MuleSoft proxy testing?
While testing validates proxy behavior in controlled environments, monitoring provides continuous, real-time insights into its performance and health in production. Monitoring tools like MuleSoft Anypoint Monitoring, Prometheus, or Datadog track key metrics (response times, error rates, CPU/memory usage) and log API calls. This real-time data helps detect issues that might have slipped through testing, identify performance bottlenecks under actual user load, and proactively alert teams to anomalies or security threats. Monitoring acts as a crucial safety net, providing ongoing assurance of your API gateway's operational integrity.
🚀You can securely and efficiently call the OpenAI API on APIPark in just two steps:
Step 1: Deploy the APIPark AI gateway in 5 minutes.
APIPark is developed based on Golang, offering strong product performance and low development and maintenance costs. You can deploy APIPark with a single command line.
curl -sSO https://download.apipark.com/install/quick-start.sh; bash quick-start.sh

In my experience, you can see the successful deployment interface within 5 to 10 minutes. Then, you can log in to APIPark using your account.

Step 2: Call the OpenAI API.