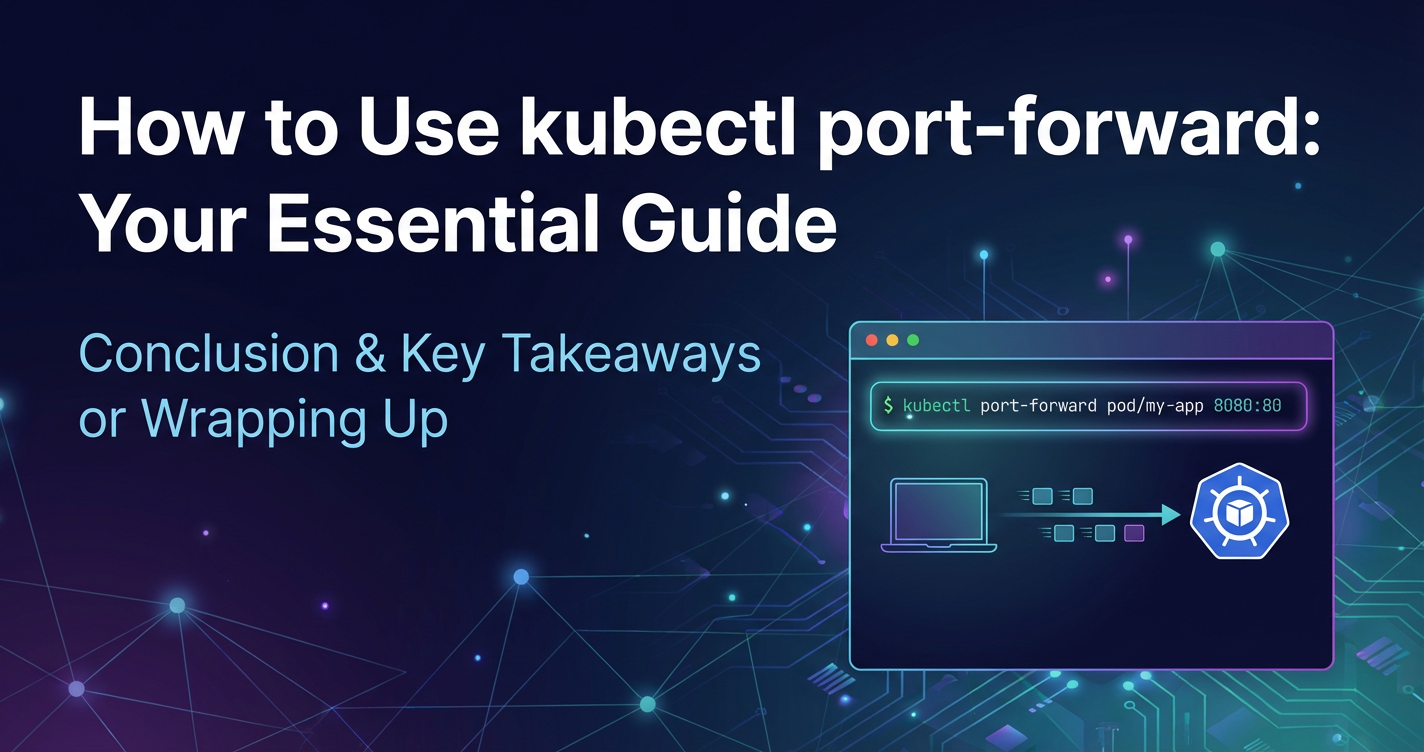
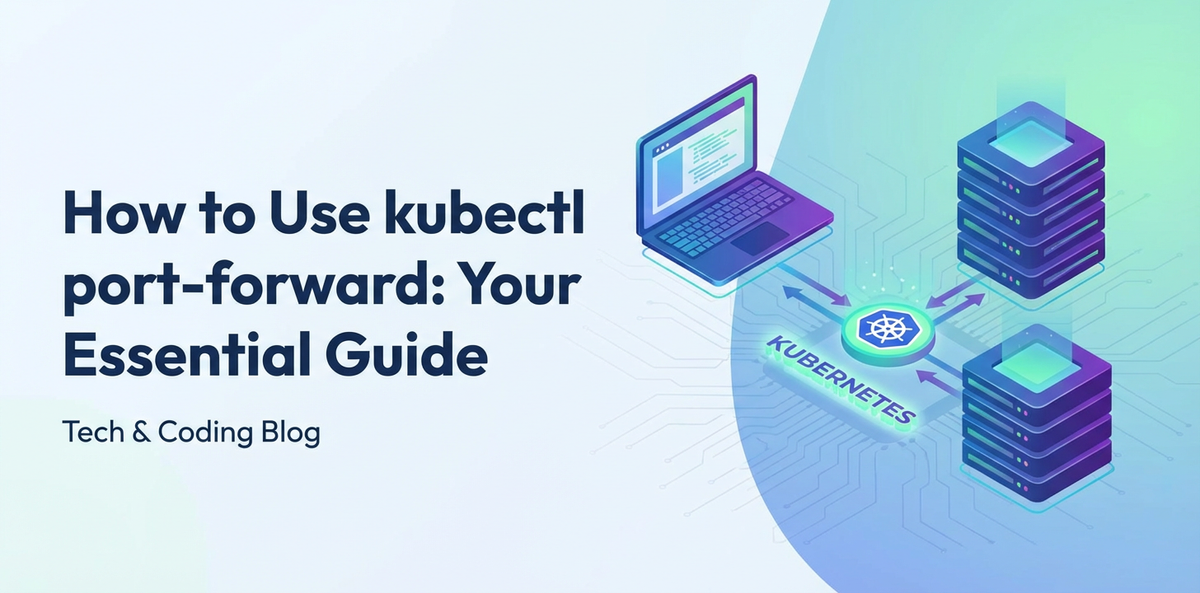
How to Use kubectl port-forward: Your Essential Guide


Kubernetes has undeniably transformed the landscape of modern application deployment, offering unparalleled capabilities for managing containerized workloads at scale. As organizations increasingly embrace microservices architectures and cloud-native patterns, the ability to efficiently deploy, scale, and manage these intricate systems becomes paramount. However, with this power comes a certain degree of complexity, especially when it comes to networking and accessing services running deep within a Kubernetes cluster. Developers and operators often find themselves needing to interact with individual services or pods for debugging, local development, or ad-hoc analysis, yet these resources are inherently isolated from the external world by Kubernetes' robust networking model. This isolation, while crucial for security and stability, presents a practical challenge: how do you get direct, temporary access to a specific application instance without fully exposing it to the internet or setting up complex ingress rules?
Enter kubectl port-forward. This unassuming yet incredibly powerful command-line utility serves as a vital bridge between your local machine and the services running inside your Kubernetes cluster. It creates a secure, temporary tunnel, allowing you to access a specific port on a pod, deployment, or service as if it were running on your localhost. For anyone working with Kubernetes, understanding and mastering kubectl port-forward is not merely a convenience; it is an indispensable skill that unlocks a new level of productivity, enabling quicker debugging cycles, seamless local development, and more efficient troubleshooting. This guide will delve deep into the mechanics of kubectl port-forward, exploring its underlying principles, practical applications, advanced configurations, and best practices, ensuring you can leverage its full potential to navigate the intricacies of your Kubernetes environments with confidence. From understanding the core networking concepts to troubleshooting common issues, we will equip you with a comprehensive understanding of this essential Kubernetes tool, making your development and operational workflows smoother and more effective.
1. Understanding Kubernetes Networking Fundamentals
Before we dive into the specifics of kubectl port-forward, it's crucial to establish a foundational understanding of how networking operates within a Kubernetes cluster. This context will illuminate why tools like port-forward are not just convenient, but often necessary. Kubernetes implements a flat network space, meaning all pods can communicate with each other directly without NAT (Network Address Translation). This design choice simplifies application development, as pods can discover and communicate with each other using their IP addresses, regardless of which node they reside on. However, this internal network model is distinct from how external clients typically interact with applications.
At the heart of Kubernetes networking are several key abstractions:
- Pods: The smallest deployable units in Kubernetes, a pod encapsulates one or more containers, storage resources, a unique network IP address, and options that govern how the containers run. Each pod receives its own unique IP address within the cluster's private network range. This IP is ephemeral, meaning it changes if the pod is restarted or rescheduled. Direct external access to a pod's IP address is generally not possible or advisable, primarily due to this ephemerality and the fact that pod IPs are internal to the cluster.
- Services: A Kubernetes Service is an abstract way to expose an application running on a set of Pods as a network service. Services provide a stable IP address and DNS name, acting as a stable endpoint for other pods or external clients to connect to, even as the underlying pods are created, destroyed, and moved around. Services allow you to decouple clients from the specific pod instances, providing load balancing and service discovery capabilities. Common service types include
ClusterIP(internal only),NodePort(exposes service on a static port on each node),LoadBalancer(exposes service via a cloud provider's load balancer), andExternalName(maps a service to an arbitrary external service). - Ingress: While Services handle internal load balancing and basic external exposure (via
NodePortorLoadBalancer), Ingress is a more sophisticated mechanism for managing external access to services within the cluster, typically HTTP/HTTPS traffic. An Ingress resource defines rules for routing external requests to specific services based on hostnames or URL paths. An Ingress controller, a component running within the cluster (like Nginx Ingress Controller or Traefik), is responsible for fulfilling these rules. Ingress acts as a powerfulgatewayfor external web traffic, providing features like URL-based routing, SSL termination, and name-based virtual hosting.
The inherent isolation of Kubernetes services from the outside world is a deliberate design choice, rooted in principles of security, manageability, and multi-tenancy. By default, pods and services reside within a private network namespace, making them inaccessible from outside the cluster unless explicitly exposed through mechanisms like NodePort, LoadBalancer, or Ingress. This isolation prevents unauthorized access, simplifies network policy enforcement, and allows for clean separation of concerns. However, this security boundary, while beneficial for production environments, can introduce friction during development and debugging workflows. When a developer needs to quickly test a new feature on a service running in a remote cluster, or an operator wants to diagnose an issue with a specific pod's process without deploying a full-fledged external exposure mechanism, the default isolation becomes a hurdle. It is precisely in these scenarios that kubectl port-forward shines, offering a precise, temporary, and secure method to bypass these layers of abstraction for direct, localized access, making it an indispensable tool in the Kubernetes ecosystem. Understanding this layered networking architecture is key to appreciating the role and utility of port-forward as a tactical solution within a broader strategic framework of Kubernetes networking.
2. What is kubectl port-forward?
In the dynamic and often isolated world of Kubernetes, kubectl port-forward emerges as a practical and indispensable utility. At its core, kubectl port-forward establishes a secure, temporary, bidirectional network tunnel between your local machine and a specific resource (a pod, deployment, or service) within your Kubernetes cluster. Think of it as creating a dedicated, direct telephone line to an extension inside a large, bustling office building. Instead of navigating through multiple receptionists, departments, and internal routing systems, port-forward gives you a direct, private connection to exactly the person (or service) you want to talk to, bypassing the usual public access points.
This command is particularly invaluable for development and debugging workflows. When you're developing an application locally and need it to communicate with a database, a microservice, or an API that's running inside your Kubernetes cluster, port-forward allows your local application to treat that remote service as if it were running on localhost. For instance, if you have a PostgreSQL database running in a pod on port 5432, you can use kubectl port-forward to map localhost:5432 on your machine directly to that pod's port 5432. Your local application can then connect to localhost:5432 just as it would to a locally installed database, completely unaware that the actual database is residing thousands of miles away in a cloud data center.
The key use cases for kubectl port-forward are numerous and varied, highlighting its versatility:
- Local Development: This is perhaps the most common use case. Developers can run their frontend applications or microservices locally, while consuming backend
APIsor databases that are deployed in a Kubernetes development cluster. This avoids the overhead of deploying every change to the cluster, significantly accelerating the development feedback loop. - Debugging Services: When a service isn't behaving as expected,
port-forwardallows you to establish a direct connection to a specific pod and inspect its state, interact with itsAPI, or even connect a debugger to it, all from your local development environment. This granular access is critical for isolating and resolving issues quickly. - Accessing Internal Dashboards/Tools: Many applications or infrastructure components deploy internal web interfaces (e.g., Prometheus, Grafana, custom admin panels) that are not meant for public exposure.
port-forwardprovides a secure way for administrators and developers to access these internalAPIsand interfaces without creating persistentIngressrules orLoadBalancers. - Testing
APIEndpoints: Before integrating a new microserviceAPIwith a larger application, developers can useport-forwardto hit theAPIdirectly from tools like Postman, curl, or their web browser, ensuring it behaves correctly in the cluster environment. - Database Access: As mentioned, connecting local database clients (like DBeaver, DataGrip, or
psqlCLI) to databases running inside Kubernetes is a breeze withport-forward, facilitating data inspection and schema management.
It's crucial to understand how kubectl port-forward differs from other Kubernetes service exposure mechanisms:
NodePortandLoadBalancerServices: These service types are designed for more permanent and externally accessible exposure.NodePortexposes a service on a static port across all nodes in the cluster, making it accessible from outside, but often involves using a non-standard high port.LoadBalancerprovision a cloud provider's external load balancer, assigning an external IP that's accessible from the internet. Both are suitable for production traffic but require more setup and are less granular thanport-forward.Ingress:Ingressis a sophisticatedgatewayfor HTTP/HTTPS traffic, offering features like URL routing, SSL termination, and virtual hosting. It's the go-to solution for exposing web applications andAPIsto the public internet in a production environment.kubectl proxy: While also creating a local connection,kubectl proxyspecifically exposes the KubernetesAPIserver on your localhost. Its purpose is to allow local tools or web UIs to interact with the Kubernetes control plane, not to tunnel to application pods or services directly.
The fundamental distinction is that kubectl port-forward is inherently temporary, ad-hoc, and local-machine specific. It's not a production gateway solution. It does not modify your cluster configuration, nor does it expose your services publicly. Instead, it provides a surgical, on-demand tunnel for direct interaction, making it an indispensable tool for anyone navigating the intricate world of Kubernetes development and operations.
3. The Anatomy of kubectl port-forward Command
The kubectl port-forward command, while simple in its most basic form, possesses a powerful and flexible syntax that allows for precise control over how you establish a connection to your Kubernetes resources. Understanding each component of the command is key to leveraging its full potential.
The general syntax for kubectl port-forward is as follows:
kubectl port-forward <resource>/<name> [local-port]:[remote-port] [options]
Let's dissect each part of this command:
kubectl: This is the Kubernetes command-line tool, your primary interface for interacting with a Kubernetes cluster. It's the client that sends commands to the KubernetesAPIserver.port-forward: This is the subcommand withinkubectlthat initiates the port-forwarding process. It instructskubectlto create a tunnel.<resource>/<name>: This specifies the target resource within your Kubernetes cluster that you want to connect to.kubectl port-forwardis remarkably versatile and can target several types of resources:pod/<pod-name>: This is the most granular target. You specify the exact name of a running pod. This is useful when you need to connect to a specific instance of an application, perhaps for debugging a particular replica. For example:pod/my-app-789abcde-fghij.deployment/<deployment-name>: When you specify a Deployment,kubectl port-forwardwill automatically select one of the healthy, running pods managed by that Deployment and forward to it. This is convenient because you don't need to manually find a pod name. It provides a level of abstraction, ensuring you always connect to an active instance. For example:deployment/my-app-deployment.service/<service-name>: This is often the most stable and recommended target for applications. When you forward to a Service,kubectlwill resolve the Service's cluster IP and port, and then use the Service's internal load-balancing mechanism to route your connection to one of the healthy pods that the Service targets. This ensures that even if individual pods are replaced or restarted, yourport-forwardconnection will remain stable as long as the Service is active and has healthy backend pods. For example:service/my-app-service.statefulset/<statefulset-name>: Similar to a Deployment,kubectl port-forwardcan target a StatefulSet, automatically selecting a pod managed by it. This is particularly useful for stateful applications like databases where each pod might have a unique identity.replicaset/<replicaset-name>: You can also target a ReplicaSet directly, though it's less common than targeting a Deployment (which manages ReplicaSets). Important Note on Resource Targeting: While you can target pods directly, forwarding to aServiceis often preferred for stable applications. AServiceprovides a consistent internal IP and load-balancing across multiple pods. When youport-forwardto aService,kubectleffectively establishes a tunnel to theService's ClusterIP and then theServiceroutes your traffic to an available backend pod. This means yourport-forwardwill likely survive if the specific pod it initially connected to dies, as theServicewill re-route to a new pod. When forwarding to aDeploymentorStatefulSet,kubectlpicks one of the managed pods; if that specific pod dies, yourport-forwardconnection will terminate. For robust local testing of a deployedAPI, targeting theServiceis usually the best approach.
[local-port]:[remote-port]: This crucial part defines the port mapping.[local-port]: This is the port on your local machine thatkubectl port-forwardwill bind to. You will connect to this port from your web browser, local application, orAPIclient. If you omit[local-port](e.g.,kubectl port-forward service/my-app 80),kubectlwill dynamically choose a random available local port and print it to the console. This can be convenient for quick, ad-hoc access.[remote-port]: This is the port inside the target pod or service that you want to expose. It must correspond to a port that the application within the pod is actually listening on. For example, if your web server inside the pod listens on port 80, you would specify80here. If you're forwarding to a service, this is thetargetPortof the service.- Example:
8080:80means "forward traffic from my local machine's port 8080 to the remote resource's port 80".
[options]:kubectl port-forwardsupports several optional flags that allow for more refined control:--address <addresses>: This flag allows you to specify which local addresses to bind to. By default,kubectl port-forwardbinds tolocalhost(127.0.0.1). If you want to access the forwarded port from other machines on your local network (e.g., a colleague's machine, or a VM), you would specify--address 0.0.0.0. Be cautious with this, as it exposes the forwarded port to your entire network. You can also specify specific IP addresses, e.g.,--address 192.168.1.100. Multiple addresses can be specified, separated by commas.--namespace <namespace>/-n <namespace>: If your target resource is not in the default namespace, you must specify the namespace using this flag. For example,--namespace dev-env.--pod-running-timeout <duration>: Specifies the maximum amount of time (e.g.,5s,2m) to wait for a pod to be running and ready before giving up. Default is 1 minute.--kubeconfig <path>: Specifies the path to thekubeconfigfile to use. Useful if you manage multiple clusters or contexts.--context <context-name>: Specifies the name of the kubeconfig context to use.--user <username>: Specifies the user for authentication.--request-timeout <duration>: The length of time to wait for a server response when requesting aAPIoperation.--v <level>: Controls the verbosity of logging (e.g.,--v 9for very detailed logs).
Understanding this detailed anatomy empowers you to construct precise port-forward commands tailored to your specific needs, whether you're debugging a single pod instance or providing a stable API endpoint for local development against a Kubernetes Service. The flexibility of targeting different resource types, combined with the ability to specify local and remote ports and binding addresses, makes kubectl port-forward an exceptionally versatile tool in the Kubernetes engineer's toolkit.
4. Practical Examples and Step-by-Step Guide
To truly grasp the power and utility of kubectl port-forward, let's walk through several practical examples, starting from basic pod forwarding to more advanced service-based scenarios. Each example will provide a step-by-step guide, command invocations, and detailed explanations of what's happening.
For these examples, let's assume you have a Kubernetes cluster running and kubectl configured to connect to it. We'll deploy a simple Nginx web server as our target application.
First, let's create a sample deployment and service in a new namespace for our examples.
# Create a new namespace
kubectl create namespace example-ns

# Deploy Nginx using a Deployment
kubectl apply -f - <<EOF
apiVersion: apps/v1
kind: Deployment
metadata:
  name: nginx-deployment
  namespace: example-ns
spec:
  selector:
    matchLabels:
      app: nginx
  replicas: 2
  template:
    metadata:
      labels:
        app: nginx
    spec:
      containers:
      - name: nginx
        image: nginx:latest
        ports:
        - containerPort: 80
EOF

# Expose the Nginx Deployment using a Service
kubectl apply -f - <<EOF
apiVersion: v1
kind: Service
metadata:
  name: nginx-service
  namespace: example-ns
spec:
  selector:
    app: nginx
  ports:
    - protocol: TCP
      port: 80
      targetPort: 80
  type: ClusterIP
EOF

# Verify that the pods and service are running
kubectl get pods -n example-ns
kubectl get services -n example-ns
You should see output similar to this, indicating that Nginx pods are running and the service is active:
NAME                                READY   STATUS    RESTARTS   AGE
nginx-deployment-7f9996d9f-68abc    1/1     Running   0          2m
nginx-deployment-7f9996d9f-xyzpd    1/1     Running   0          2m

NAME            TYPE        CLUSTER-IP       EXTERNAL-IP   PORT(S)   AGE
nginx-service   ClusterIP   10.100.200.150   <none>        80/TCP    1m
Now, let's proceed with the port-forward examples.
Example 1: Forwarding to a Specific Pod
This is the most direct method, useful when you need to interact with a specific instance of your application, perhaps to debug an issue that's only occurring on one particular pod.
Scenario: You want to access the Nginx web server running inside one of the nginx-deployment pods directly from your local machine.
Steps:
- Identify a Pod Name: First, you need the exact name of a running pod.
bash kubectl get pods -n example-nsPick one of the pod names, e.g.,nginx-deployment-7f9996d9f-68abc. - Execute
kubectl port-forward:bash kubectl port-forward pod/nginx-deployment-7f9996d9f-68abc 8080:80 -n example-nspod/nginx-deployment-7f9996d9f-68abc: Specifies the target resource as a pod with the given name.8080:80: Maps your local port 8080 to the pod's internal port 80 (where Nginx is listening).-n example-ns: Specifies the namespace.
- Observe the Output: The command will block and show output similar to:
Forwarding from 127.0.0.1:8080 -> 80 Forwarding from [::1]:8080 -> 80This indicates that the tunnel has been successfully established. - Access the Application Locally: Open your web browser or use
curlto accesshttp://localhost:8080.bash curl http://localhost:8080You should see the "Welcome to nginx!" default page.
Explanation: When you execute this command, kubectl connects to the Kubernetes API server, which then establishes a connection to the kubelet agent on the node where the nginx-deployment-7f9996d9f-68abc pod is running. The kubelet then sets up a tunnel directly to port 80 of the Nginx container within that specific pod. Your local requests to localhost:8080 are then securely routed through this tunnel to the target pod. If the specified pod dies or is rescheduled, your port-forward connection will terminate.
Example 2: Forwarding to a Deployment
This method provides more abstraction than forwarding to a specific pod. When targeting a Deployment, kubectl port-forward automatically picks a healthy, available pod managed by that Deployment. This is convenient when you don't care about the specific pod instance and just want to access an instance of your application.
Scenario: You want to access the Nginx web server provided by the nginx-deployment without knowing the individual pod names.
Steps:
- Execute
kubectl port-forward:bash kubectl port-forward deployment/nginx-deployment 8081:80 -n example-nsdeployment/nginx-deployment: Specifies the target resource as the deployment namednginx-deployment.8081:80: Maps your local port 8081 to the pod's internal port 80.-n example-ns: Specifies the namespace.
- Observe the Output: The output will look similar, but
kubectlfirst identifies a target pod:Forwarding from 127.0.0.1:8081 -> 80 Forwarding from [::1]:8081 -> 80 - Access the Application Locally:
bash curl http://localhost:8081You will again see the "Welcome to nginx!" page.
Explanation: kubectl queries the API server to find pods associated with nginx-deployment. It then intelligently selects one of the ready pods and establishes the tunnel to that chosen pod. This offers slightly more resilience than directly targeting a pod, as you don't need to manually update your command if a specific pod is replaced. However, if the chosen pod dies, the port-forward will still terminate. For truly stable access that survives individual pod failures, forwarding to a Service is generally preferred.
Example 3: Forwarding to a Service (Recommended for Stable Access)
Forwarding to a Service is often the most robust and recommended approach for development and debugging, especially when your application has multiple replicas. When you forward to a Service, kubectl establishes a tunnel to the Service's stable ClusterIP, and then the Service's internal load-balancing mechanism routes your traffic to one of its healthy backend pods. This means your port-forward connection is more resilient to individual pod failures.
Scenario: You want a stable way to access the Nginx application, leveraging the load-balancing and stability provided by its Kubernetes Service.
Steps:
- Execute
kubectl port-forward:bash kubectl port-forward service/nginx-service 8082:80 -n example-nsservice/nginx-service: Specifies the target resource as the service namednginx-service.8082:80: Maps your local port 8082 to the service's internal port 80.-n example-ns: Specifies the namespace.
- Observe the Output:
Forwarding from 127.0.0.1:8082 -> 80 Forwarding from [::1]:8082 -> 80 - Access the Application Locally:
bash curl http://localhost:8082Again, you'll see the Nginx welcome page.
Explanation: This is the most resilient approach for accessing APIs and applications. The port-forward tunnel now targets the nginx-service's internal ClusterIP. Any requests arriving at this ClusterIP are then distributed by Kubernetes' internal service proxy (kube-proxy) to one of the healthy Nginx pods. If the specific pod that kube-proxy initially routed to fails, the Service will simply re-route subsequent requests to another healthy pod, and your port-forward connection remains intact. This stability is invaluable for prolonged development and testing sessions.
Example 4: Using Specific Addresses (--address)
By default, kubectl port-forward binds to localhost (127.0.0.1). This means only applications running on your local machine can access the forwarded port. Sometimes, you might need to access the forwarded port from another device on your local network (e.g., a mobile device for testing, or a virtual machine). The --address flag allows you to specify which local network interface to bind to.
Scenario: You want to access the Nginx service from another device on your local network (e.g., your phone).
Steps:
- Execute
kubectl port-forwardwith--address:bash kubectl port-forward service/nginx-service 8083:80 -n example-ns --address 0.0.0.0--address 0.0.0.0: This tellskubectlto bind the local port 8083 to all available network interfaces on your machine.- Caution: Binding to
0.0.0.0means anyone on your local network (and potentially beyond, depending on your firewall rules) can access this port. Use with care.
- Observe the Output:
Forwarding from 0.0.0.0:8083 -> 80Notice the0.0.0.0indicating it's listening on all interfaces. - Access the Application from Another Device: Find your local machine's IP address on your network (e.g.,
192.168.1.100). From another device on the same network, open a browser and navigate tohttp://<YOUR_LOCAL_IP>:8083(e.g.,http://192.168.1.100:8083). You should see the Nginx welcome page.
Explanation: The --address 0.0.0.0 flag tells the port-forward process to listen on all available network interfaces on your local machine. This allows incoming connections from other devices on your local area network (LAN) to reach the forwarded port. If you have specific network interfaces or IP addresses you want to bind to, you can specify them instead of 0.0.0.0 (e.g., --address 192.168.1.100).
Example 5: Multiple Port Forwards in a Single Command
Sometimes, a single application or service might expose multiple ports, or you might need to access different services through a single port-forward session. You can specify multiple port mappings in one command.
Scenario: Imagine your Nginx service also had an admin interface on port 8000 (though Nginx typically doesn't, this is for demonstration). You want to access both the web server and this hypothetical admin interface.
Steps:
- Execute
kubectl port-forwardwith multiple mappings:bash # (Assuming a service named 'my-multiport-service' with internal ports 80 and 8000) kubectl port-forward service/nginx-service 8084:80 8085:80 -n example-ns8084:80: Maps local port 8084 to the service's internal port 80.8085:80: Maps local port 8085 to the service's internal port 80. (Here we're mapping two local ports to the same remote port, but in a real scenario, the remote ports would likely be different, e.g.,8085:8000for an admin port).
- Observe the Output:
Forwarding from 127.0.0.1:8084 -> 80 Forwarding from [::1]:8084 -> 80 Forwarding from 127.0.0.1:8085 -> 80 Forwarding from [::1]:8085 -> 80 - Access Both Ports Locally:
bash curl http://localhost:8084 curl http://localhost:8085Both commands will return the Nginx welcome page, as both local ports are forwarding to the same remote port 80. If we had a second remote port configured, they would hit different endpoints.
Explanation: kubectl port-forward supports multiple [local-port]:[remote-port] pairs, allowing you to establish several tunnels simultaneously within a single command execution. This simplifies the process when dealing with multi-port applications or when you need to access different facets of a service during a single debugging session. Each pair establishes its own independent forwarding rule.
These examples provide a solid foundation for using kubectl port-forward. Remember that the command runs in your foreground and continues until you terminate it (usually with Ctrl+C). For background execution, you would typically use a shell job control (&) or a tool like nohup. Master these practical applications, and you'll find yourself much more agile and efficient in your Kubernetes development and debugging workflows.
APIPark is a high-performance AI gateway that allows you to securely access the most comprehensive LLM APIs globally on the APIPark platform, including OpenAI, Anthropic, Mistral, Llama2, Google Gemini, and more.Try APIPark now! 👇👇👇
5. Advanced Use Cases and Best Practices
While the basic usage of kubectl port-forward covers a significant portion of common scenarios, its true power lies in its applicability to more complex development and operational tasks. Mastering these advanced use cases and adhering to best practices can dramatically enhance your productivity and maintain the security posture of your environments.
Debugging Database Connections
One of the most frequent advanced applications of kubectl port-forward is gaining temporary, local access to databases running inside your Kubernetes cluster. Imagine you have a PostgreSQL, MySQL, MongoDB, or Redis instance deployed as a StatefulSet or a standalone pod within your cluster. Your local development environment often requires direct interaction with this database for tasks like:
- Schema Migration: Running local migrations against the remote development database.
- Data Inspection: Using a GUI database client (like DBeaver, DataGrip, pgAdmin, MySQL Workbench, MongoDB Compass) to browse tables, query data, and manage schemas.
- Troubleshooting Data Issues: Directly connecting to the database to verify data integrity or diagnose application-level data problems.
How to do it: If your PostgreSQL service is my-postgresql-service in database-ns and listens on port 5432, you would typically run:
kubectl port-forward service/my-postgresql-service 5432:5432 -n database-ns
After executing this, you can configure your local database client to connect to localhost:5432 with the appropriate credentials. Your client will believe it's talking to a local database server, while kubectl handles all the secure tunneling to the actual instance within Kubernetes. This approach completely bypasses the need for exposing the database publicly, enhancing security significantly.
Developing Against Internal APIs
Modern applications are often composed of numerous microservices, each exposing its own set of APIs. When developing a new microservice locally, you frequently need it to interact with other dependent APIs already deployed in a Kubernetes development cluster. Rather than deploying your half-finished microservice to the cluster for every test, port-forward allows you to establish connections to these internal APIs directly.
How to do it: If your local frontend-service needs to call backend-api-service (listening on port 8080 in the cluster), you would run:
kubectl port-forward service/backend-api-service 8080:8080 -n dev-api-ns
Then, configure your local frontend-service to call http://localhost:8080 for its backend dependencies. This creates a highly efficient development loop, as changes to your local code can be tested immediately against a realistic remote environment without incurring deployment overhead. This capability is paramount for rapid prototyping and iterative development of complex distributed systems.
Accessing Message Queues or Caches
Similar to databases, distributed caching systems (like Redis) and message queues (like Kafka, RabbitMQ) are crucial components of many microservice architectures. Debugging or interacting with these services from your local machine can be essential. kubectl port-forward provides the same seamless access:
- Redis: Connect a local Redis CLI or GUI tool to a Redis instance in Kubernetes.
- Kafka: Use local Kafka tools (producer, consumer CLIs) to interact with Kafka brokers inside the cluster.
- RabbitMQ: Access the RabbitMQ management
APIor connect local clients.
The principle remains the same: map a local port to the remote service's port, and your local tools can connect to localhost.
Temporary Admin Access
Many infrastructure tools or custom applications deployed in Kubernetes come with web-based admin dashboards or monitoring interfaces that are intended for internal use only. Examples include: * Prometheus or Grafana dashboards. * Application-specific admin panels. * Kubernetes dashboard itself (though kubectl proxy is often preferred for that).
Using port-forward for these means you don't need to configure Ingress rules or LoadBalancers for temporary access, which might otherwise introduce security risks or unnecessary configuration.
Example: Accessing a Prometheus server's UI:
kubectl port-forward service/prometheus-k8s 9090:9090 -n monitoring
Then navigate to http://localhost:9090 in your browser.
Scripting port-forward
While kubectl port-forward runs in the foreground, it can be integrated into development scripts or CI/CD pipelines (with extreme caution in CI/CD, usually for very specific integration tests).
To run it in the background:
kubectl port-forward service/my-service 8080:80 -n my-ns &
# Perform local operations
# ...
kill %1 # To kill the background job later
This is useful for automating temporary environments where a local tool needs to communicate with a remote service, then the tunnel is torn down.
Integrating with Local IDEs
Modern Integrated Development Environments (IDEs) often have powerful debugging capabilities. For applications running in Kubernetes, kubectl port-forward can bridge the gap, allowing you to attach a local debugger to a remote process. For example, in Java, you might configure a remote debugging session in IntelliJ IDEA or Eclipse to connect to localhost:<debug-port> after port-forward has mapped that port to your Java application's debug port in the pod. This provides a rich debugging experience without having to leave your local IDE.
Security Considerations
Despite its utility, kubectl port-forward is a powerful tool and should be used with an understanding of its security implications:
- Ephemeral Nature, Not a Production Solution:
port-forwardis explicitly for temporary, ad-hoc access. It is NOT a substitute for properIngresscontrollers orLoadBalancersfor production traffic. Never rely onport-forwardto expose production services publicly. kubectlPermissions: The ability to usekubectl port-forwardimplies that the user hasport-forwardpermissions on the target pod/deployment/service. This typically means the user has read access to the resource. Ensure your RBAC (Role-Based Access Control) policies are granular enough to restrict who can useport-forwardto sensitive resources.- Local Exposure: While
port-forwardis secure in the sense that it doesn't expose services directly to the internet, using--address 0.0.0.0means the forwarded port is accessible on your local network. Be mindful of exposing sensitive internalAPIs or databases to your entire LAN, especially in less secure network environments (e.g., public Wi-Fi). Always use127.0.0.1unless absolutely necessary. - Auditing:
port-forwardoperations are logged by the KubernetesAPIserver, allowing administrators to audit who is creating tunnels and to which resources. This is important for security compliance.
When Not to Use port-forward: * For permanent external access to production APIs: Use Ingress, LoadBalancer services, or dedicated API Gateways. * For exposing public web services: Use Ingress for HTTP/HTTPS routing. * For stable network connectivity between services within the cluster: Use Kubernetes Services.
By understanding these advanced use cases and adhering to security best practices, kubectl port-forward transforms from a simple tunnel into a strategic tool for efficient development, robust debugging, and secure, temporary access to the intricate internal workings of your Kubernetes applications. It empowers developers and operators to confidently navigate and interact with their cluster-resident workloads without compromising the security or stability of the production environment.
6. Comparison with Other Access Methods
kubectl port-forward is an excellent tool for specific, temporary access needs, but it's crucial to understand its place within the broader ecosystem of Kubernetes service exposure mechanisms. Each method serves a distinct purpose, and choosing the right one depends heavily on your requirements: whether it's for internal cluster communication, temporary debugging, or robust external access for production traffic. Let's compare kubectl port-forward with NodePort, LoadBalancer, and Ingress.
NodePort Service
A NodePort service type exposes a service on a static port on each node's IP address within the cluster. This means if your Kubernetes cluster has three nodes, and your service is exposed via NodePort on port 30000, you can access your service by hitting any node's IP address on that specific port (e.g., http://<Node1-IP>:30000, http://<Node2-IP>:30000).
- Pros:
- Simple to set up for basic external access.
- Works in any Kubernetes environment, even bare-metal.
- No cloud provider integration required beyond basic networking.
- Cons:
- Uses a high-numbered port (typically 30000-32767), which is less user-friendly and can clash with other services.
- Exposes the service on all nodes, even if the pod isn't running on that specific node.
- No built-in load balancing for external traffic; you'd typically need an external load balancer in front of the nodes.
- Not suitable for production
gatewayfor public facing applications due to the high port and lack of advanced routing features.
- When to use: For testing basic connectivity, internal applications in private networks, or as a stepping stone to a
LoadBalancerwhere a cloud provider automatically provisions a load balancer that targets theNodePorts.
LoadBalancer Service
The LoadBalancer service type is typically available in cloud environments (AWS, GCE, Azure, etc.). When you create a service of this type, the cloud provider automatically provisions an external load balancer (e.g., an ELB in AWS, a GCLB in GCP) and assigns it an external IP address. This load balancer then routes traffic to the pods backing your service.
- Pros:
- Provides a stable, publicly accessible IP address.
- Cloud-provider integrated load balancing, often with advanced features like health checks and SSL termination (depending on the provider).
- Excellent for exposing stateful applications or those that require a dedicated IP address.
- Cons:
- Can be expensive, as it provisions dedicated cloud resources.
- Tied to specific cloud provider capabilities; not universally available on bare-metal clusters without additional components (like MetalLB).
- Limited to basic layer 4 (TCP/UDP) load balancing. Lacks advanced HTTP routing features like path-based or host-based routing.
- When to use: For exposing a small number of services to the public internet where simple TCP/UDP traffic forwarding is sufficient, and you need a stable external IP. Often used for databases, VPN endpoints, or non-HTTP applications.
Ingress
Ingress is a Kubernetes API object that manages external access to services in a cluster, typically HTTP and HTTPS. It acts as a sophisticated gateway for web traffic. An Ingress resource defines rules for routing traffic, while an Ingress Controller (like Nginx Ingress Controller, Traefik, GCE Ingress) is the actual component running in your cluster that implements these rules.
- Pros:
- Advanced HTTP/HTTPS Routing: Supports host-based routing (e.g.,
app1.example.comto Service A,app2.example.comto Service B), path-based routing (e.g.,example.com/apito Service A,example.com/webto Service B). - Single Entry Point: A single
Ingress Controllercan manage routing for many services, providing a unifiedgatewayto your applications. - SSL/TLS Termination: Handles SSL certificate management and encryption/decryption at the
gatewaylevel, offloading this from individual services. - Cost-Effective: Often more cost-effective than multiple
LoadBalancerservices, as oneIngress Controller(potentially fronted by oneLoadBalancer) can serve many applications. - Traffic Management: Some
Ingress Controllersoffer advanced traffic management features like rate limiting,APIkey authentication, and canary deployments.
- Advanced HTTP/HTTPS Routing: Supports host-based routing (e.g.,
- Cons:
- Requires an
Ingress Controllerto be deployed and configured in the cluster. - Primarily designed for HTTP/HTTPS traffic (Layer 7). Not suitable for arbitrary TCP/UDP services.
- Configuration can become complex for very intricate routing rules.
- Requires an
- When to use: The preferred method for exposing web applications and
APIs to the public internet in production environments. Ideal for microservice architectures where many services need to be exposed via a commongateway.
kubectl port-forward
As discussed, kubectl port-forward creates a temporary, secure tunnel from your local machine to a specific port on a pod, deployment, or service within the cluster.
- Pros:
- Temporary and Ad-Hoc: Ideal for quick debugging, local development, and temporary access.
- Secure: Doesn't expose services publicly or modify cluster configuration. Connection is local to your machine by default.
- Granular: Can target specific pods or services.
- No Cluster Changes: Requires no changes to your Kubernetes manifests or service definitions.
- Universal: Works in any Kubernetes cluster, regardless of cloud provider or infrastructure.
- Cons:
- Temporary: The tunnel closes when the command terminates. Not suitable for continuous, production access.
- Single-User Focus: Primarily for individual developer/operator use, not for shared access by multiple external clients.
- Limited Scope: Does not provide load balancing, SSL termination, or advanced routing.
- Foreground Process: Runs in the foreground unless explicitly backgrounded.
- When to use: Essential for local development, debugging, troubleshooting, connecting local tools (IDEs, database clients) to remote services, and accessing internal dashboards.
Comparative Table
To summarize the differences, here's a comparative table highlighting the key characteristics of each access method:
| Feature | kubectl port-forward |
NodePort Service |
LoadBalancer Service |
Ingress |
|---|---|---|---|---|
| Purpose | Temp. Local Access, Debug | Basic External Access | External w/ Cloud LB | Sophisticated HTTP/HTTPS Gateway |
| Exposure Level | Localhost (by default) | All Nodes (static port) | External IP (Cloud LB) | External (via Ingress Controller) |
| Persistence | Temporary (session-bound) | Permanent | Permanent | Permanent |
| Target Audience | Developers, Operators | Internal/Limited External | External Public | External Public |
| Traffic Type | Any TCP/UDP | Any TCP/UDP | Any TCP/UDP | Primarily HTTP/HTTPS |
| Load Balancing | Service (if targeting a Service) | External LB needed | Built-in (Cloud Provider) | Built-in (Ingress Controller) |
| DNS/Hostnames | N/A (localhost) | N/A | Static IP (can use DNS) | Host/Path-based routing |
| SSL/TLS Termination | N/A | N/A | Cloud Provider (optional) | Ingress Controller (common) |
| Setup Complexity | Very Low | Low | Medium (Cloud dependent) | Medium-High (requires Controller) |
| Cost Implications | None (local compute) | None (uses existing nodes) | Cloud provider charges | Cloud provider (for Controller LB), compute for Controller |
| Production Ready | No (Debugging/Dev Only) | Limited (often behind LB) | Yes (for L4 services) | Yes (for L7 web services/APIs) |
| Cluster Modification | No | Yes (Service definition) | Yes (Service definition) | Yes (Ingress resource, Controller) |
This comparison clearly illustrates that kubectl port-forward is a tactical tool for specific, development-centric needs, while NodePort, LoadBalancer, and especially Ingress are strategic solutions for exposing services in production environments. An effective Kubernetes strategy often involves using a combination of these methods: port-forward for local development, Ingress as the primary public gateway for APIs and web applications, and potentially LoadBalancers for non-HTTP services or as the underlying entry point for the Ingress Controller itself. Understanding when and why to choose each method is fundamental to managing Kubernetes efficiently and securely.
7. Troubleshooting Common kubectl port-forward Issues
Even with its straightforward nature, kubectl port-forward can sometimes throw unexpected errors or behave in ways that prevent a successful connection. Understanding the common pitfalls and their resolutions is essential for efficient troubleshooting. Here's a breakdown of frequently encountered issues and how to address them.
Issue 1: Unable to listen on port <local-port>: Listeners failed to create with the following errors: [...], can't listen on port <local-port>
Problem: This error indicates that the local port you've specified (local-port) is already in use by another process on your machine.
Diagnosis: * Check which process is using the port. * Linux/macOS: sudo lsof -i :<local-port> * Windows: netstat -ano | findstr :<local-port> (then use tasklist | findstr <PID> to find the process name).
Solution: 1. Choose a Different Local Port: The simplest solution is to pick an alternative local port that is not in use. For example, if 8080 is taken, try 8081 or 9000. 2. Terminate the Conflicting Process: If the conflicting process is something you don't need, you can terminate it. Be cautious, as terminating system processes can cause instability. 3. Let kubectl Choose a Port: If you omit the local-port (e.g., kubectl port-forward service/my-service :80 -n my-ns), kubectl will automatically select an available local port and print it to the console. This is often the quickest way to get a tunnel up.
Issue 2: error: services "<service-name>" not found or error: pods "<pod-name>" not found
Problem: kubectl cannot find the specified target resource (pod, deployment, or service).
Diagnosis: * Typo: Double-check the spelling of the resource name. * Incorrect Namespace: The resource might be in a different namespace than the one you're currently targeting or that you've specified with -n. * Resource Not Created/Running: The resource might not have been created yet, or it might be in a failed/terminated state.
Solution: 1. Verify Name and Type: Use kubectl get pods -n <namespace>, kubectl get deployments -n <namespace>, or kubectl get services -n <namespace> to list resources and confirm the correct name and type. 2. Specify Namespace: Always explicitly specify the namespace using -n <namespace> if the resource is not in the default namespace. 3. Check Resource Status: Ensure the target pod is Running and Ready or that the target service exists and its endpoints are healthy.
Issue 3: Error from server (NotFound): pods "<pod-name>" not found (even if kubectl get pods shows it)
Problem: This can sometimes happen if your kubeconfig context is pointing to the wrong cluster or if there's a transient API server issue. Less common but frustrating.
Diagnosis: * Current Context: Verify your current kubectl context: kubectl config current-context. * Access to Cluster: Ensure you can access the cluster's API server generally (e.g., kubectl get nodes).
Solution: 1. Switch Context: If you have multiple kubeconfig contexts, ensure you're using the correct one. kubectl config use-context <context-name>. 2. Retry: Sometimes, transient API server issues resolve themselves on retry. 3. Check kubectl Version: Ensure your kubectl client version is compatible with your cluster's API server version.
Issue 4: Error from server (Forbidden): pods "<pod-name>" is forbidden: User "system:anonymous" cannot portforward pods in namespace "<namespace>"
Problem: You lack the necessary RBAC (Role-Based Access Control) permissions to perform a port-forward operation on the target resource or in the specified namespace.
Diagnosis: * RBAC Policy: Your user account (or the service account kubectl is using) does not have the port-forward verb granted for pods in that namespace.
Solution: 1. Contact Administrator: You will likely need to ask your Kubernetes administrator to grant you the necessary permissions. The required permission is typically pods/portforward within the specific namespace. 2. Switch User/Context: If you have another user or kubeconfig context with elevated privileges, try using that.
Issue 5: E0723 10:30:45.123456 12345 portforward.go:xxx] error copying from local connection to remote stream: read tcp 127.0.0.1:8080->127.0.0.1:45678: read: connection reset by peer
Problem: The port-forward connection was established, but then unexpectedly terminated, often due to the remote pod/service becoming unavailable or unresponsive. This often manifests as "connection refused" or a similar error when you try to access localhost:<local-port>.
Diagnosis: * Pod Crash/Restart: The target pod might have crashed, been evicted, or restarted while the port-forward was active. * Application Crash: The application inside the pod might have crashed or stopped listening on the specified remote-port. * Network Instability: Transient network issues between your kubectl client and the Kubernetes node.
Solution: 1. Check Pod Status: Monitor the target pod's status: kubectl get pod <pod-name> -n <namespace> -w. Look for CrashLoopBackOff, Evicted, or Terminating states. 2. Examine Pod Logs: View logs for the target pod to identify application errors: kubectl logs <pod-name> -n <namespace>. 3. Check Application Port: Ensure the application inside the pod is actually listening on the remote-port you specified. You can exec into the pod and use netstat -tulnp (if installed) or ss -tulpn to verify. 4. Restart port-forward: If the pod has recovered, simply restart the kubectl port-forward command. 5. Target Service (if applicable): If you were forwarding to a specific pod or deployment, consider forwarding to the Service instead. This provides more resilience, as the Service's internal load balancer will route to a healthy pod even if one fails.
Issue 6: port-forward hangs or closes unexpectedly without clear error
Problem: The port-forward command starts, but no traffic flows, or it abruptly terminates without a specific error message.
Diagnosis: * Network Policies: Kubernetes network policies might be blocking traffic to/from the target pod/service, even for port-forward connections (though port-forward typically bypasses most network policies by routing through the API server). * Firewall on Local Machine: A firewall on your local machine might be blocking outgoing connections from kubectl or incoming connections to the local-port. * Firewall on Cluster Nodes: Less common for port-forward, but node firewalls could interfere.
Solution: 1. Check Network Policies: Consult your cluster administrator about any active network policies that might impact connectivity to the target resource. 2. Disable Local Firewall (Temporarily): For testing purposes, temporarily disable your local machine's firewall to rule it out. Re-enable immediately afterward. 3. Increased Verbosity: Run kubectl port-forward with increased verbosity (-v 7 or -v 8) to get more detailed debugging output from kubectl itself. This can sometimes reveal underlying connection issues. 4. Pod Readiness Probes: If a pod's readiness probe is failing, it might not be considered a valid target by a service, impacting the ability to forward to it effectively. Check kubectl describe pod <pod-name> -n <namespace>.
By systematically diagnosing these common issues, you can quickly identify the root cause of kubectl port-forward problems and restore your ability to debug and interact with your Kubernetes services effectively. The key is to check the resource's existence and status, verify permissions, and ensure no local or cluster-level networking configurations are impeding the tunnel.
8. The Broader Context: API Management and Gateways
While kubectl port-forward is an exceptionally versatile and indispensable tool for development and debugging within a Kubernetes environment, it's essential to recognize its specific scope and limitations. Port-forward excels at providing temporary, direct, and isolated access for individual users or local applications. However, it is fundamentally an ad-hoc mechanism and not designed for the robust, scalable, and secure external exposure required by production-grade applications and APIs. For those scenarios, a more comprehensive solution is needed: an API Gateway and an API management platform.
An API Gateway serves as a crucial component in modern microservices architectures. It acts as a single entry point for all external API calls, abstracting away the complexities of the backend services. Instead of clients needing to know the individual addresses and configurations of multiple microservices, they interact solely with the API Gateway. This gateway then intelligently routes requests to the appropriate backend services, often performing additional functions like authentication, authorization, rate limiting, traffic management, caching, and analytics. It's the public face of your APIs, providing a stable, secure, and managed gateway for external consumers.
Consider the distinct roles: kubectl port-forward is like a secret, temporary back door for a technician to inspect a specific room in a large building. An API Gateway, on the other hand, is the grand main entrance, complete with security personnel, a concierge, and clear signage, designed to handle thousands of visitors smoothly and securely every day.
For more comprehensive and scalable API management, especially when dealing with production-grade APIs and integrating advanced functionalities like AI models, platforms like APIPark become indispensable. While kubectl port-forward provides a direct tunnel for debugging and local development, APIPark offers an all-in-one AI gateway and API developer portal that addresses the complex needs of managing APIs across their entire lifecycle, from design and publication to invocation and decommission.
APIPark stands out as an open-source (Apache 2.0 licensed) solution designed to help developers and enterprises manage, integrate, and deploy both traditional REST services and a rapidly expanding array of AI models with unparalleled ease and efficiency. It significantly simplifies the exposure and governance of APIs that are built atop your Kubernetes services. For example, once your backend API services are stably running in Kubernetes (perhaps exposed via ClusterIP services internally), APIPark can sit in front of them, acting as the intelligent gateway that handles all external client interactions.
Here’s how APIPark extends beyond the capabilities of kubectl port-forward and complements your Kubernetes deployments:
- Unified
APIFormat for AI Invocation: APIPark standardizes the request data format across diverse AI models, ensuring that changes in AI models or prompts do not ripple through your application or microservices. This is crucial for integrating the rapidly evolving world of AI into productionAPIs without constant refactoring. - Prompt Encapsulation into REST
API: Users can quickly combine AI models with custom prompts to create new, specializedAPIs (e.g., sentiment analysis, translation, data analysisAPIs). APIPark turns these complex AI interactions into simple, callable REST endpoints, making AI services consumable by any application. - End-to-End
APILifecycle Management: Beyond just routing, APIPark assists with managing the entire lifecycle ofAPIs, including design, publication, invocation, and decommission. It helps regulateAPImanagement processes, manage traffic forwarding, load balancing, and versioning of publishedAPIs. This level of control is vital for maintaining robust and evolvingAPIecosystems. APIService Sharing within Teams: The platform allows for the centralized display of allAPIservices, making it easy for different departments and teams to discover, understand, and use the requiredAPIservices, fostering collaboration and reuse.- Independent
APIand Access Permissions for Each Tenant: APIPark enables the creation of multiple teams (tenants), each with independent applications, data, user configurations, and security policies. This multi-tenancy model is ideal for larger organizations or SaaS providers who need to securely share underlying infrastructure while maintaining strict isolation for different client groups. APIResource Access Requires Approval: APIPark can enforce subscription approval features, ensuring that callers must subscribe to anAPIand await administrator approval before they can invoke it. This prevents unauthorizedAPIcalls and potential data breaches, adding a critical layer of security thatport-forwardinherently lacks.- Performance Rivaling Nginx: With efficient architecture, APIPark boasts impressive performance, capable of achieving over 20,000 TPS with modest hardware, and supports cluster deployment to handle large-scale traffic. This robust performance is a non-negotiable requirement for any production
API Gateway. - Detailed
APICall Logging and Powerful Data Analysis: APIPark provides comprehensive logging, recording every detail of eachAPIcall. This enables businesses to quickly trace and troubleshoot issues, ensuring system stability. Furthermore, it analyzes historical call data to display long-term trends and performance changes, aiding in preventive maintenance.
Deploying APIPark is remarkably simple, designed for quick integration into existing infrastructures, often with a single command line. This ease of deployment makes it accessible for organizations looking to quickly enhance their API governance capabilities. While kubectl port-forward provides immediate, direct access for tactical needs, APIPark offers the strategic, scalable, and secure gateway and management platform necessary for powering sophisticated API and AI-driven applications in production. It represents the robust layer of management and security that external consumers expect, transforming a collection of internal services into a coherent, manageable, and performant API ecosystem.
9. Conclusion
Throughout this comprehensive guide, we've explored kubectl port-forward not just as a command, but as an essential bridge connecting your local development environment to the intricate world within your Kubernetes cluster. We began by demystifying the fundamental networking concepts of Kubernetes, illustrating why direct access to internal services is a challenge by design and how port-forward elegantly solves this. From understanding its core definition as a secure, temporary tunnel to dissecting its command-line anatomy, we've laid a solid foundation for its effective use.
Through practical, step-by-step examples, we've demonstrated how to forward ports to individual pods, leverage the stability of deployments and services, manage network interfaces with the --address flag, and even establish multiple tunnels simultaneously. These hands-on scenarios underscore kubectl port-forward's versatility for tasks ranging from local development and real-time debugging to accessing internal APIs and databases. We delved into advanced use cases, showcasing its utility for connecting local IDEs, script automation, and emphasized crucial security considerations that distinguish its temporary nature from permanent exposure methods.
Furthermore, we placed kubectl port-forward within the broader context of Kubernetes service exposure, offering a detailed comparison with NodePort, LoadBalancer, and Ingress. This comparison highlighted that while port-forward is an indispensable tactical tool for developers and operators, it is not a production solution for exposing APIs to external consumers. For that, robust API Gateways and comprehensive API management platforms are required. In this context, we introduced APIPark as a powerful, open-source AI gateway and API management platform that provides the necessary features for secure, scalable, and intelligent API governance in production environments, effectively complementing the ad-hoc capabilities of port-forward.
Ultimately, mastering kubectl port-forward empowers you to navigate the complexities of Kubernetes with greater agility and efficiency. It significantly shortens development cycles, streamlines debugging workflows, and provides immediate insight into your containerized applications, making it an indispensable asset in any Kubernetes professional's toolkit. By understanding its strengths, limitations, and how it fits into the larger API management landscape, you are better equipped to build, operate, and troubleshoot cloud-native applications effectively and securely.
Frequently Asked Questions (FAQs)
1. What is the primary purpose of kubectl port-forward?
The primary purpose of kubectl port-forward is to create a secure, temporary, bidirectional network tunnel from your local machine to a specific port on a resource (pod, deployment, or service) inside your Kubernetes cluster. This allows developers and operators to access internal services as if they were running on localhost, facilitating local development, debugging, and ad-hoc troubleshooting without exposing the services publicly.
2. Is kubectl port-forward suitable for exposing production APIs to external users?
No, kubectl port-forward is explicitly not suitable for exposing production APIs or web services to external users. It's a temporary, single-user, local-machine-centric tool designed for development and debugging. Production APIs require stable, scalable, secure, and managed exposure mechanisms like Kubernetes Ingress (for HTTP/HTTPS traffic), LoadBalancer services, or dedicated API Gateways (like APIPark) that offer features such as load balancing, SSL termination, traffic management, authentication, and monitoring.
3. What's the difference between kubectl port-forward and kubectl proxy?
While both commands create a local connection, their purposes differ significantly. kubectl port-forward creates a tunnel to a specific application port within a pod or service, allowing you to interact with your deployed applications. kubectl proxy, on the other hand, exposes the Kubernetes API server on your localhost, allowing you to interact with the Kubernetes control plane itself (e.g., viewing cluster resources through a local web UI).
4. Can I use kubectl port-forward to access a database running in Kubernetes from my local machine?
Yes, this is one of the most common and powerful use cases for kubectl port-forward. You can map a local port to the database's internal port (e.g., 5432 for PostgreSQL, 3306 for MySQL) and then connect your local database client (like DBeaver, DataGrip, or CLI tools) to localhost:<local-port>. This provides secure, direct access to the database without needing to expose it publicly.
5. What happens if the pod I'm forwarding to restarts or dies?
If you're using kubectl port-forward to target a specific pod/<pod-name> or deployment/<deployment-name>, and the particular pod instance being forwarded to restarts or dies, your port-forward connection will terminate. To mitigate this and achieve more stable access, it's generally recommended to forward to a service/<service-name>. When forwarding to a service, Kubernetes' internal load balancer will automatically route your traffic to a new, healthy backend pod if the original one fails, maintaining your port-forward connection as long as the service has at least one ready endpoint.
🚀You can securely and efficiently call the OpenAI API on APIPark in just two steps:
Step 1: Deploy the APIPark AI gateway in 5 minutes.
APIPark is developed based on Golang, offering strong product performance and low development and maintenance costs. You can deploy APIPark with a single command line.
curl -sSO https://download.apipark.com/install/quick-start.sh; bash quick-start.sh

In my experience, you can see the successful deployment interface within 5 to 10 minutes. Then, you can log in to APIPark using your account.

Step 2: Call the OpenAI API.