Master kubectl port forward: Access Services Locally


In the intricate world of Kubernetes, where applications are meticulously orchestrated across a distributed cluster, developers frequently encounter a common challenge: how to efficiently access and interact with individual services running within this isolated environment from their local machine. Debugging, local testing, and rapid iteration become significantly more cumbersome when services are hidden behind layers of network abstraction. This is precisely where kubectl port-forward emerges as an indispensable tool, acting as a secure, temporary gateway that bridges the gap between your local development environment and the remote Kubernetes cluster.
kubectl port-forward isn't merely a command; it's a developer's secret weapon, providing a direct, unhindered conduit to specific services, pods, or deployments. It eliminates the need for complex ingress configurations or external service exposures during the development phase, allowing engineers to connect to a database, test a new API endpoint, or inspect a running microservice as if it were running on localhost. This article delves deep into the power and versatility of kubectl port-forward, exploring its fundamental mechanics, advanced applications, common troubleshooting scenarios, and its rightful place within the broader Kubernetes networking landscape. We will uncover how this command enables a fluid development workflow, discuss its underlying network architecture, and position it against other service exposure methods, ultimately equipping you with the expertise to master this critical Kubernetes utility.
The Foundation: Understanding Kubernetes Networking
To truly appreciate the utility of kubectl port-forward, one must first grasp the foundational principles of Kubernetes networking. Kubernetes, by design, champions a flat network space where all pods can communicate with each other without Network Address Translation (NAT) and where agents on a node (like Kubelet) can communicate with all pods on that node. However, this internal network is inherently isolated from the external world.
At its core, Kubernetes employs a distinct network model built upon several key abstractions:
- Pods: The smallest deployable units, each receiving its own unique IP address within the cluster. These IP addresses are ephemeral; they change if a pod restarts or is rescheduled. This transient nature makes direct IP-based access from outside the cluster unreliable and impractical.
- Services: An abstraction layer that defines a logical set of pods and a policy by which to access them. Services provide a stable, consistent IP address and DNS name within the cluster, even as the underlying pods come and go. Services act as internal load balancers, distributing traffic among their matching pods. By default, Services are of
ClusterIPtype, meaning they are only reachable from within the cluster. - Endpoints: Managed by the Kubernetes control plane, Endpoints objects store the IP addresses and ports of the pods backing a service. When a service is created, Kubernetes continuously updates its associated Endpoints object as pods matching the service's selector are created or destroyed.
- Ingress: An API object that manages external access to services within a cluster, typically HTTP. Ingress provides features like host-based and path-based routing, SSL termination, and more, usually implemented by an Ingress Controller (e.g., Nginx Ingress Controller, Traefik).
The isolation inherent in this model offers significant security and operational benefits. Pods are encapsulated, preventing direct exposure of internal components. Services provide a stable internal interface, decoupling consumers from the churn of individual pod lifecycles. However, this very isolation creates a hurdle for developers who need immediate, direct access to a specific service or pod for local development, debugging, or testing.
Consider a scenario where you've deployed a new microservice in your Kubernetes cluster. This service exposes a RESTful API on port 8080. If it's a ClusterIP service, you cannot simply curl its IP address from your laptop. Even if you knew the IP of a specific pod running your microservice, that IP is internal to the cluster's network and inaccessible directly. This is where kubectl port-forward steps in, offering a clever, secure workaround to temporarily punch a hole through this isolation, acting as a personal, temporary network gateway directly to your target. Without it, developers would be forced into cumbersome deployment cycles or complex external exposure mechanisms, slowing down the development process considerably.
Demystifying kubectl port-forward: The Core Mechanism
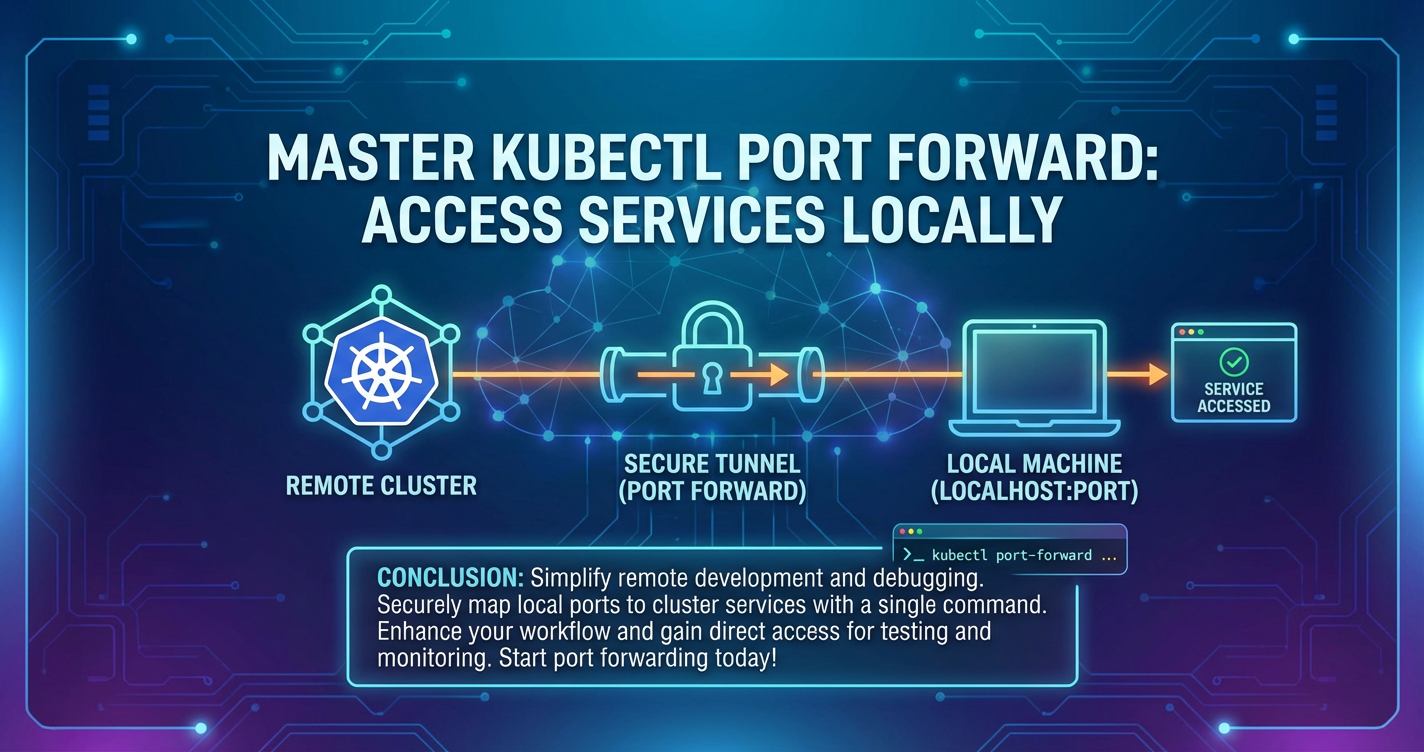
At its heart, kubectl port-forward is a powerful command-line utility that creates a secure, bidirectional TCP tunnel between your local machine and a specified port on a pod, service, or deployment within your Kubernetes cluster. It effectively establishes a temporary, dedicated network gateway for your local environment, making remote services appear as if they are running on localhost.
What it is and How it Works
Imagine you have a Kubernetes pod named my-app-789abcde-fghij running a web server on port 80. You want to access this web server from your local browser without exposing it globally. kubectl port-forward allows you to map a local port (e.g., 8080) to the remote port (80) of that specific pod. When you navigate to http://localhost:8080 on your machine, kubectl intercepts that request, securely forwards it through the Kubernetes API server to the target pod, and then relays the response back to your browser.
The process unfolds in several key steps:
- Client Request: You execute the
kubectl port-forwardcommand on your local machine. - API Server as Proxy:
kubectlestablishes a secure connection with the Kubernetes API server. The API server then acts as an intermediary, essentially creating a proxy. - Kubelet's Role: The API server instructs the
kubeletagent running on the node where the target pod resides to open a connection to the specified port within that pod. - TCP Tunnel: A direct TCP tunnel is established from your local machine, through the API server and
kubelet, to the target port within the pod. - Local Access: Any traffic sent to the specified local port is then forwarded through this tunnel to the pod's port, and the pod's responses are sent back through the same tunnel to your local machine.
This entire process is secure because it leverages the existing API server authentication and authorization mechanisms (RBAC). You must have the necessary permissions to access and port-forward to the target resource. Furthermore, the connection remains local to your machine unless explicitly configured otherwise, preventing unintended external exposure.
Basic Syntax and Breakdown of Arguments
The most fundamental form of the kubectl port-forward command targets a specific pod:
kubectl port-forward <resource-type>/<resource-name> <local-port>:<remote-port>
Let's break down each component:
<resource-type>: This specifies the type of Kubernetes resource you want to forward to. Common types includepod,service, anddeployment.<resource-name>: The exact name of the target resource (e.g.,my-app-789abcde-fghijfor a pod, ormy-servicefor a service). You can find pod names usingkubectl get pods. For instance,kubectl get pods -l app=my-appwould list all pods associated with themy-applabel.<local-port>: This is the port on your local machine that you want to open. You can choose any available port on your system. For example, 8080, 3000, or 5000 are common choices for development. If this port is already in use,kubectlwill report an error.<remote-port>: This is the port that the application inside the pod is listening on. It's crucial that this matches the actual port your application is exposing. This could be a container port defined in your pod specification or atargetPortdefined in your Service specification.
Illustrative Example: Forwarding a Simple Web Server
Let's walk through a practical example. We'll deploy a simple Nginx web server and then port-forward to it.
- Deploy a Nginx Pod: First, create a deployment for Nginx:
yaml # nginx-deployment.yaml apiVersion: apps/v1 kind: Deployment metadata: name: nginx-deployment labels: app: nginx spec: replicas: 1 selector: matchLabels: app: nginx template: metadata: labels: app: nginx spec: containers: - name: nginx image: nginx:latest ports: - containerPort: 80Apply this deployment:bash kubectl apply -f nginx-deployment.yamlVerify the pod is running:bash kubectl get pods -l app=nginx # Expected output similar to: # NAME READY STATUS RESTARTS AGE # nginx-deployment-5c689d89b8-abcdef 1/1 Running 0 2mNote down the full pod name, e.g.,nginx-deployment-5c689d89b8-abcdef. - Execute
kubectl port-forward: Now, forward a local port (e.g., 8080) to the Nginx container's port (80):bash kubectl port-forward pod/nginx-deployment-5c689d89b8-abcdef 8080:80 # Expected output: # Forwarding from 127.0.0.1:8080 -> 80 # Handling connection for 8080This command will run in your terminal, actively maintaining the tunnel. - Verify Local Access: Open your web browser and navigate to
http://localhost:8080, or usecurl:bash curl http://localhost:8080You should see the default Nginx welcome page HTML. This confirms that your local machine is successfully communicating with the Nginx server running inside the Kubernetes pod, thanks to the temporary gateway established byport-forward.
The transient nature of this connection is key. As soon as you terminate the kubectl port-forward command (e.g., by pressing Ctrl+C), the tunnel is closed, and local access to the service ceases. This makes it perfect for debugging and testing without leaving open vulnerabilities.
Advanced Usage: Expanding Your port-forward Toolkit
While the basic kubectl port-forward command is powerful, mastering its advanced features and targeting options can significantly enhance your Kubernetes development workflow. These techniques allow for greater flexibility, convenience, and control over how you interact with your cluster's services.
Targeting Services Directly
Often, you don't care about a specific pod instance; you want to access any healthy pod associated with a particular Kubernetes Service. This is where forwarding to a Service directly becomes incredibly useful, leveraging Kubernetes' built-in load balancing.
kubectl port-forward service/my-service 8080:80
When you target a Service instead of a Pod, kubectl consults the service's endpoints and automatically selects one of the healthy backing pods to establish the tunnel. If that pod goes down, or if you restart the port-forward command, kubectl will likely pick another available pod. This is often preferred because:
- Abstraction: You don't need to know the specific, ephemeral pod name. You rely on the stable Service name.
- Load Balancing (Implicit): While
port-forwarditself creates a direct tunnel to one pod, it respects the service's health checks. If the initially selected pod becomes unhealthy, subsequentport-forwardinvocations would pick a different healthy pod. - Use Cases: Accessing a database service (e.g.,
service/postgres), a central API gateway service that fronts multiple microservices, or any other stateless service where any healthy instance will suffice.
For example, if you have a my-app-service exposed internally on port 80, and you want to debug its API locally:
kubectl port-forward service/my-app-service 9000:80
Now, http://localhost:9000/api/v1/status will reach one of the pods backing my-app-service. This approach streamlines interactions, especially in environments with frequent pod churn.
Forwarding Multiple Ports Simultaneously
Sometimes, an application or microservice might expose multiple ports for different functionalities (e.g., an application port and a metrics port). kubectl port-forward allows you to forward multiple such ports in a single command.
kubectl port-forward pod/my-app-pod 8080:80 9090:90
In this command, local port 8080 maps to remote port 80, and local port 9090 maps to remote port 90, all through the same tunnel to my-app-pod. This is particularly useful when developing or debugging complex applications that have several interfaces. For instance, you might forward a main web API on one port and a Prometheus metrics endpoint on another, allowing your local monitoring tools to scrape data directly.
Backgrounding the Process
By default, kubectl port-forward runs in the foreground, tying up your terminal. For continuous local access while you work on other tasks, you'll want to run it in the background.
- Using
&for immediate backgrounding: The simplest way to runport-forwardin the background on Linux/macOS is to append an ampersand (&) to the command:bash kubectl port-forward service/my-app-service 8080:80 &This will immediately return control to your terminal while theport-forwardprocess runs in the background. You can check background jobs withjobsand bring them back to the foreground withfg %<job-number>. - Using
nohupfor more robust backgrounding: For a more robust solution that persists even if your terminal session is disconnected, usenohup:bash nohup kubectl port-forward service/my-app-service 8080:80 > /dev/null 2>&1 &This ensures that the process continues running even if you close the terminal.> /dev/null 2>&1redirects all output to/dev/nullto preventnohupfrom creating anohup.outfile. To stop such a process, you'd typically need to find its PID usingps aux | grep 'kubectl port-forward'and thenkill <PID>.
Specifying a Namespace
In multi-tenant Kubernetes clusters or environments with many applications, resources are often organized into namespaces. You must specify the namespace if the target resource is not in your current kubectl context's namespace.
kubectl port-forward -n my-namespace pod/my-app-pod 8080:80
This ensures that kubectl looks for my-app-pod specifically within my-namespace. Forgetting this is a common cause of "NotFound" errors.
Binding to a Specific Local IP Address
By default, kubectl port-forward binds to 127.0.0.1 (localhost) on your machine. This means only processes running on your local machine can access the forwarded port. If you want to expose the forwarded port to other devices on your local network (e.g., a colleague's machine, or a separate VM on your network), you can specify the --address flag.
kubectl port-forward --address 0.0.0.0 service/my-app-service 8080:80
Using --address 0.0.0.0 will bind the local port to all network interfaces on your machine, making it accessible from other machines on your local network (subject to your local firewall rules). You could also specify a particular network interface's IP address if you have multiple. While useful, remember this expands the scope of access, so use it with caution and awareness of potential security implications.
Automatic Port Assignment
In rare cases, you might not care about the specific local port, and just want kubectl to pick any available port. You can achieve this by specifying 0 or omitting the local port for the first entry.
kubectl port-forward pod/my-app-pod :80
# Or
kubectl port-forward pod/my-app-pod 0:80
kubectl will then print which local port it chose, for example: Forwarding from 127.0.0.1:49152 -> 80. This is generally less common but can be handy for automated scripts or when you need a quick, throwaway connection.
By leveraging these advanced capabilities, developers can sculpt kubectl port-forward to fit a wide array of development and debugging scenarios, making it an even more integral part of their daily Kubernetes interaction.
Deep Dive: The Mechanics and Network Flow
Understanding the precise sequence of events and the roles of various Kubernetes components during a kubectl port-forward operation provides invaluable insight into its robustness and security. It's more than just a simple command; it's a sophisticated orchestration of network connections.
The Role of the API Server
The Kubernetes API server (kube-apiserver) is the central control plane component, handling all RESTful API requests, validating objects, and updating the state of the cluster. In the context of port-forward, the API server plays a critical role, not merely as an orchestrator but as a secure proxy and connection manager.
When you execute kubectl port-forward, your kubectl client doesn't directly connect to the target pod's node or IP. Instead, it initiates an authenticated and authorized connection to the API server. kubectl sends a request to the API server, instructing it to establish a port-forward connection to a specific pod and port. This request includes your credentials, which the API server validates against its RBAC policies to ensure you have permission to access and forward traffic to that particular resource. This initial handshake leveraging the API server's authentication is a cornerstone of port-forward's security.
Kubelet's Involvement
Once the API server receives and authenticates the port-forward request, it doesn't directly connect to the pod itself. Instead, it delegates the task to the kubelet agent running on the specific node where the target pod resides. Each node in a Kubernetes cluster runs a kubelet, which is responsible for managing the pods on that node.
The API server communicates with the kubelet over a secure HTTPS connection. It sends instructions to the kubelet to establish a local connection to the specified port within the target pod. The kubelet then creates a socket connection to the pod's network namespace and port, effectively bridging the API server's connection to the application running inside the pod.
TCP Tunneling Explained
The core mechanism of kubectl port-forward is TCP tunneling. Once the kubelet establishes its connection to the pod, a bidirectional TCP stream is created:
- Client to API Server: Your local
kubectlclient maintains a TCP connection to the API server. - API Server to Kubelet: The API server maintains another TCP connection to the
kubeleton the target node. - Kubelet to Pod: The
kubeletmaintains a third TCP connection to the specific port within the target pod.
These three connections are effectively chained together to form a secure, end-to-end TCP tunnel. When you send data to your local forwarded port (e.g., localhost:8080), that data travels along this chain:
- It's picked up by
kubectlon your machine. kubectlsends it over its secure connection to the API server.- The API server receives it and forwards it over its secure connection to the
kubelet. - The
kubeletreceives it and injects it directly into the target pod's network namespace, reaching the application listening on the specifiedremote-port.
Responses from the application follow the reverse path back to your local machine. This entire process effectively encapsulates your local network traffic within a secure channel, making it appear as if your local machine is directly connected to the pod's network interface. It's an ingenious way to create a temporary, dedicated network gateway without altering the cluster's network configuration or exposing services externally. This encapsulation is crucial for maintaining the integrity and isolation of the Kubernetes network.
Security Context
The security implications of kubectl port-forward are important to understand:
- RBAC Enforcement: As mentioned,
port-forwardrespects Kubernetes Role-Based Access Control (RBAC). A user must have theport-forwardverb for pods or services in the target namespace. If a user lacks these permissions, the command will fail with an authorization error. - Limited Scope: The connection is generally limited to the local machine where
kubectlis running (unless0.0.0.0or a specific IP is used with--address). It does not automatically expose the service to the internet or other machines on the same local network by default. This is a critical distinction from other exposure mechanisms likeNodePort,LoadBalancer, orIngress. - No Firewall Bypass (Internal): While
port-forwardcreates a tunnel, it doesn't bypass internal network policies or firewalls within the cluster. If a NetworkPolicy prevents communication between thekubeletand the target pod on that specific port,port-forwardmight still encounter issues. - HTTPS for API Communication: All communication between
kubectl, the API server, andkubeletis secured via HTTPS and TLS, ensuring the confidentiality and integrity of the forwarded data.
In essence, kubectl port-forward provides a secure, controlled, and temporary way to access internal Kubernetes services, making it an indispensable tool for development and debugging without compromising the cluster's overall security posture. The intricate dance between kubectl, the API server, and kubelet forms this robust, temporary gateway for your localized interaction.
APIPark is a high-performance AI gateway that allows you to securely access the most comprehensive LLM APIs globally on the APIPark platform, including OpenAI, Anthropic, Mistral, Llama2, Google Gemini, and more.Try APIPark now! 👇👇👇
Troubleshooting Common kubectl port-forward Issues
Even with a deep understanding of kubectl port-forward, you might encounter issues. Troubleshooting effectively requires knowing common pitfalls and systematic approaches to diagnose them. Here are some of the most frequent problems and their solutions:
"Error: unable to listen on any of the requested ports"
This is perhaps the most common error. It means the local-port you specified is already in use by another process on your machine.
Diagnosis: * Check existing processes: * Linux/macOS: Use lsof -i :<local-port> (e.g., lsof -i :8080) to see which process is using the port. * Windows: Use netstat -ano | findstr :<local-port> to find the PID, then tasklist | findstr <PID> to identify the process. * Check other kubectl port-forward processes: You might have another port-forward command running in a different terminal or in the background.
Solutions: 1. Choose a different local port: Simply pick another available port (e.g., 8081 instead of 8080). 2. Terminate the conflicting process: If it's a development server you forgot to shut down, terminate it. If it's another port-forward instance, find and kill it (e.g., kill <PID>). 3. Allow kubectl to choose: In some cases, you can let kubectl select a random available port by using 0 or an empty string for the local port (kubectl port-forward pod/my-pod :80).
"Error from server (NotFound): pods '...' not found"
This indicates that kubectl cannot locate the pod you are trying to forward to.
Diagnosis: * Incorrect pod name: Pod names often include unique hashes (e.g., my-app-789abcde-fghij). Ensure you're using the exact, full name. * Incorrect namespace: If the pod is in a different namespace than your current context, you need to specify it with -n <namespace-name>. * Pod not running: The pod might be in a Pending, ContainerCreating, Error, or CrashLoopBackOff state. port-forward requires the pod to be Running.
Solutions: 1. Verify pod name and status: Run kubectl get pods -n <namespace-name> to get the exact pod name and check its STATUS. 2. Specify the namespace: Always use -n <namespace-name> if the pod isn't in your current default namespace. 3. Wait for the pod: If the pod is still starting, wait until its STATUS is Running. 4. Debug the pod: If the pod is not running or crashing, investigate its logs (kubectl logs pod/<pod-name> -n <namespace>) and describe its state (kubectl describe pod/<pod-name> -n <namespace>) to fix the underlying issue.
"Error from server (NotFound): services '...' not found"
Similar to the pod error, this occurs when the specified service cannot be found.
Diagnosis: * Incorrect service name: Double-check the spelling of the service name. * Incorrect namespace: Services are also scoped by namespace.
Solutions: 1. Verify service name and namespace: Run kubectl get services -n <namespace-name> to list services and confirm the name. 2. Specify the namespace: Use -n <namespace-name> as needed.
"Unable to connect to the server: dial tcp ..."
This error indicates a problem with kubectl connecting to your Kubernetes cluster's API server itself.
Diagnosis: * Cluster unreachable: Your machine might not have network access to the cluster. * Incorrect KUBECONFIG context: kubectl might be configured to talk to the wrong cluster or an invalid cluster. * API server down: The Kubernetes API server itself might be experiencing issues.
Solutions: 1. Check network connectivity: Ping the cluster's API server endpoint (if you know it) or ensure your VPN/network connection to the cluster is active. 2. Verify kubectl context: Run kubectl config current-context to see which cluster kubectl is configured to connect to. Use kubectl config use-context <context-name> to switch to the correct one if necessary. 3. Cluster health check: If you have cluster administrator access, check the health of the API server.
Connection Refused / No Data Received on Localhost
This is a tricky one because the port-forward command itself might appear successful, but when you try to access localhost:<local-port>, you get a connection refused or no response.
Diagnosis: * Application not running inside the pod: The application intended to listen on remote-port might not be started, or it might have crashed. * Application listening on localhost (127.0.0.1) inside the pod: This is a very common pitfall! If your application inside the pod is explicitly configured to listen only on 127.0.0.1 (localhost), kubelet won't be able to connect to it from outside the pod's localhost interface. Applications typically need to listen on 0.0.0.0 to accept connections from any IP address within the pod's network namespace. * Incorrect remote-port: The port you specified as remote-port might not be the actual port the application is listening on. * Internal pod network policies: A Kubernetes NetworkPolicy might be blocking ingress traffic to the pod on that specific port, even from the kubelet's connection. * Application taking time to start: Some applications have a lengthy startup process.
Solutions: 1. Check pod logs: Run kubectl logs pod/<pod-name> -n <namespace> to see if the application started successfully, if there are any error messages, or if it's still initializing. 2. Verify application bind address: Access the pod directly (if possible, e.g., kubectl exec -it pod/<pod-name> -- /bin/bash) and use netstat -tulnp or ss -tulnp to check what IP addresses and ports the application is listening on. Crucially, ensure it's listening on 0.0.0.0 (all interfaces) and not 127.0.0.1 (localhost only). If it's listening on 127.0.0.1, you'll need to reconfigure your application to bind to 0.0.0.0. 3. Confirm remote-port: Verify the application's configuration or code to ensure the remote-port matches what it's truly exposing. 4. Check NetworkPolicies: If NetworkPolicies are in use, consult cluster administrators or the policy definitions to ensure they permit traffic to the target pod's port.
By methodically addressing these common troubleshooting scenarios, you can swiftly resolve issues with kubectl port-forward and maintain a smooth development flow, leveraging this essential gateway for your Kubernetes interactions.
Beyond port-forward: When to Use Other Kubernetes Exposure Mechanisms
While kubectl port-forward is an invaluable tool for local development and debugging, it's crucial to understand its limitations and when to opt for other Kubernetes service exposure mechanisms. port-forward creates a temporary, single-client tunnel to a specific internal resource, unsuitable for production traffic, multi-user access, or high availability. For broader, more permanent, and feature-rich exposure of your services, Kubernetes offers several robust alternatives.
kubectl port-forward's Niche
- Purpose: Primarily for individual developer workflow, local testing, and debugging. It creates a personal, transient gateway to an internal service.
- Scope: Limited to the local machine where the
kubectlcommand is running (or a specific local IP). - Longevity: Temporary; the tunnel closes when the command is terminated.
- Security: Leverages
kubectl's RBAC for authentication, but its local nature means it's not designed for broader security controls like WAFs or advanced authorization.
NodePort
NodePort is a basic service type that makes a service accessible on a static port on every node's IP address in the cluster.
- How it works: When a service is declared as
type: NodePort, Kubernetes allocates a port from a predefined range (default 30000-32767) on each node. Any traffic hitting<NodeIP>:<NodePort>will be routed to the service. - Use cases: Useful for simple demonstrations, exposing services in development/testing environments, or when an external load balancer isn't available or desired.
- Disadvantages:
- Port range limitations: Restricted to a specific port range, which can lead to conflicts.
- Node IP dependency: Clients must know the IP address of at least one node. If nodes change, access might be disrupted.
- Basic load balancing: Relies on external load balancing if high availability is needed.
- No HTTP routing: Simply forwards TCP traffic; no intelligence for HTTP host/path routing.
- Comparison to
port-forward:NodePortprovides a persistent, cluster-wide external exposure via node IPs, whereasport-forwardis a temporary, local tunnel to a single resource.
LoadBalancer
The LoadBalancer service type integrates with cloud provider infrastructure to provision an external network load balancer (e.g., AWS ELB, GCP Load Balancer).
- How it works: When a service is declared as
type: LoadBalancer, the cloud provider automatically provisions an external IP address and a dedicated load balancer that forwards traffic to the service's pods. - Use cases: Ideal for exposing services directly to the internet or an external network with a stable, public IP address. It's often used for core backend APIs that require direct external access.
- Advantages: Provides a single, stable IP; handles traffic distribution and health checks; integrates seamlessly with cloud networking.
- Disadvantages:
- Cloud provider specific: Only works in cloud environments with
LoadBalancerintegration. - Cost: Cloud load balancers incur costs.
- Layer 4 (TCP) focus: Primarily for TCP/UDP load balancing, less intelligent for HTTP/HTTPS routing compared to Ingress.
- Cloud provider specific: Only works in cloud environments with
- Comparison to
port-forward:LoadBalanceris a production-grade external gateway for stable, high-availability access, whileport-forwardis a developer-focused direct connection.
Ingress
Ingress is a Kubernetes API object that manages external HTTP/HTTPS access to services within a cluster. It acts as a routing layer, typically implemented by an Ingress Controller.
- How it works: An
Ingressresource defines rules for routing external HTTP/HTTPS traffic (based on hostnames or URL paths) to internal services. An Ingress Controller (e.g., Nginx Ingress, Traefik, GKE Ingress) is then deployed in the cluster to fulfill these rules, often provisioning aLoadBalancerorNodePortbehind the scenes. - Use cases: Exposing multiple services through a single external IP/hostname; providing advanced routing (e.g.,
api.example.com/userstousers-service,api.example.com/productstoproducts-service); SSL termination. This is the standard way to expose web applications and RESTful APIs in a production environment. - Advantages: Centralized routing; host/path-based rules; SSL termination; often more cost-effective than multiple
LoadBalancerservices. - Disadvantages: Requires an Ingress Controller to be deployed and managed. Basic Ingress lacks advanced API gateway features.
Introduction to API Gateways
While Ingress provides foundational HTTP routing, a full-fledged API gateway takes external service exposure and API management to the next level. An API gateway sits at the edge of your microservices architecture, acting as a single entry point for all external API calls. It can incorporate or replace an Ingress Controller, offering a richer set of features essential for managing modern API ecosystems.
API gateways provide crucial functionalities such as: * Authentication and Authorization: Centralized enforcement of security policies (e.g., OAuth, JWT validation). * Rate Limiting and Throttling: Protecting backend services from overload and ensuring fair usage. * Request/Response Transformation: Modifying API requests or responses on the fly (e.g., translating formats, adding headers). * Traffic Management: Advanced routing capabilities like A/B testing, canary deployments, and circuit breakers. * Centralized Logging and Monitoring: Comprehensive insights into API usage and performance. * Developer Portals: Self-service environments for API discovery, documentation, and subscription management.
For organizations dealing with a proliferation of APIs, especially those involving AI models, a robust API gateway is not just an option but a necessity. Platforms like APIPark offer comprehensive solutions for managing the entire API lifecycle. APIPark, for instance, functions as an open-source AI gateway and API developer portal, designed to easily manage, integrate, and deploy both AI and REST services. It unifies API formats for AI invocation, encapsulates prompts into REST APIs, and provides end-to-end API lifecycle management with features like sharing within teams, tenant isolation, and performance rivaling Nginx. While kubectl port-forward provides a direct local pathway for a developer to interact with a single service, an API gateway like APIPark serves as the sophisticated, scalable, and secure gateway for all external consumers to access a managed portfolio of APIs. It's the difference between a personal temporary bridge and a full-scale, well-managed international airport.
Service Mesh (e.g., Istio, Linkerd)
A service mesh provides a dedicated infrastructure layer for handling service-to-service communication within the cluster.
- How it works: It uses sidecar proxies (e.g., Envoy) deployed alongside each application pod to intercept and manage all network traffic between services.
- Use cases: Advanced traffic management (e.g., fine-grained routing, retries, timeouts), policy enforcement (mutual TLS, authorization), and observability (metrics, tracing, logging) within the cluster. Often used in conjunction with Ingress or API Gateways for external traffic.
- Comparison to
port-forward: A service mesh adds a sophisticated gateway layer for intra-cluster communication, enhancing reliability and observability, whileport-forwardis for direct developer access.
Comparison Table
To summarize the various service exposure mechanisms:
| Feature | kubectl port-forward |
NodePort | LoadBalancer | Ingress Controller / API Gateway | Service Mesh |
|---|---|---|---|---|---|
| Purpose | Local Dev/Debug | Basic External Access | Stable External IP | Advanced HTTP/HTTPS Routing, API Management | Intra-cluster Traffic Management |
| Scope of Access | Local machine only | Cluster Nodes' IPs | Cloud Provider IP | Domain/Path-based, external | Internal Cluster Traffic |
| Longevity | Temporary | Permanent | Permanent | Permanent | Permanent |
| Cost | Free | Free (Kubernetes) | Cloud Provider Charges | Varies (Open-source free, Commercial plans) | Free (Open-source), Ops cost |
| Layer | L4 (TCP) | L4 (TCP) | L4 (TCP) | L7 (HTTP/HTTPS) | L7 (HTTP/HTTPS) |
| Security | Client-side RBAC | Basic network exposure | Cloud security groups | Advanced (AuthN/AuthZ, WAF, mTLS) | Advanced (mTLS, Policies) |
| Traffic Management | None | None | Basic load balancing | Advanced (Rate limits, transforms, A/B) | Very Advanced (Retries, Timeouts, Circuit Breakers) |
| API Management | None | None | None | Full lifecycle (e.g., APIPark) | Observability, Security |
These exposure mechanisms are not mutually exclusive; they serve different purposes at different stages of the development and deployment lifecycle. kubectl port-forward is your immediate local gateway during development, while Ingress, LoadBalancer, and particularly robust API gateways like APIPark manage the complex demands of exposing and governing APIs for broader consumption in production environments. Mastering Kubernetes means knowing when to deploy each tool for maximum efficiency and security.
Security Best Practices for kubectl port-forward
While kubectl port-forward is an incredibly useful and generally secure tool for development, understanding and adhering to security best practices is essential to prevent unintended exposures or misuse. Its power to bypass conventional network boundaries means it demands careful handling.
- Principle of Least Privilege (RBAC): The most fundamental security principle applies here: grant users only the minimum necessary permissions. Ensure that the Kubernetes Role-Based Access Control (RBAC) policies restrict who can perform
port-forwardoperations, and to which resources (pods, services) and namespaces. For instance, a developer might only needport-forwardaccess to their specific development namespace and to pods or services related to their active projects, rather than blanket access to the entire cluster. This limits the blast radius if a user'skubectlcredentials are compromised. - Ephemeral Use and Cleanup:
kubectl port-forwardshould always be treated as a temporary measure. Do not leaveport-forwardprocesses running indefinitely, especially in backgrounded modes.- Foreground processes: Terminate them with
Ctrl+Cas soon as you're done. - Background processes (using
&ornohup): Make it a habit to explicitly kill these processes once they are no longer needed. Regularly check for strayport-forwardprocesses (ps aux | grep 'kubectl port-forward') and terminate them. Unintended open tunnels can become an unnecessary security liability.
- Foreground processes: Terminate them with
- Mind Your Local Port Selection: While
port-forwardallows you to map any local port, exercise caution with privileged ports (those below 1024, like 80, 443, 22). Binding to these ports on Linux/macOS often requires elevated privileges (e.g.,sudo), which should be avoided unless absolutely necessary for specific testing scenarios. Sticking to non-privileged ports (e.g., 1024-65535) is generally a safer practice, as they don't require root access for binding. - Be Cautious with
--address 0.0.0.0: By default,kubectl port-forwardbinds the local port to127.0.0.1(localhost). This means only applications running on your specific machine can access the forwarded service. Using--address 0.0.0.0or a specific network interface IP will expose the forwarded port to your entire local network. While useful for certain collaboration or testing scenarios, this significantly broadens the attack surface.- Always be aware: If you use
--address 0.0.0.0, ensure your local machine's firewall is configured to block unwanted external access to that port. - Avoid in untrusted networks: Never use
0.0.0.0on untrusted public Wi-Fi networks. - Default is best: If you only need access from your own machine, stick to the default
127.0.0.1binding.
- Always be aware: If you use
- Trust Your Cluster and Services: Only
port-forwardto trusted services running in trusted Kubernetes clusters. Whileport-forwarditself is secure, the security of the underlying service you're connecting to is paramount. Ensure the service you're accessing doesn't contain vulnerabilities that could be exploited through your local connection. This also implies ensuring the integrity of the images running in your pods. - Avoid Forwarding to Sensitive Services Unnecessarily: Be judicious about which services you
port-forwardto. For example, regularly forwarding to a production database's API or directly to an authentication service could increase risks. Limit such access to specific debugging instances and restrict the duration. Consider if a local mock or a test instance would suffice.
By integrating these security practices into your daily Kubernetes development routine, you can leverage the immense power of kubectl port-forward without inadvertently introducing vulnerabilities, making it a secure and productive gateway for your local interactions with Kubernetes services.
Conclusion: Empowering Your Kubernetes Development Workflow
In the dynamic and often complex landscape of Kubernetes, the ability to seamlessly interact with your deployed services from a local development environment is not just a convenience—it's a necessity. kubectl port-forward stands out as a singularly powerful and flexible utility, carving out a secure, temporary gateway that brings the remote world of your Kubernetes cluster directly to your desktop.
We've embarked on a comprehensive journey, starting from the foundational isolation of Kubernetes networking, which necessitates such a tool. We demystified the core mechanism of port-forward, understanding how kubectl, the API server, and kubelet orchestrate a secure TCP tunnel. From basic pod-level forwarding to advanced techniques like targeting services directly, handling multiple ports, and backgrounding processes, we've explored how to tailor port-forward to a myriad of development and debugging scenarios. The deep dive into its mechanics revealed the robust and secure nature of this temporary connection, while the troubleshooting guide equipped you to overcome common hurdles swiftly.
Crucially, we also placed kubectl port-forward within the broader context of Kubernetes service exposure. While port-forward is your go-to for isolated, local debugging of APIs and microservices, it's distinct from the production-grade gateway solutions like NodePort, LoadBalancer, Ingress, and full-fledged API gateways such as APIPark. Understanding these differences is key to designing a scalable, secure, and performant Kubernetes architecture. APIPark exemplifies how dedicated API gateway and management platforms handle the sophisticated demands of publishing, securing, and analyzing APIs for external consumption, acting as the stable, feature-rich interface to your services in production, a stark contrast to port-forward's role as a developer's direct, temporary bridge.
Ultimately, mastering kubectl port-forward is about empowering your development workflow. It enables rapid iteration, efficient debugging, and confident local testing, reducing friction and accelerating the delivery of high-quality software. Integrate this mastery into your daily routine, and you'll find yourself navigating the Kubernetes ecosystem with unparalleled agility and confidence.
Frequently Asked Questions (FAQs)
1. What is the primary purpose of kubectl port-forward? The primary purpose of kubectl port-forward is to create a secure, temporary TCP tunnel between your local machine and a specific port on a pod, service, or deployment within your Kubernetes cluster. This allows developers to access internal Kubernetes services (such as a database, a microservice API, or a web application) as if they were running on localhost, facilitating local development, debugging, and testing without exposing the services externally.
2. Is kubectl port-forward suitable for exposing services in a production environment? No, kubectl port-forward is explicitly not suitable for exposing services in a production environment. It's a temporary, developer-centric tool for individual access. For production, you should use stable Kubernetes service exposure mechanisms like NodePort, LoadBalancer, Ingress, or a dedicated API gateway (such as APIPark) which offer features like load balancing, persistent public IPs, advanced routing, security, and scalability for external API consumers.
3. What's the difference between kubectl port-forward to a Pod versus a Service? When you port-forward to a Pod, you establish a direct tunnel to a specific instance of a pod. If that pod restarts or is replaced, your port-forward connection will break. When you port-forward to a Service, kubectl automatically selects one of the healthy backing pods of that service to establish the tunnel. This provides more abstraction and resilience, as kubectl will pick another healthy pod if the initially chosen one becomes unavailable (though a new port-forward command might be needed if the selected pod dies mid-connection). Forwarding to a service is often preferred for stateless applications.
4. Why might my kubectl port-forward command appear successful, but I can't connect to localhost? This is a common issue often caused by the application inside the Kubernetes pod not listening on the correct network interface. While the port-forward tunnel is established, the application itself might be configured to listen only on 127.0.0.1 (localhost) inside the pod. For kubectl port-forward to work, the application within the pod generally needs to be listening on 0.0.0.0 (all network interfaces) so that the kubelet can connect to it. You should check the application's configuration or logs and confirm it's binding to 0.0.0.0 on the specified remote-port.
5. How does kubectl port-forward interact with Kubernetes RBAC (Role-Based Access Control)? kubectl port-forward respects Kubernetes RBAC policies. Your user account must have the necessary permissions (specifically, the port-forward verb) for the target resource (pod or service) in the relevant namespace. If you lack these permissions, kubectl will return an authorization error, ensuring that only authorized users can create these temporary network gateway connections into the cluster.
🚀You can securely and efficiently call the OpenAI API on APIPark in just two steps:
Step 1: Deploy the APIPark AI gateway in 5 minutes.
APIPark is developed based on Golang, offering strong product performance and low development and maintenance costs. You can deploy APIPark with a single command line.
curl -sSO https://download.apipark.com/install/quick-start.sh; bash quick-start.sh

In my experience, you can see the successful deployment interface within 5 to 10 minutes. Then, you can log in to APIPark using your account.

Step 2: Call the OpenAI API.